

To muffle audio in CapCut, select the clip, open the voice changer and pick a muffle-type filter, then lower its strength until the sound feels behind a wall rather than broken. On Windows and Mac that's the Audio tab in the right-hand panel, scrolled down to Voice changer; on iPhone and Android it's Audio > Voice effects in the bottom toolbar. Creators reach for filters named Underwater, Low-Pass, Lo-Fi or Vinyl. If none of them shows up in your list, or the one you want is locked, the tutorial speed method further down is an optional fallback to try on a duplicate short sample. Check its pitch, duration and sound before using it on the whole clip.
For a "headphones on" moment, where the sound turns muffled at one exact point, split the clip there first and filter only the second part. I'd always split before choosing a filter, because a filter on the whole clip makes it hard to hear whether the change lands on the right frame.
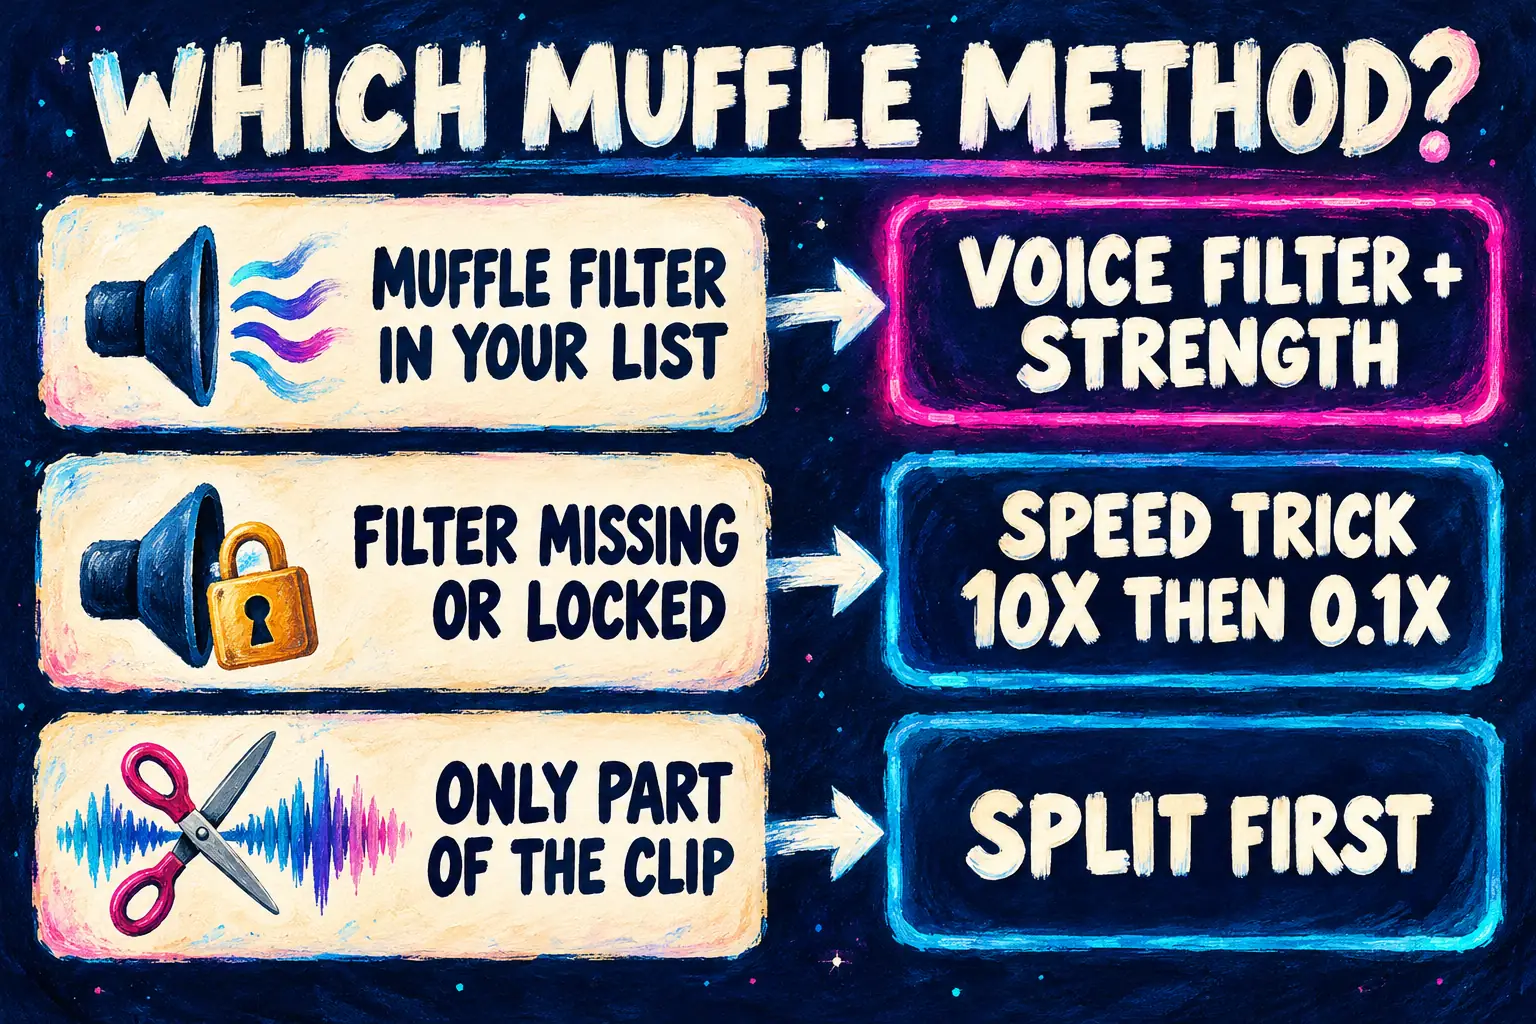
Pick your method
| Your situation | Method | Where to go |
|---|---|---|
| A muffle-type filter shows up in your voice changer list | Voice filter, then lower its strength | Desktop or mobile steps |
| The filter is missing, locked or greyed out | Speed round trip: 10x, then 0.1x | The free speed trick |
| Only part of the clip should sound muffled | Split first, filter one part | Muffle only one moment |
| Music should sit under a voice | Muffle and lower the music track only | Make the muffle believable |
Muffle audio on Windows or Mac
CapCut Desktop puts the voice changer in the same place on PC and Mac. CapCut's guide to changing your voice in CapCut has you select the clip, click the Audio tab in the top-right panel and scroll down to the Voice changer section.
- Decide what you're muffling. A filter can go straight onto a video clip's own sound. Detach the sound first only if you want to cut or fade it separately from the picture: right-click the video on the timeline and choose Separate audio, the route CapCut gives in its live voice changer roundup. Our guide to syncing audio to video covers keeping a detached track lined up.
- Split where the muffle starts, if it shouldn't cover the whole clip. Put the playhead on that frame and press Ctrl+B on Windows or Command+B on Mac. The CapCut keyboard shortcuts list has the rest.
- Select the part you want muffled. Its settings open on the right.
- Open Audio and scroll to Voice changer. CapCut's voice filters page puts the filters under Voice changer > Voice filters.
- Click a muffle-type filter and listen. Try Underwater or Low-Pass first if your list has them, then Lo-Fi or Vinyl.
- Lower the strength if the filter has a slider, then play from a second before the change so you hear the switch as well as the result.
If detaching the sound brings up a Pro prompt, that's the extraction command, not the filter. The Extract audio Pro error guide sorts out which command triggered it.
Muffle audio on iPhone or Android
The phone app hides the same filters behind the bottom toolbar.
- Tap the clip on the timeline, or the extracted audio if you split the sound off, so its toolbar appears.
- Scroll to Audio, then Voice effects. That's the path in CapCut's voice guide. Its audio voice changer overview calls the same button Audio effects. The menu names vary by version, so look for either label.
- Pick a muffle-type filter, set its strength and apply it.
- Play back from just before the muffled section with the volume at the level your viewers will use.
To muffle only part of the clip, move the playhead to the change and tap Split before step 1. Cutting and splitting clips in CapCut shows where Split sits on each platform.
What 9 published muffle tutorials do
I compared nine CapCut muffle tutorials that show their steps on screen or in the description: four on YouTube, dated May 2024 to July 2026, and five on TikTok from TikTok's collection of CapCut muffle tutorials.
| Tutorial | Method | Effect it names | Extra step |
|---|---|---|---|
| Tongcreative, YouTube, May 2024 | Voice changer | A muffled effect | Extract audio, adjust strength |
| Video Nerd, YouTube, May 2024 | Audio effects | Not named | None shown |
| Low-quality audio walkthrough, YouTube, July 2026 | Audio or Voice effects | Low-Pass, Lo-Fi, Vinyl | Retro or Distortion category |
| only1sai_, TikTok | Voice changer | Vinyl | None shown |
| EditsbyRaviK, TikTok | Audio effects | Underwater | Split first, adjust intensity |
| Terhideshotit, TikTok | Voice changer | Flashback | Keyframes |
| Rebecca Sun, YouTube, April 2026 | Speed trick | None | 10x with pitch change, compound clip, 0.1x |
| ICON, TikTok | Speed trick | None | 10x, export, re-import, 0.1x |
| Viora, TikTok | Speed trick | None | Extract audio, 10x, export, re-import, 0.1x |
Composite result: 6 of 9 tutorials use a built-in filter and 3 of 9 use the speed trick. Between them, those six name five different filters, and only Vinyl appears twice: in only1sai_'s Vinyl tutorial and in the July 2026 low-quality audio walkthrough, which also lists Lo-Fi and Low-Pass under the Retro and Distortion categories. All three speed tutorials use identical numbers: 10x up, 0.1x back down.
The spread of names tells you the filter list differs between builds, which matches that walkthrough's own warning that each CapCut version can sound slightly different. Tongcreative's voice changer tutorial doesn't even need a specific name: it extracts the audio, picks a muffled effect and adjusts the strength.
My verdict: start with Low-Pass or Underwater and lower the strength, because a low-pass filter is by definition the one that cuts the high end, and the July walkthrough calls it the most noticeable muffle. Keep the speed trick as the fallback. It needs a compound clip or an intermediate export, and the current speed and pitch settings determine whether the result is usable. Check a short sample before committing to it.
Two TikTok posts point to access limits. Georgy Romelashvili says the effect is paid in CapCut, and ICON's post says Underwater isn't offered everywhere and suggests a VPN. I wouldn't change your network to reach one audio filter; try the short-sample fallback below without changing your account or region, and keep the original if it does not sound right.
The free speed trick
Use this when no muffle filter shows up or the one you need is locked. Duplicate the project first, so a failed round trip never touches your only draft.
- Select the audio clip and open Speed.
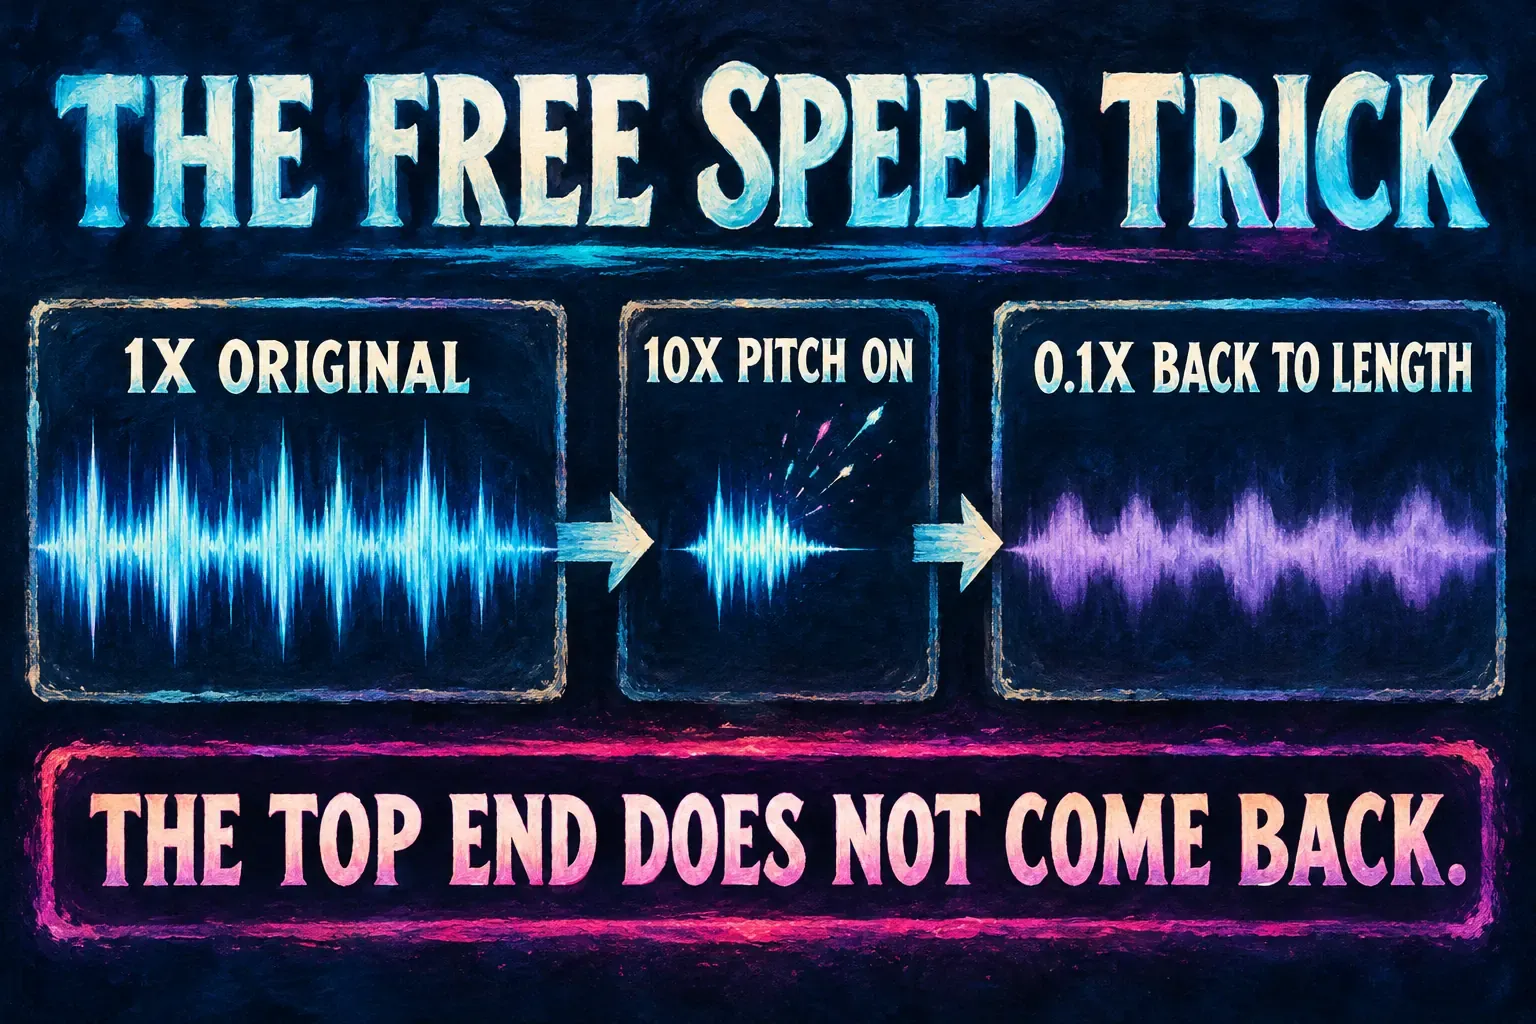
- Set it to 10x with the pitch change on. The sound should go high and squeaky. CapCut's music speed changer page lists speeds from 0.10x to 100.00x and calls the toggle Change audio pitch; its online pitch changer guide describes switching the pitch slider on inside the Speed section.
- Bake the fast version in. Rebecca Sun's speed trick tutorial turns the sped-up clip into a compound clip. The TikTok versions export the fast clip and import it into a new project instead.
- Slow the processed version to 0.1x, with pitch changing along with speed. Use Change audio pitch for this second step too; if your control instead says Keep pitch, disable pitch preservation. Compare the sample with the original for both pitch and duration. The two speed values alone do not guarantee a matching result.
- Line it up with the picture again. CapCut's speed page points to the Duration field for matching a clip to your video.
Step 3 matters because changing one clip from 10x to 0.1x only replaces one speed setting with the other. The next slowdown must act on the already processed fast version. If your compound clip simply recalculates the original or exposes no suitable pitch control, try the tutorial's intermediate-export route on the short sample instead; keep the original audio and project.
The tutorials use the fast intermediate version to seek a loss of high-frequency detail, then slow that processed audio with pitch changing again. The amount of dulling depends on the processing path; 10x followed by 0.1x is not a guarantee of a particular sound. If the sample does not keep the intended pitch and timing, return to the original and use a filter instead.
I'd compare a five-second sample with the original before processing the whole song. Check the starting pitch, total duration and a sound near each end. If it is unchanged, the current route has not produced the intended dulling; check both pitch settings and the intermediate version rather than assuming the first toggle is the cause. Our guide to speeding up video in CapCut covers the Speed panel in more detail, and merging clips in CapCut explains how a compound clip is made on Desktop.
Muffle only one moment
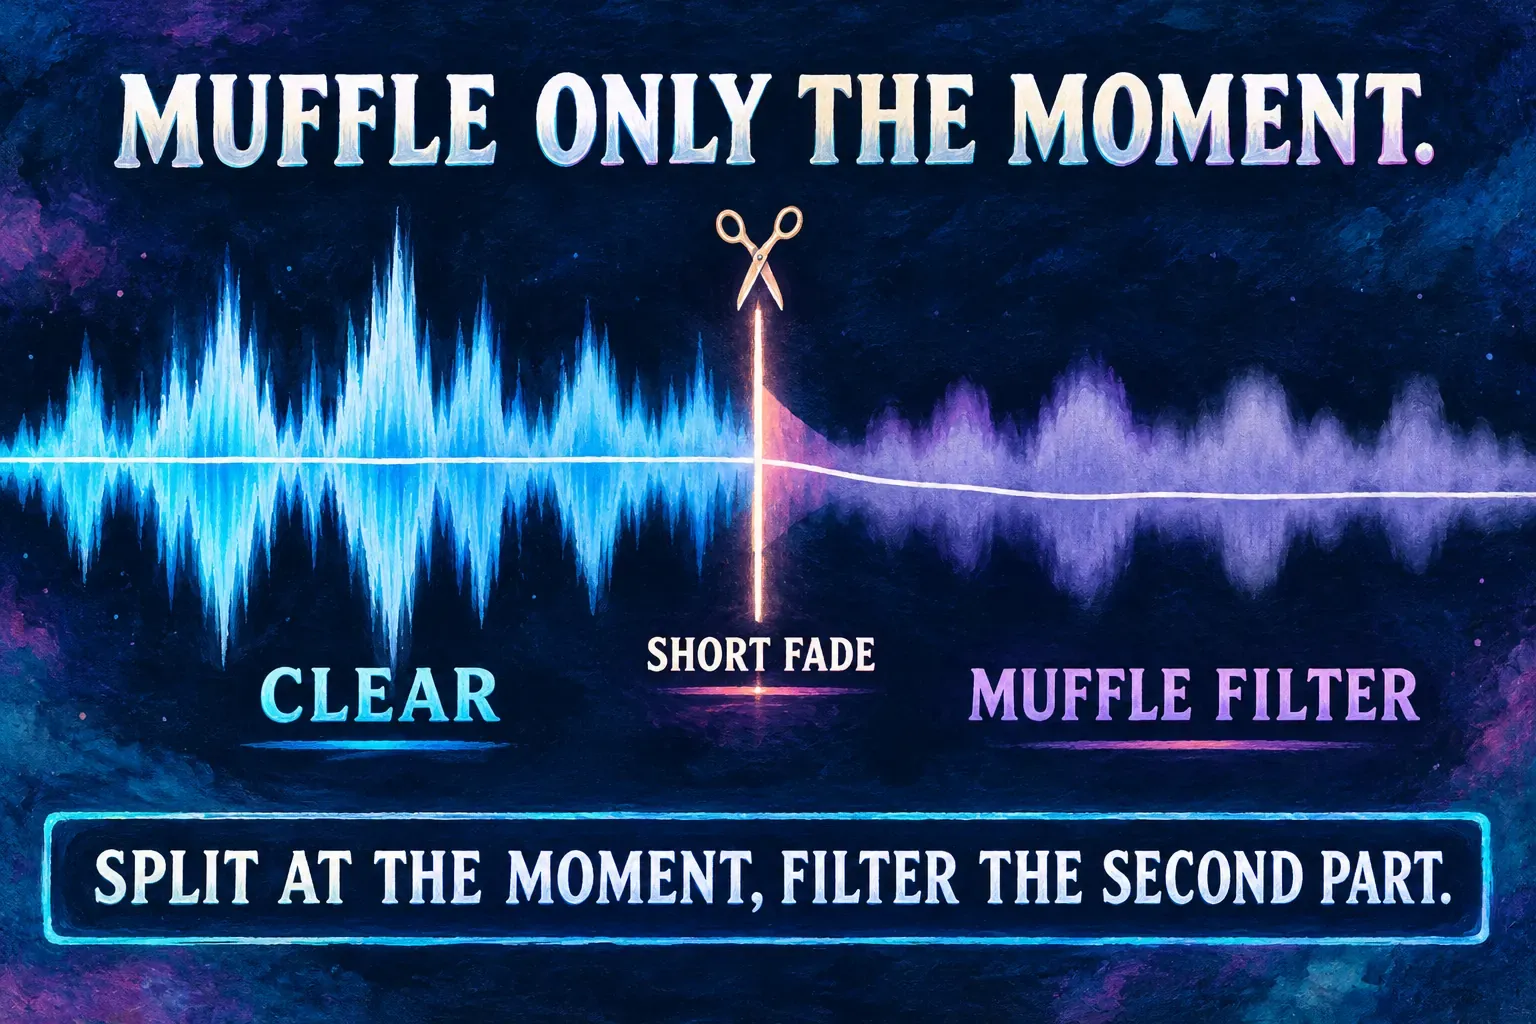
The "headphones on" effect is a split plus a filter. EditsbyRaviK's Headphones-On tutorial splits the clip at the frame where the headphones go on, selects the second part, applies Underwater and adjusts the intensity.
- Split the sound at the moment the muffle should start.
- Filter only the part after the split.
- Smooth the cut. A very short fade on each side of the split hides any click where the two treatments meet. Fading audio in CapCut shows the fade controls.
- Bring it back. Split again where the sound should turn clear and leave that last part unfiltered.
For a muffle that builds gradually, Terhideshotit pairs Flashback with keyframes. CapCut documents volume keyframes for mobile in its audio ducking guide, so you can ease the level down as the filtered part begins. The CapCut keyframes guide covers setting them on each platform.
Make the muffle believable
- Drop the volume a little on the muffled part. Sound through a wall is quieter as well as duller, and the July walkthrough pairs the effect with lower volume for the same reason.
- Muffle the music, not the voice, when someone talks over a track. Jelan Abrams' TikTok says a muffled track helps vocals not clash with the music. Pair it with the ducking steps in the CapCut audio mixing guide.
- Check it on a phone speaker. I'd do this before posting any muffle, because phone speakers reproduce little bass and a muffled sound is mostly bass, so a level that's right on headphones can almost vanish on a phone.
- Add a cue if the moment needs one. A door, a splash or a click sells the change; the CapCut sound effects guide shows where to find them.
If you need the muffled sound as a file for another project, export audio only from CapCut and keep the original clip untouched in the project.
Filter missing, locked or wrong
| What happens | Likely cause | What to do |
|---|---|---|
| No Voice changer section | No clip with sound is selected | Select the audio or the video clip, then scroll the Audio tab |
| No muffle filter in the list | Your build or region doesn't offer it | Look for Low-Pass, Lo-Fi, Vinyl or Flashback, then use the speed trick |
| The filter has a Pro badge | It's a paid effect in your account | Use the speed trick or check what CapCut Pro includes |
| Detaching the audio asks for Pro | The extraction command, not the filter | Follow the Extract audio Pro error guide |
| The speed trick changed nothing | The current pitch or intermediate-processing settings didn't produce the intended dulling | Compare a short sample with the original. Check the pitch setting at both speed steps and confirm the intermediate version was processed; if pitch or timing shifts, keep the original and use a filter. |
| Muffled audio drifts off the picture | Offset, an extra tail, or duration drift after processing | For a constant offset, move the clip. Trim only an extra tail when the interior stays in sync. For increasing drift, fix the speed/duration round trip or return to the original and use a filter; trimming an edge cannot repair the interior timing. |
| The muffled part is silent in the export | A level, mute or export problem | Work through CapCut no sound fixes |
If what bothers you is hiss or hum rather than a sound that's too clear, muffling is the wrong tool. Removing background noise in CapCut cleans the recording without dulling it.
Muffled audio questions
Does CapCut have an equalizer for a low-pass cut?
CapCut's voice enhancer page mentions equalizer presets alongside Audio Enhance, but I couldn't find CapCut documentation for a filter where you type your own cutoff frequency. For a muffle, the named filters and the speed trick are the practical routes. Georgy Romelashvili's TikTok suggests DaVinci Resolve's AUlowpass filter at around 700 Hz as a free alternative outside CapCut.
How do I muffle only part of a song?
Split the song where the muffle should start and again where it should end, filter only the middle part, and add a short fade at both cuts.
Can I muffle audio in CapCut Web?
In the web timeline editor, select the clip and open the voice effects in its audio settings. Our CapCut AI voice guide covers both web interfaces, and CapCut's voice guide says its standalone web voice changer takes files up to 50 MB and 15 minutes. Whether a muffle-type filter appears there depends on the list your account gets.
Is muffling the same as lowering the volume?
No. Lower volume makes everything quieter equally. Muffling removes the bright high end, so the sound seems distant or behind a wall. The most convincing results use a little of both.