

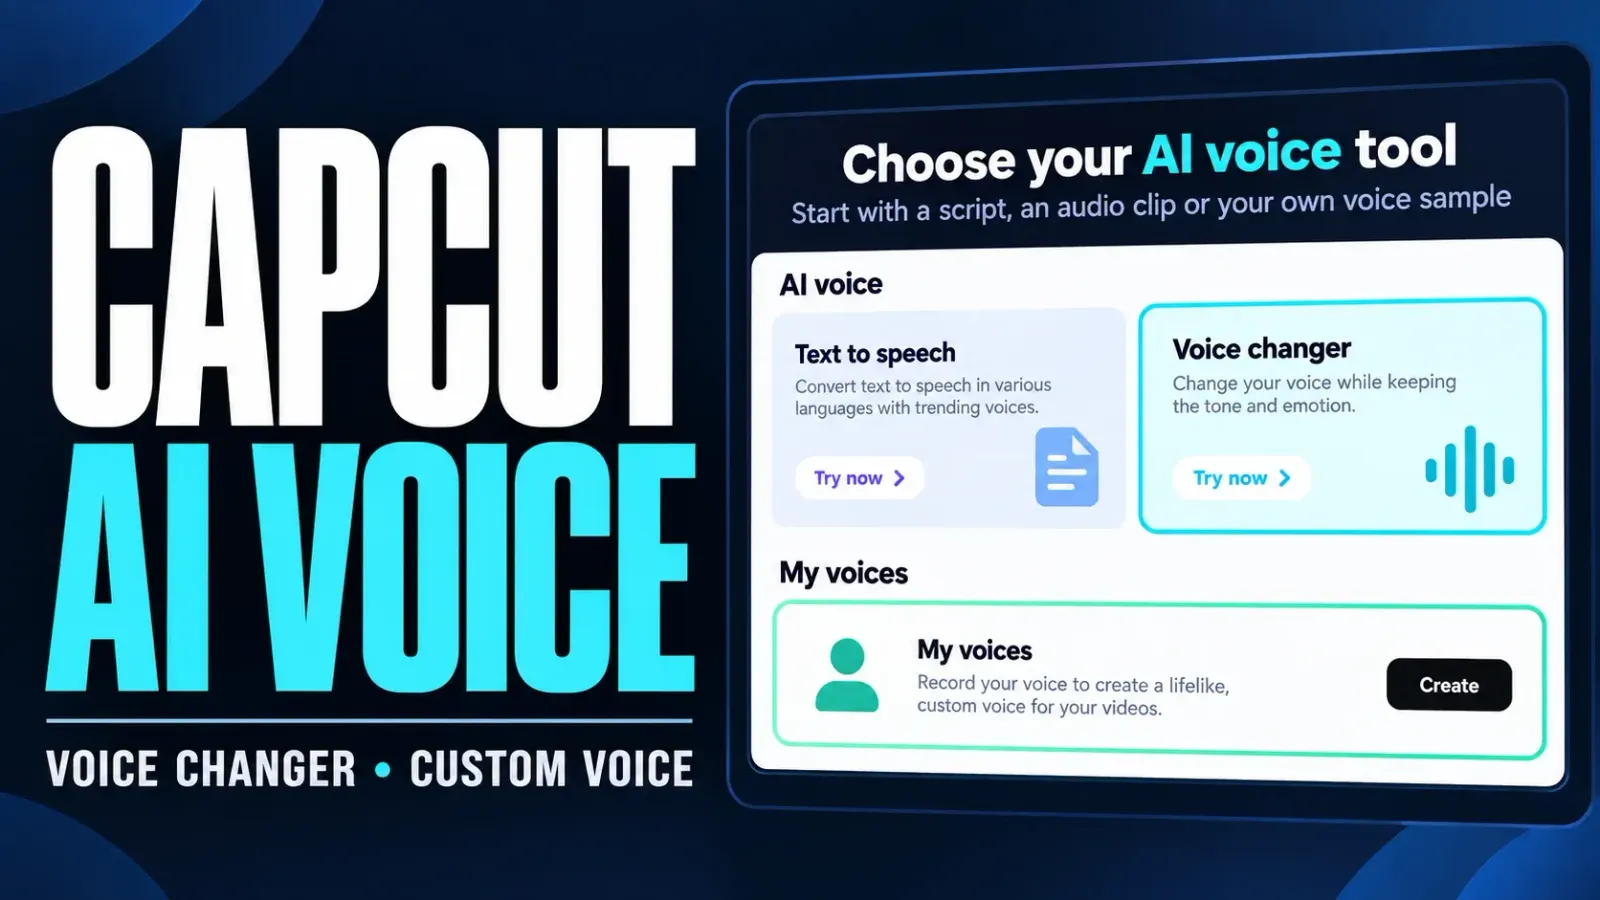
Use Voice Changer to alter an audio clip; use Custom Voice to make new scripts sound like you. Text to Speech is the third option: it creates narration from typed text using a selected voice. These tools accept different inputs, so finding the right one matters more than finding a particular preset.
This guide covers changing an existing voice, recording a sample, reusing a custom profile and fixing missing controls. If you only need a script read aloud, go straight to our CapCut text-to-speech instructions.
Choose the tool for your starting material
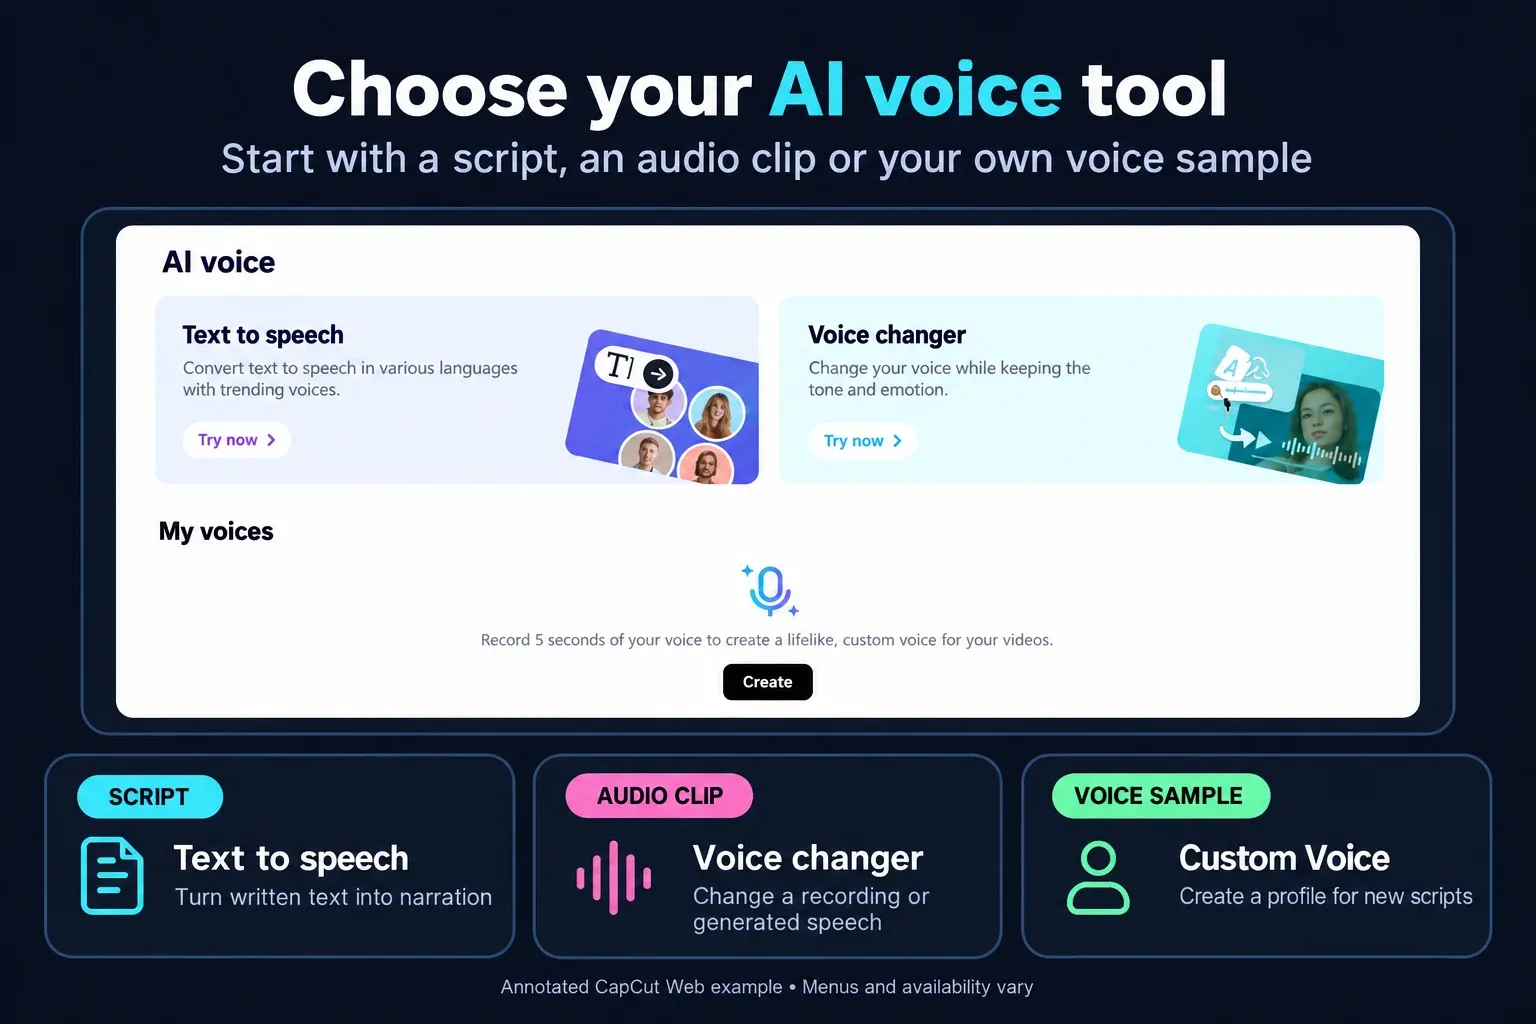
- A written script: Text to Speech creates an audio clip from your words.
- An audio clip: Voice Changer alters speech you recorded or already generated with TTS.
- Your own voice sample: Custom Voice creates a profile you can select for new narration where that feature is available.
The examples below follow CapCut's published workflows. Menus, presets and access can differ in your account. Open any illustration at full size if a label is hard to read, then follow the controls in your own editor.
Change a recorded or generated voice
Start with a clear recording and keep an untouched copy of the source file. For a quick creative comparison, a muted original track is useful; it is not a backup if you later delete the project's stored data.
Desktop and mobile
CapCut's voice-changing tutorial describes these routes:
- Desktop: import your clip, place it on the timeline and select it. Open Audio → Voice changer, choose an effect, listen, then export.
- Mobile: select the clip in your project and look for Audio → Voice effects in the lower toolbar. Apply a choice and preview before exporting.
If the toolbar looks different, confirm that you selected the clip containing speech, not a title. Don't stack several effects just to find a missing control. Test one change on a short sentence so you can hear what it actually does.
Web: two different interfaces
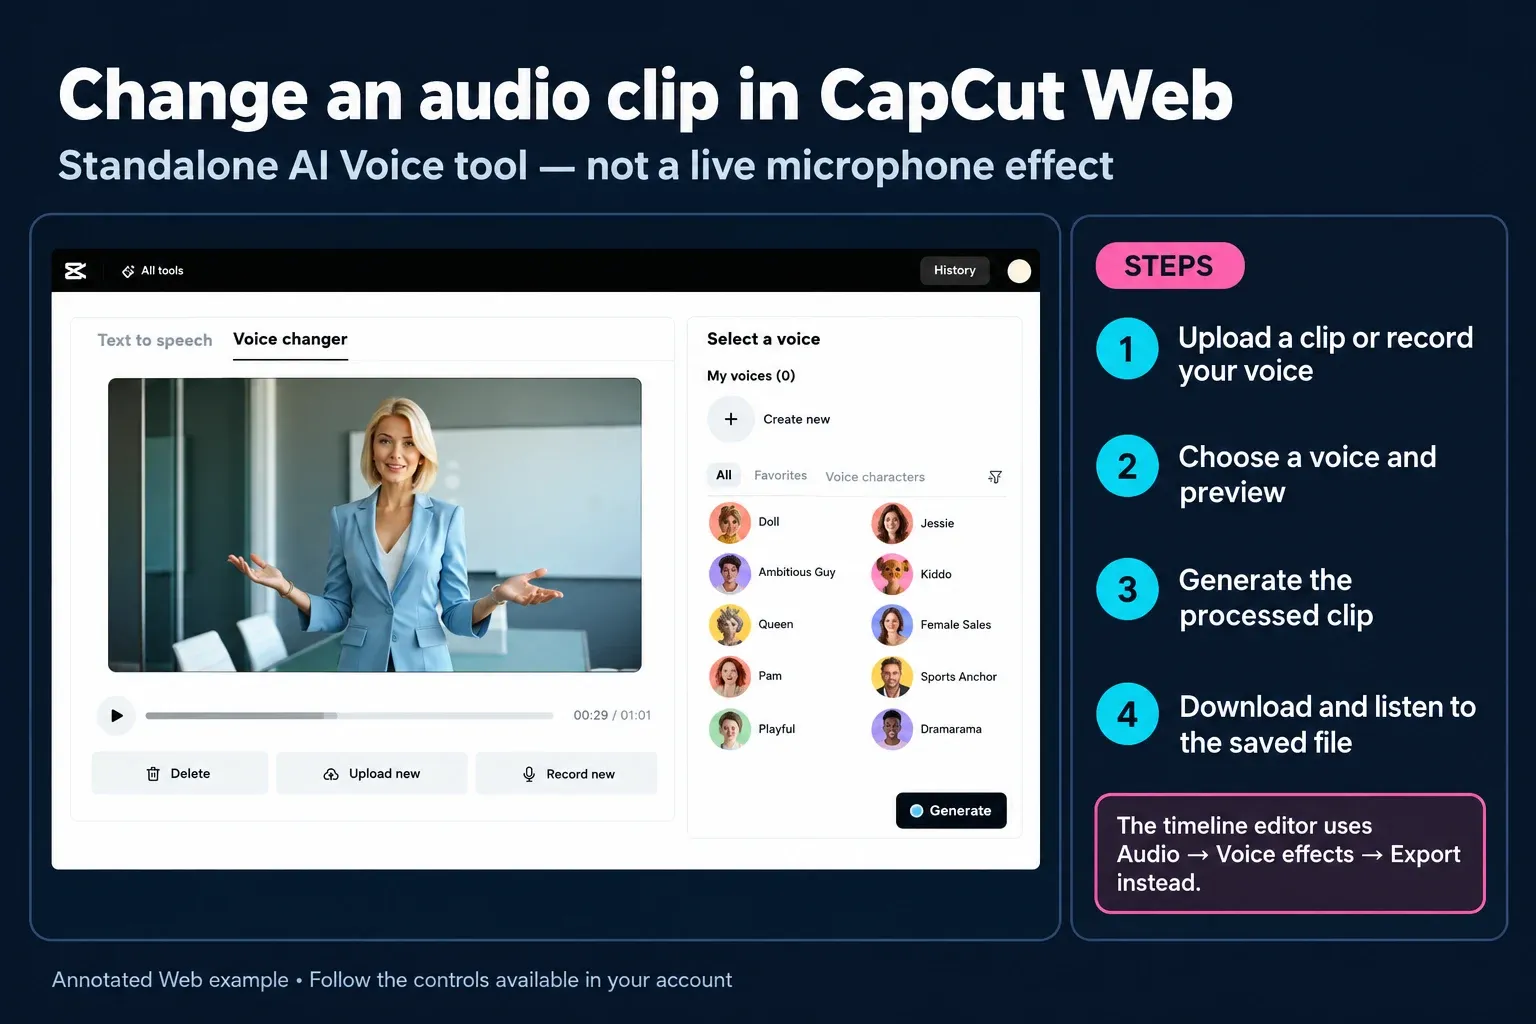
In the web timeline editor, select the clip and open Audio → Voice effects. Choose an effect, preview the timeline, then use Export.
The separate AI Voice → Voice changer tool uses a different sequence: upload a file or choose Start recording, select a voice, preview, then Generate → Download. Follow the interface you opened; you do not need to find a Generate button in the timeline route.
These are editing workflows, not a replacement microphone for a live Discord call or stream. A preview inside CapCut and a live microphone effect are different things.
Listen to the saved file, not just the preview. Pay attention to clipped first syllables, breaths, pauses and the last word. If you only need the finished sound file, follow the audio-only export guide for your platform.
Record and reuse a Custom Voice
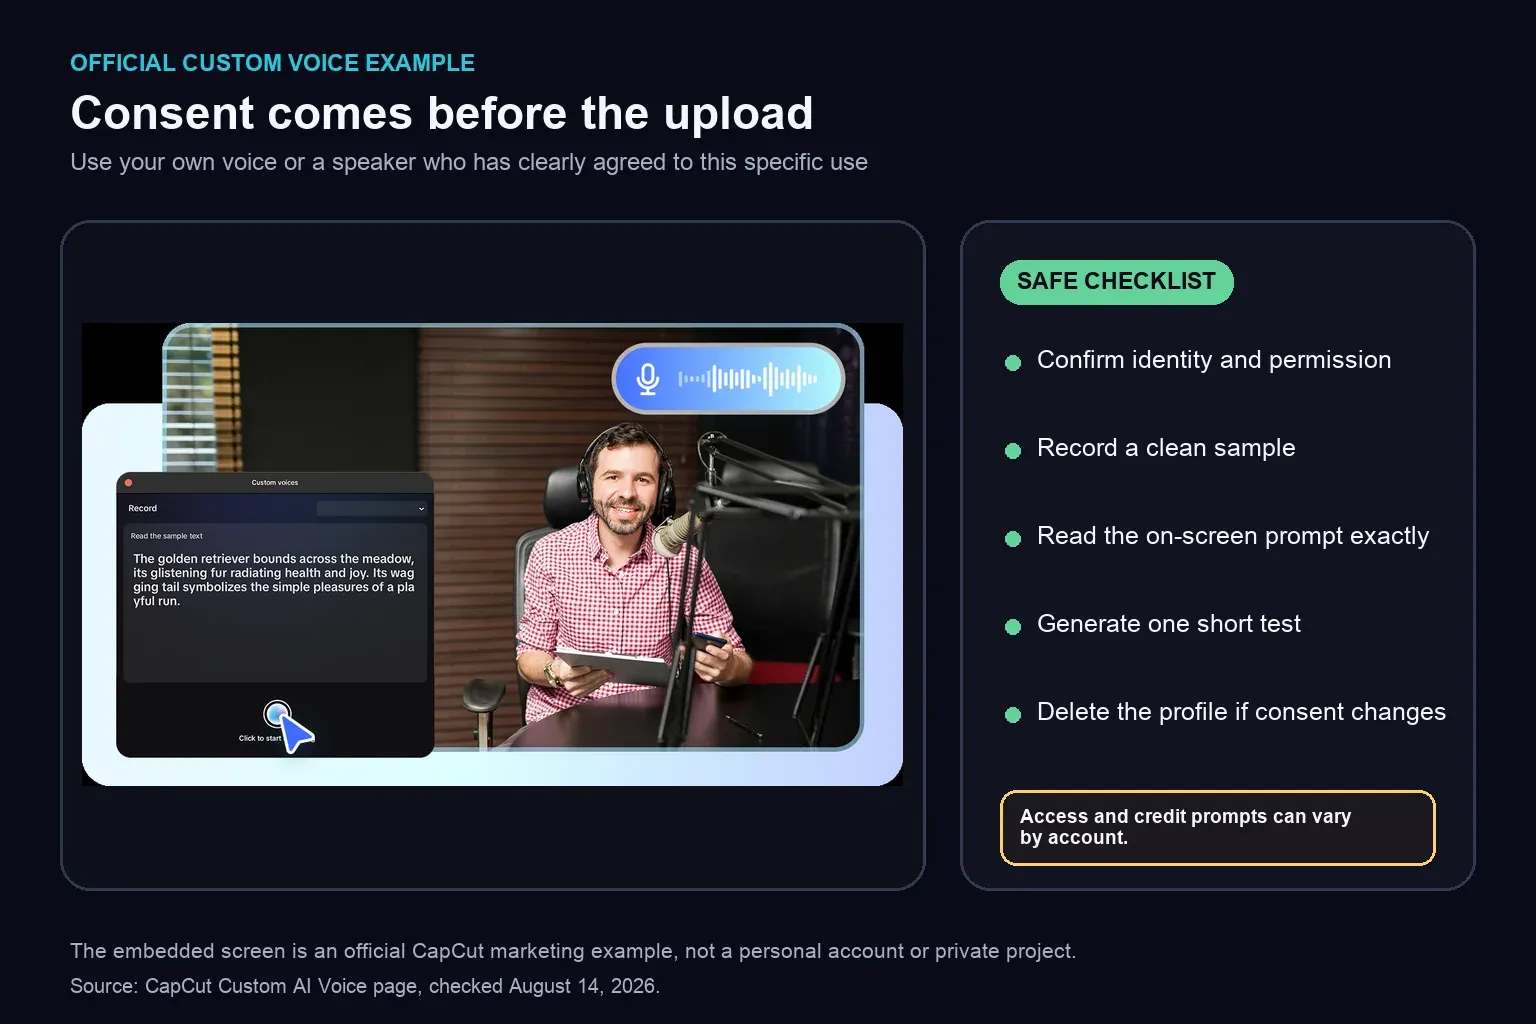
Use your own voice, or get the speaker's permission before recording or uploading their sample. For client work, confirm permission for CapCut's online processing as well as for the finished narration. CapCut's AI safety guidance specifically warns against uploading confidential recordings and client material without authorization.
On Web, look for My voices → Create new in the AI Voice tool. Follow the recording prompt and save the profile. In the voice selector for your next script, look for that saved profile and generate a short sample.
For Desktop, CapCut's Custom voices example starts in Text to speech → Custom voices. Read the requested sample, save it, then select your voice to read the text. If that control is absent, don't assume a mobile or web tutorial applies to your build.
Record in a quiet room, with the microphone at a steady distance. Listen back before accepting the sample. If recording does not start, check the selected microphone and the app or browser's microphone permission. Grant access only to the input you intend to use.
Follow the sample length and wording shown in your account; a duration printed in an older example is not a universal requirement. Test the saved profile with a new sentence, a name and a number. Also check whether it supports the language you need. Do not assume the profile will appear on every other device or in every CapCut voice tool.
If the panel asks for Pro access or credits, read that prompt before generating. CapCut lists premium voiceovers among credit-using AI features, but that does not establish a single price for every voice. Our AI credits guide explains what to check in the balance and activity history.
Fix missing voices without risking your projects
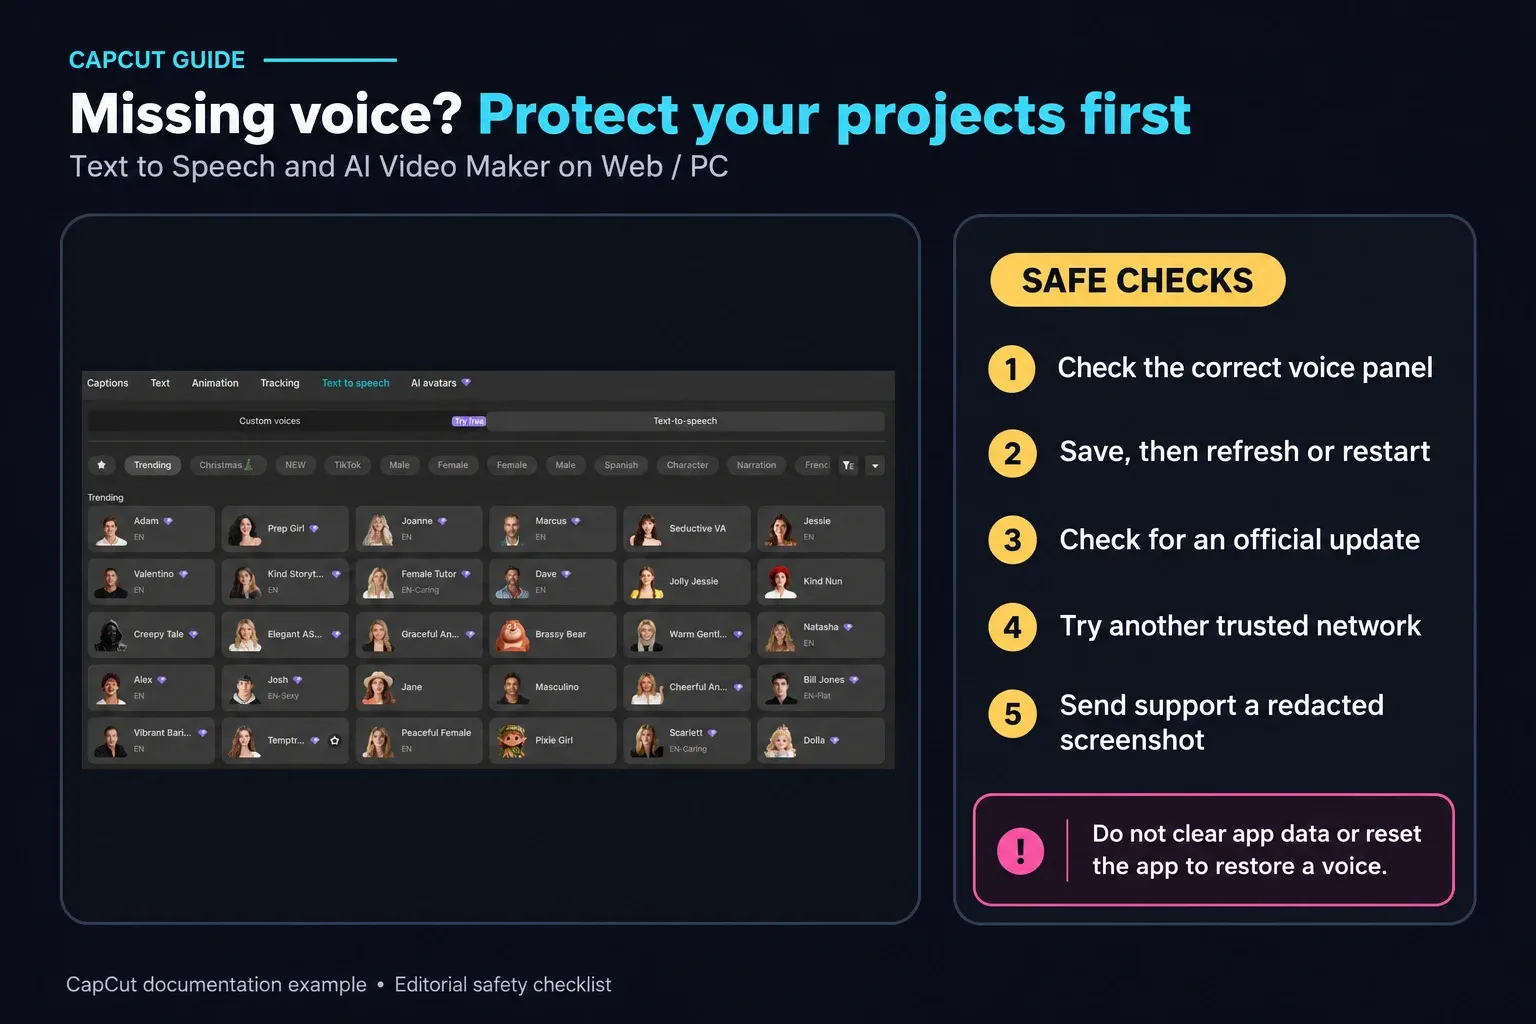
A TTS or AI Video Maker voice disappeared
CapCut's missing voice-options help covers Text to Speech and AI Video Maker on Web and PC. It names maintenance, gradual rollout and an outdated app or browser as possible causes. For a missing custom profile, use the separate check below.
- Check the correct voice panel and the account you are using.
- Save your work before refreshing the browser or restarting the app.
- Check for an official update. Protect important projects before changing the installed app.
- If the current network restricts access, try another trusted connection.
- If the voice remains missing, send support the platform, version and a screenshot with account details, project names and file paths removed.
Do not clear app data, reset the app or reinstall it just to restore a voice. Android distinguishes temporary cache from Clear storage, which permanently deletes app data. Before considering any destructive troubleshooting, make a restorable copy of the editable project and original media outside the storage being cleared. A duplicate inside the same app is not enough. Follow our CapCut project backup instructions and check that the copy opens correctly.
Voice Changer is missing
Select the actual audio or video clip, then check the platform-specific route above. In the standalone web tool, open Voice changer rather than the Text to speech tab. Try a short speech clip in a separate test project. If a control is still absent, use another available effect or contact support; reinstalling is not a reliable way to change feature access.
A saved Custom Voice is missing
Check the account and the same tool where you created it. A user report of Custom Voice disappearing after an update describes a similar problem, but does not establish a general outage or a dependable fix. Keep the original voice sample and a usable narration file outside the app. For a deadline, use a voice you can access now rather than making the project depend on an unavailable profile.
Generation fails, or the new clip is silent
CapCut documents TTS generation as cloud processed. Check your connection and test a short, plain sentence with an available voice. In the timeline workflow, select the text layer first; the standalone generator instead accepts text in its script field.
If generation succeeds but you hear nothing, inspect the new clip's mute state, volume, position and export range. For Voice Changer, compare a clean short recording with the problematic clip. Stop repeated attempts if a payment prompt or the same error keeps returning.
When the export sounds different from the preview
A browser user's report describes lost pitch changes after export. Treat it as a reason to check your file, not proof that all CapCut versions have that bug.
Export a short section with one voice effect, then compare it with a version without speed or pitch changes. If you test the render-and-reimport workaround, listen to the intermediate audio file before importing it. If the defect is already there, reimporting will not fix it.
When the intermediate file sounds correct, import it as a new track and mute the original so the two do not play together. Keep the source file untouched outside the project. Do not apply the same pitch or speed changes again. Check timing against the video and play the final export on another device. This is a troubleshooting experiment, not a guaranteed repair.
Check permission and publishing rules
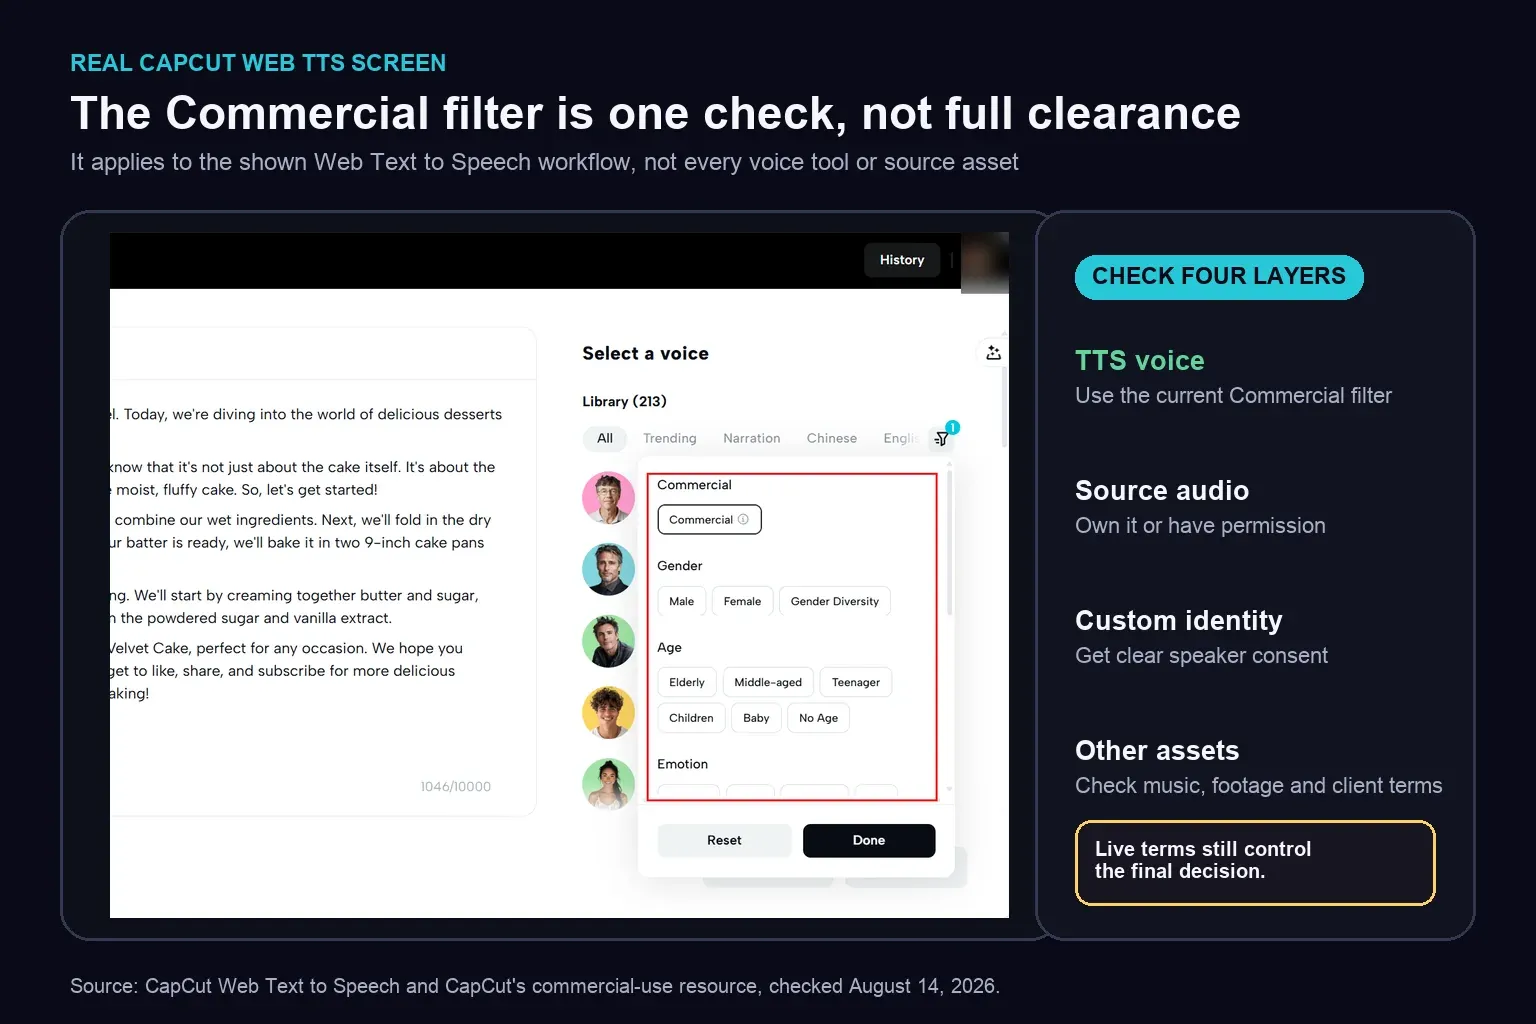
CapCut documents a Commercial License option for Web TTS. Where the filter appears, use it when choosing a commercial voice and keep a dated record of the selected option and applicable terms. It does not clear the rights to every recording, person or asset in your video.
- Voice Changer: check permission to use the recording and the performance you are altering.
- Custom Voice: agree on the speaker, project, audience and permitted reuse. Do not imitate a real person as though they approved words they never said.
- The finished video: check the script, music, footage and client agreement too.
CapCut's Terms of Service prohibit uses that infringe privacy, publicity and intellectual-property rights. Review the terms applicable to your region and feature; a working generation button does not grant those permissions.
Before posting, check the destination's AI disclosure requirements. YouTube lists cloning your own voice for narration or dubbing as an example that does not need disclosure, while realistic, meaningfully altered content can require it. That example does not exempt the rest of your video. Check TikTok's separate AI-generated-content rules when publishing there.
Make the narration work in the actual edit
Choose a sample that includes the hardest word in the script, not just an easy greeting. Listen once on headphones and once through a phone speaker. Can you understand the quiet sentence over the music? Does the pause still land on the cut?
For generated narration, try a phonetic spelling or a shorter phrase when pronunciation fails. If the delivery still sounds wrong, switch voices or record the line yourself. Stronger effects rarely make an unclear recording easier to follow.
Check captions against the final audio, especially after changing speed. For translation and dubbing rather than a different voice effect, use the Video Translator guide. The AI Tools hub connects these workflows without treating them as the same job.
CapCut AI Voice FAQ
What is the difference between Voice Changer and Text to Speech?
Text to Speech generates narration from typed text. Voice Changer alters an existing audio clip, including a recording or previously generated speech. Custom Voice creates a reusable profile from an authorized sample for new narration where available.
Can CapCut clone my voice?
CapCut offers Custom Voice in supported accounts and tools. Follow My voices or Custom voices, record the requested sample, save the profile and test it with new text. Check permission, language support and any payment prompt before relying on it for a series.
Why did a CapCut voice disappear?
For TTS and AI Video Maker on Web and PC, CapCut lists maintenance, rollout and outdated software as possible causes. Save your work, check the correct account and panel, restart or refresh, then check for updates. Do not clear app data or reset the app to restore a voice.
Is CapCut AI Voice free?
There is no single free-use promise for every voice tool. Check the selected voice and the generation or export prompt for Pro access, credits or other limits. An advertised free tool does not establish that a particular custom voice is included in your account.
Does CapCut AI voice work offline?
Generating new TTS audio requires a connection because CapCut documents cloud processing. That does not establish the offline behavior of every Voice Changer effect or of an audio file you already generated and downloaded.
How do I fix pitch or speed that changes after export?
Compare short exports with and without the effect. If you try exporting processed audio and reimporting it, listen to that intermediate file first. Only reuse it if it sounds correct, and do not apply the same pitch or speed changes twice. Keep the original recording.
Documentation and source review: September 12, 2026. Interface illustrations are annotated examples, not proof of current access in every account. This review did not run paid voice generation or verify a finished audio export.