

To change opacity in CapCut, select the clip and lower its Opacity slider. On Windows and Mac it's in the right-hand panel under Video > Basic, beside the Blend controls; on iPhone and Android it's in the bottom toolbar once the clip is selected. 100% is fully solid and 0% hides the clip. For the clip to look see-through rather than just darker, something has to sit under it, so put the base shot on the main track and the clip you're fading on a track above it.
Set the value while the busiest part of the overlap plays, not on the first frame. I'd do it there because a strength that looks gentle over a dark opening can bury a face or a caption a few seconds later, and CapCut's own opacity workflow guide tells you to check faces, labels and bright areas while both pictures overlap.
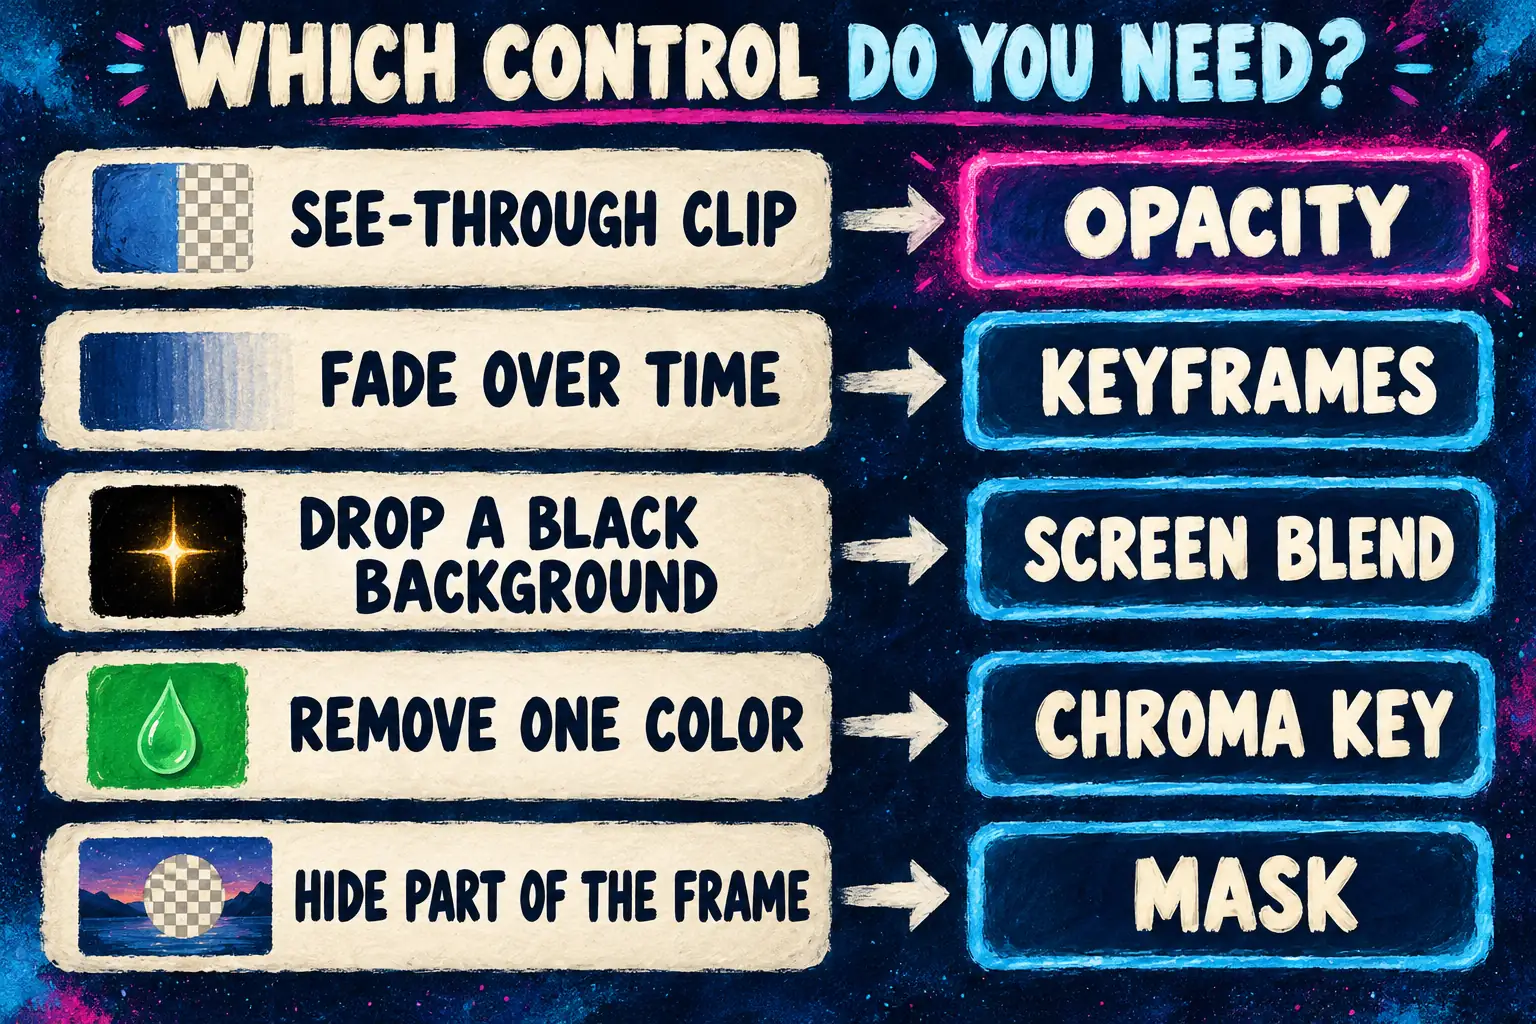
Pick the right control first
Opacity fades the whole layer evenly: the subject, its background and everything else on it. Plenty of "opacity doesn't work" moments are really a job for a different control.
| What you want | Control to use |
|---|---|
| The whole clip, image or overlay partly see-through | Opacity |
| A clip that appears or disappears gradually | Opacity keyframes |
| Light, sparkles or a light leak shot on black, without the black | Screen blend mode |
| A green or other solid background gone, subject solid | Chroma key |
| Only part of the frame hidden or revealed | Mask |
| A file that stays transparent in another app | Alpha export, not opacity |
| Title text you can see through | Text opacity |
If your job sits lower in that table, go straight to the right guide: fading video in and out covers fades to black, green screen with chroma key covers solid backgrounds, the masking tutorial covers partial visibility, transparent video and alpha export covers files that keep transparency, and transparent text in CapCut covers titles.
Change opacity on Windows or Mac
CapCut Desktop puts opacity in the same panel on Windows and Mac.
- Stack the clips. Put the base clip on the main track. Drag the clip, image or overlay you want to make translucent onto a track above it, so the two overlap on the timeline.
- Select the upper clip. Its settings open in the panel on the right.
- Open Video > Basic. The Blend section holds a Mode dropdown that starts at Normal, and Opacity sits with it. Arafin Media's walkthrough of blend mode on CapCut PC describes that tab sitting right next to Opacity and Mask, and CapCut's film strip overlay steps use the same Basic > Blend > Mode path.
- Drag the slider or type a value. Watch the player while you do it.
- Play the whole overlap. Check the start, the busiest moment and the end before you export.
For text, the same idea applies to the text clip itself. CapCut's fix for text that isn't appearing has you select the text and check Opacity in its Basic or Style panel, which is also where a title at 0% hides.
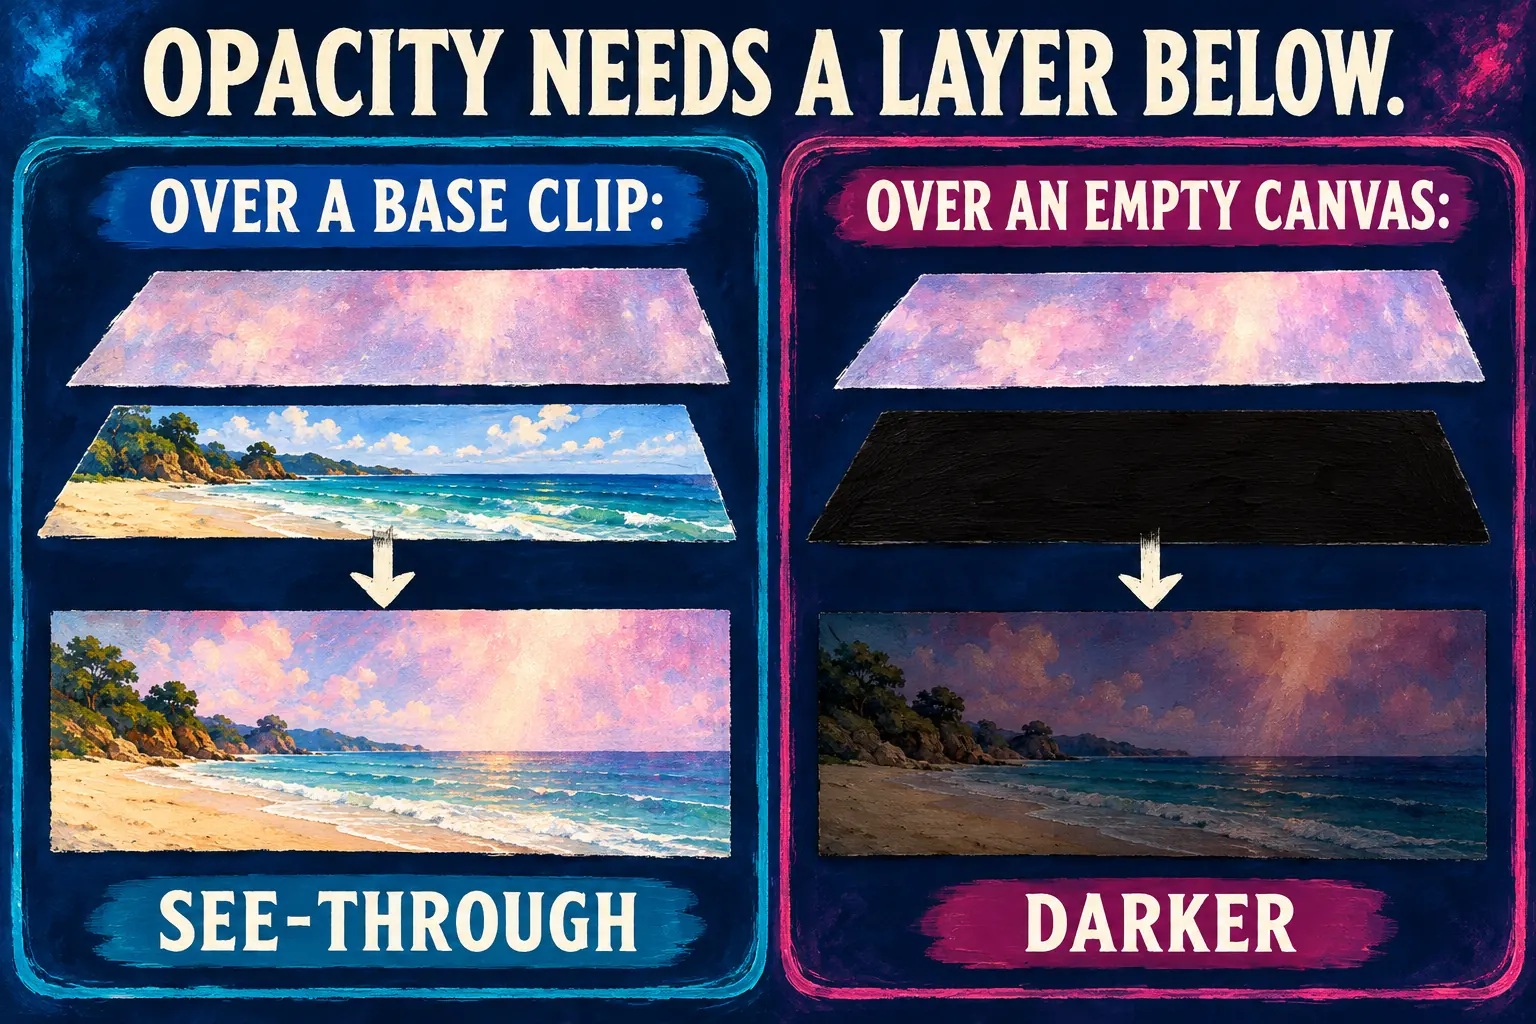
That darker look is the most common surprise. CapCut's opacity guide says a partly transparent clip over an empty black canvas can look darker rather than reveal another image, so decide what the viewer should see through the clip before you touch the slider.
Change opacity on iPhone or Android
The phone app hides the same control behind a scrolling toolbar.
- Add the second layer. Open the project, tap Overlay > Add overlay and pick the clip or image. It lands above the main video as a picture-in-picture layer.
- Size it. Pinch the overlay in the preview until it covers the area you want.
- Select the overlay so its toolbar appears along the bottom.
- Scroll the toolbar to Opacity and drag the slider. iTechGuides' transparent overlay walkthrough notes you may have to swipe through the toolbar before Opacity shows up.
- Check Blend if Opacity isn't there. In anfx's CapCut overlay guide, the mobile slider appears under the blend modes, and some versions put Blend inside a Mix button.
The menu names vary by version, so if neither label appears, update CapCut before you assume the feature is gone. And remember the stacking rule: a clip on the main track with nothing under it has nothing to show through, so lowering it only dims the frame.
Change opacity in CapCut Web
The browser editor keeps clip properties in one panel. CapCut's keyframe animation steps for the web editor say to select the clip in the multitrack editor and open the Basic tab in the upper-right control panel, which lists Position, Scale, Rotation and Opacity.
Upload the base file and the overlay, put the overlay on a layer above the base, select it and set Opacity in that Basic tab. Our guide to adding an overlay in CapCut has the web upload and layer steps if you haven't stacked two visuals there before.
Where to start the slider
Choose a starting range for the job and blend mode you are using. These published suggestions describe different effects; they are not repeated measurements of one shared task.
| What the layer is | Suggested start | Mode in that guide | Source |
|---|---|---|---|
| Texture over faces | 10% to 20% | Not specified | CapCut blend mode guide |
| Overlay, general | 15% to 35% | Not specified | CapCut blend mode guide |
| Faint second video | 30% to 60% | Normal | iTechGuides |
| VHS or grain effect | 40% to 70% | Screen or Overlay | anfx |
| Overlay in a strong blend mode | About 60% | Any blend mode | Arafin Media |
A texture over a face and a bright Screen overlay solve different problems. Keep those starting ranges separate, then adjust while the busiest part of your footage plays.
The spread isn't random. CapCut's blend mode guide suggests trying 15% to 35% opacity first for overlays and 10% to 20% for textures over faces. iTechGuides puts a faint overlay at around 30% to 60% and adds that a bright overlay may need a lower value than a dark one. anfx pulls VHS and grain effects down to 40% to 70% after setting Screen or Overlay, and Arafin Media pulls an aggressive blend back to about 60.
My verdict: start at 15% for anything over a face, 30% for a second video in Normal mode, and 50% to 60% for grain or light on Screen or Overlay. Faces get the lowest number because CapCut singles them out, and Screen already drops the dark part of a layer, which is why blended light and grain can sit higher. Move in small steps from there while the busiest part plays.
Fade opacity over time with keyframes
A fixed value keeps the layer at one strength for its whole length. To make it appear or disappear, animate Opacity between two keyframes.
- Select the clip and move the playhead to where the fade should start.
- Click the diamond beside Opacity to set the first keyframe at the current value.
- Move the playhead to where the fade should end and set Opacity to 0%. CapCut adds the second keyframe when you change the value.
- Play it back. Swap the values for a fade-in.
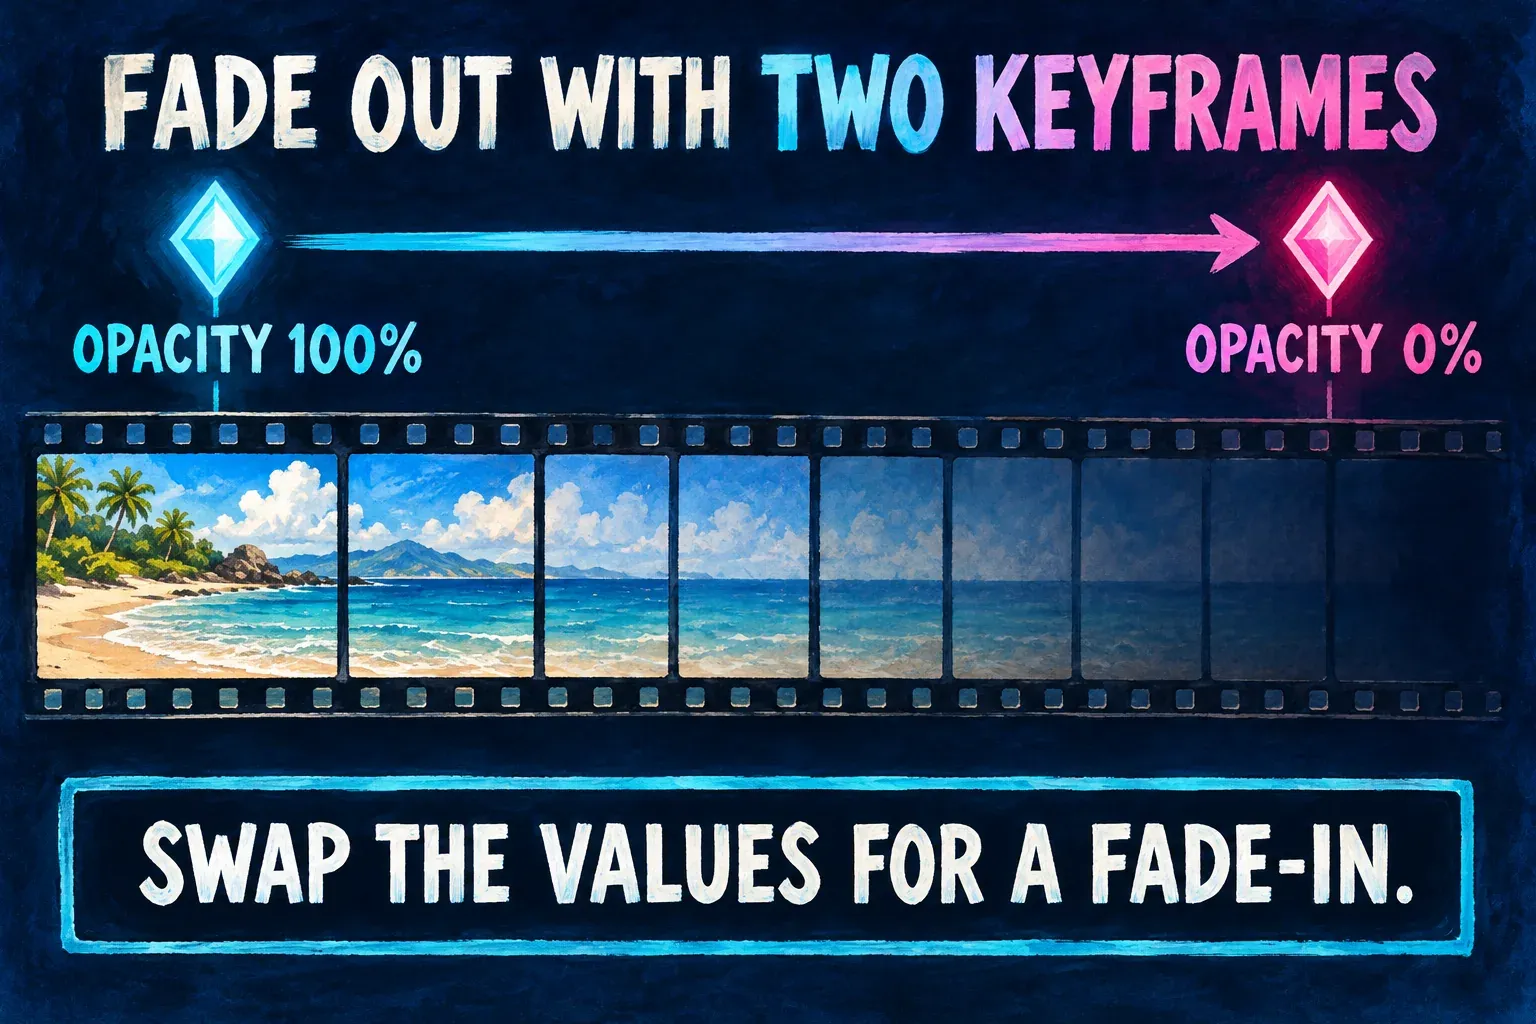
CapCut's help page for keyframes on PC says the keyframe icon only appears when a video, image or text clip is selected, and that Opacity has its own small diamond. The same 100-to-0 pattern works in the web editor's Basic tab. If your build won't keyframe the layer, iTechGuides suggests splitting it into sections with different fixed values as a rough substitute.
Opacity fades the picture only. The audio keeps playing at full volume, so pair a visual fade with fading out the audio. The keyframes guide covers keyframes on mobile and smoother motion.
When an effect has no opacity slider
Effects are the awkward case, because each one exposes its own settings. In a Reddit thread on lowering effect opacity, one user found a shimmer effect with six settings and no intensity, another pointed to Spot Blur as adjustable, and a third noticed three near-identical blur effects where only one had an intensity control.
The workaround posted there is to turn the effect layer into a compound clip, set a blend mode on it, then lower the compound clip's opacity. Another user replied that it had no effect for them, so treat it as a maybe.
My order would be:
- Select the effect and read every setting in its panel, scrolling to the end. A strength or intensity slider may reduce that effect's processing; it does not necessarily change the transparency of the whole layer as Opacity does. Compare the result over the underlying clip.
- Try a lookalike effect from the same category that does expose intensity. The CapCut effects guide covers adding and adjusting effects on each platform.
- On Desktop, try the compound clip route on a duplicate project, so a failed attempt doesn't touch your only draft. Merging clips in CapCut explains how a compound clip differs from a group.
- Shorten the effect to the moment that needs it. A brief effect at full strength often reads better than a long one you can't dial back.
Use blend modes with opacity
Blend mode decides how the upper layer mixes with the one below; opacity decides how much of that result you see. I'd always set the mode first and fine-tune opacity after, because the same 40% reads very differently in Normal, Screen and Overlay, so a value picked in Normal stops meaning anything once you switch. anfx's overlay guide follows the same order.
CapCut's blend mode guide matches modes to jobs:
- Normal puts the layer on top and uses opacity alone. It's the right choice for captions, logos and product shots that must stay clean.
- Screen keeps bright content and drops dark areas, so light leaks, sparkles and dust shot on black stop covering the footage.
- Multiply darkens, and white leaves the layer below mostly unchanged. Use it for shadows, ink and paper textures.
- Overlay adds bold contrast, while Soft Light is the safer pick over faces, food and products where color accuracy matters.
One placement detail from the same guide: a texture above your captions makes them harder to read, while the same texture under the captions adds style without hurting legibility. Keep captions on the top layer.
Opacity isn't background removal or a transparent file
CapCut's opacity guide answers both questions directly. Opacity affects the whole layer, while chroma key removes a selected color range. And a visible composite in the editor is not the same thing as an exported alpha channel.
iTechGuides puts it in practical terms: lowering opacity makes the overlay translucent only while CapCut composites it over the main video, and it doesn't create a video file with transparency. CapCut's guide to transparent video export explains why a missing alpha channel often turns into a black or white box in the next app.
I wouldn't lower opacity to hide a busy background: it fades the subject by exactly the same amount. If the goal is a subject without its background, use background removal without a green screen or chroma key, then check the export format separately.
Fix common opacity problems
| What happens | Likely cause | What to do |
|---|---|---|
| The clip only gets darker | Nothing visible under it | Put a base clip on a lower track |
| The clip disappeared | Opacity at 0% or the clip is turned off | Select it and check Opacity and visibility |
| No Opacity control | An effect, audio clip or template item is selected | Select a video, image or text clip; scroll the phone toolbar or check Blend |
| The look changed color instead | A color, mask or blend setting was moved | Reset that setting and use Opacity under Basic |
| Text vanished | Text opacity is very low or its color matches the background | Raise Opacity and change the color |
| A black box appears in the next app | The export is flat, with no alpha | Follow the alpha export guide |
| Picture fades, sound doesn't | Opacity is visual only | Add an audio fade |
The vanished-clip row comes from CapCut's page on video not showing in CapCut, which lists a disabled clip or opacity set to zero among the PC causes. For titles that still won't show, CapCut text not showing goes through layers, fonts and captions.
Opacity questions
Is opacity the same as chroma key in CapCut?
No. Opacity makes the entire layer equally see-through, background included. Chroma key removes one selected color range and keeps the rest of the layer solid.
Will lowering opacity give me a transparent video file?
No. Opacity only changes how the layer mixes with what's under it inside the project. An exported file needs an alpha-capable format to stay transparent, and a normal export is a flat composite.
How do I change the opacity of a photo in CapCut?
The same way as a video. Put the photo on a layer above the base clip, select it, and lower Opacity in the Basic panel on Desktop or in the toolbar on mobile.
Why does my CapCut effect have no opacity slider?
Each effect exposes its own settings, and many have no opacity or intensity control. Check the effect's full settings list, try a similar effect that has an intensity slider, or test a compound clip with lower opacity on a duplicate project.