
Best CapCut Export Settings for TikTok, Reels & Shorts
For a 30 fps vertical project, start with 1080 × 1920, MP4, H.264 where available and Recommended bitrate. Keep the timeline’s frame rate, check the local file, then test the processed upload.
Last updated October 10, 2026.
Choose the export job in front of you
Need an ordinary MP4 for TikTok, Reels or Shorts? Continue with the settings workflow below. If the render fails, the finished file looks wrong or you need a different kind of output, open the focused route instead of changing every control.
FREE INTERACTIVE TOOL Get the export settings for this file Choose the source, destination and controls you can actually see. The result labels official values and refuses to invent a universal social bitrate. →


A good export starts with the footage, not the highest number in every menu. Keep the frame rate you edited at, choose a resolution that fits the composition, and check the finished file before posting. If the result still looks softer, choppy or different from the timeline, work through our CapCut export quality breakdown to separate source, settings and playback problems.
Settings and source documentation checked September 13, 2026. The numbered panels below follow the routes described in CapCut Help. Your app may arrange the controls differently or show different plan badges.
Best CapCut export settings: quick setup
30 fps source and timeline
1080 × 1920 · 30 fps
MP4 with H.264 where selectable.
Start with Recommended bitrate; compare Higher if detail breaks up.
60 fps source and timeline
1080 × 1920 · 60 fps
Keep the extra motion detail when the upload route supports it. Check a processed sample before exporting a batch.
24 or 25 fps project
Keep the original cadence.
Save a separate delivery copy only if the receiving app or client requires another frame rate.
These are starting points for vertical social video, not one specification shared by TikTok, Reels and Shorts. Keep your original project and source media. Export a file, play it outside CapCut, then upload that file directly to each service.
Set the Canvas Before Opening Export
Resolution and canvas shape are connected, but they are not the same control. A 1080p label can describe a horizontal 1920 × 1080 project or a vertical 1080 × 1920 project. The export panel can't repair a badly framed horizontal edit by itself.
Set the project to 9:16 while the timeline is still editable. Check every crop after the change, especially close-ups, screen recordings, text near the edges and clips that were reframed automatically. A technically vertical file can still contain tiny horizontal footage, empty bars or a subject cut off by the crop.
If one edit must also become a horizontal YouTube video, duplicate the project before reframing. Keep separate 9:16 and 16:9 timelines instead of forcing both compositions into one canvas. For help building the edit first, start with our step-by-step CapCut tutorial.
What changes between TikTok, Reels and Shorts?
Keep 9:16 for a full-screen vertical composition, but check the upload route before treating any frame rate or bitrate as mandatory.
- Instagram Reels: Meta's Instagram API publishing specification lists 23–60 fps. That is an API workflow, not a guarantee about every version of the Instagram app or a scheduling service. Keep a 24/25 fps master; if your actual uploader asks for 30 fps or rejects the frame rate, make a separate 30 fps copy and check pans and moving subjects for judder.
- YouTube Shorts: Square or vertical uploads up to three minutes can qualify as Shorts under YouTube's current rules. The Shorts creation help lists a maximum 1080p upload resolution alongside its app-creation steps. Do not assume the general YouTube 4K encoding table describes every Shorts creation route.
- TikTok: its advertising creative guidance recommends vertical 9:16, at least 720p and keeping content clear of interface controls. Those are ad recommendations, not an organic-post bitrate limit. Use a clean 1080p file as a practical starting point and inspect the processed post.
For the editing and posting workflow, follow the TikTok guide, Reels guide or YouTube Shorts guide.
Where to Set Resolution, Bitrate and Codec on Desktop
Finish the timeline, then click Export in the upper-right corner. The Desktop export panel can show Resolution, Bit rate, Codec, Format, Frame rate and Color space. The exact list depends on the build and project.
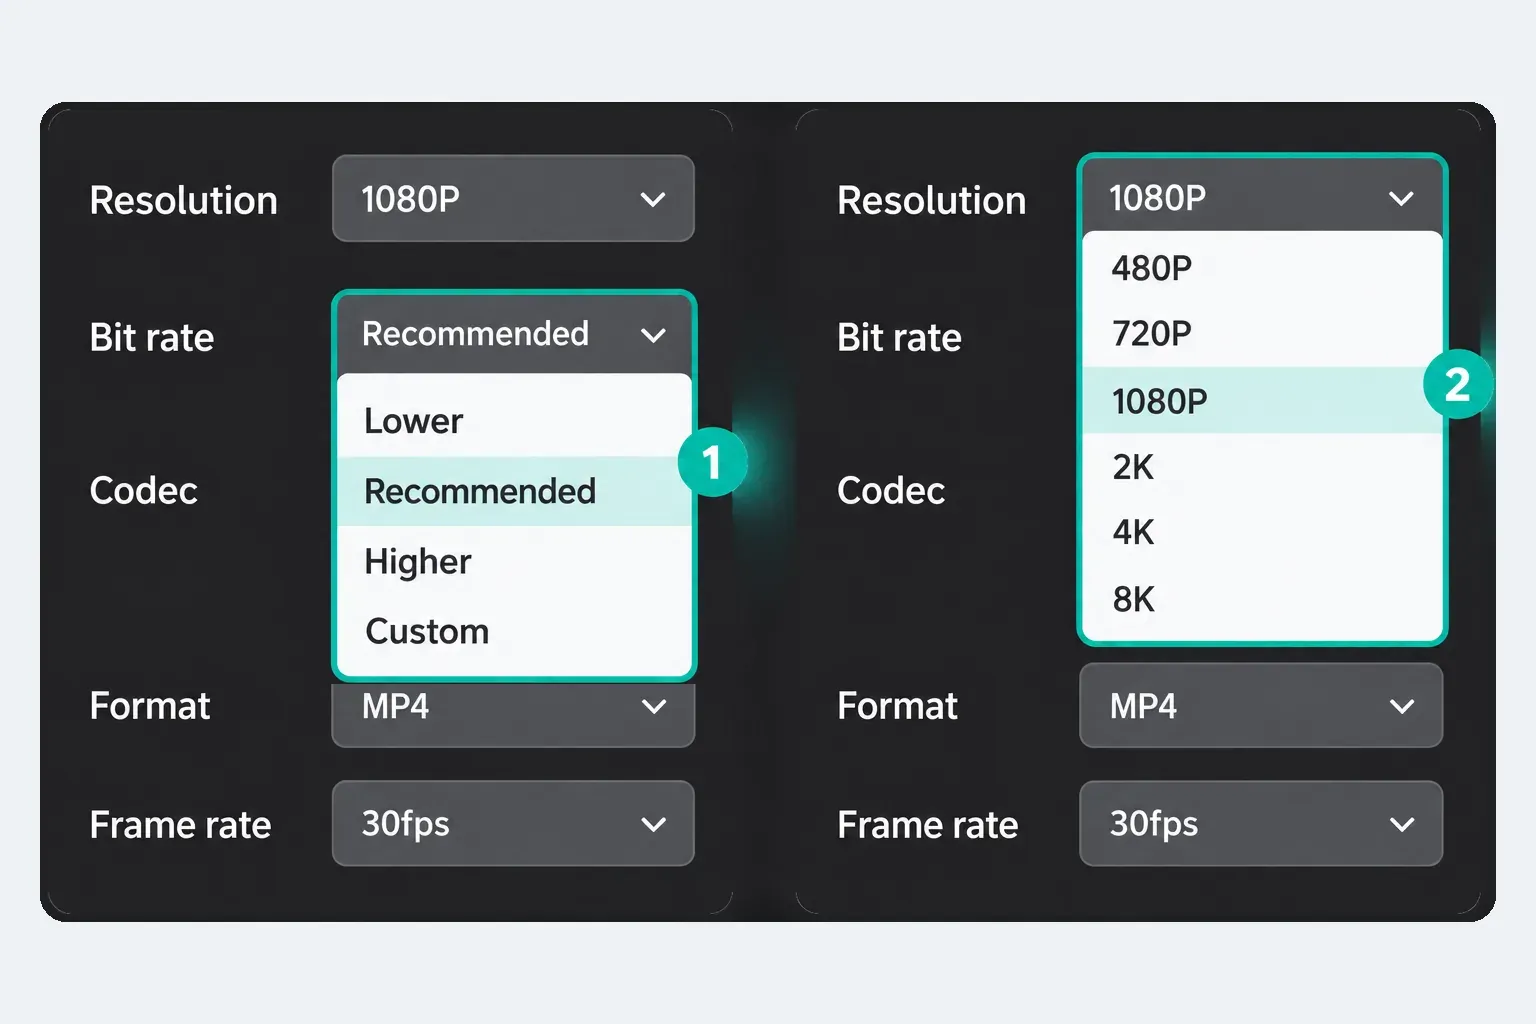
- Set Resolution to match the project. Use 1080p for a normal 1080 × 1920 vertical timeline.
- Set Frame rate from the source, timeline and destination decision below.
- Choose Recommended, Higher or Custom only when the current build exposes it and the destination warrants it.
- Choose H.264 and MP4 where those controls are available for a broadly compatible delivery file.
- Keep ordinary SDR projects in Rec.709 unless capture, timeline, export and destination are all intentionally HDR.
Pick a save folder you can identify, keep the source media and confirm the estimated size before rendering. If the job freezes or never creates a file, switch to the CapCut export-stuck checklist; a failed render and a soft completed upload are different problems.
If you need one current frame as an image instead of a rendered video, use the CapCut still-frame export guide; it separates Desktop Export still frames from Mobile Frame Capture and the Web fallback.
Mobile and Web export controls
In CapCut’s Mobile export instructions, the resolution label appears near Export. Tap that label before rendering to open the available resolution, frame-rate and bitrate controls. The screen can expose 24, 25, 30, 50 or 60 fps, but seeing an option doesn't mean it suits this project.
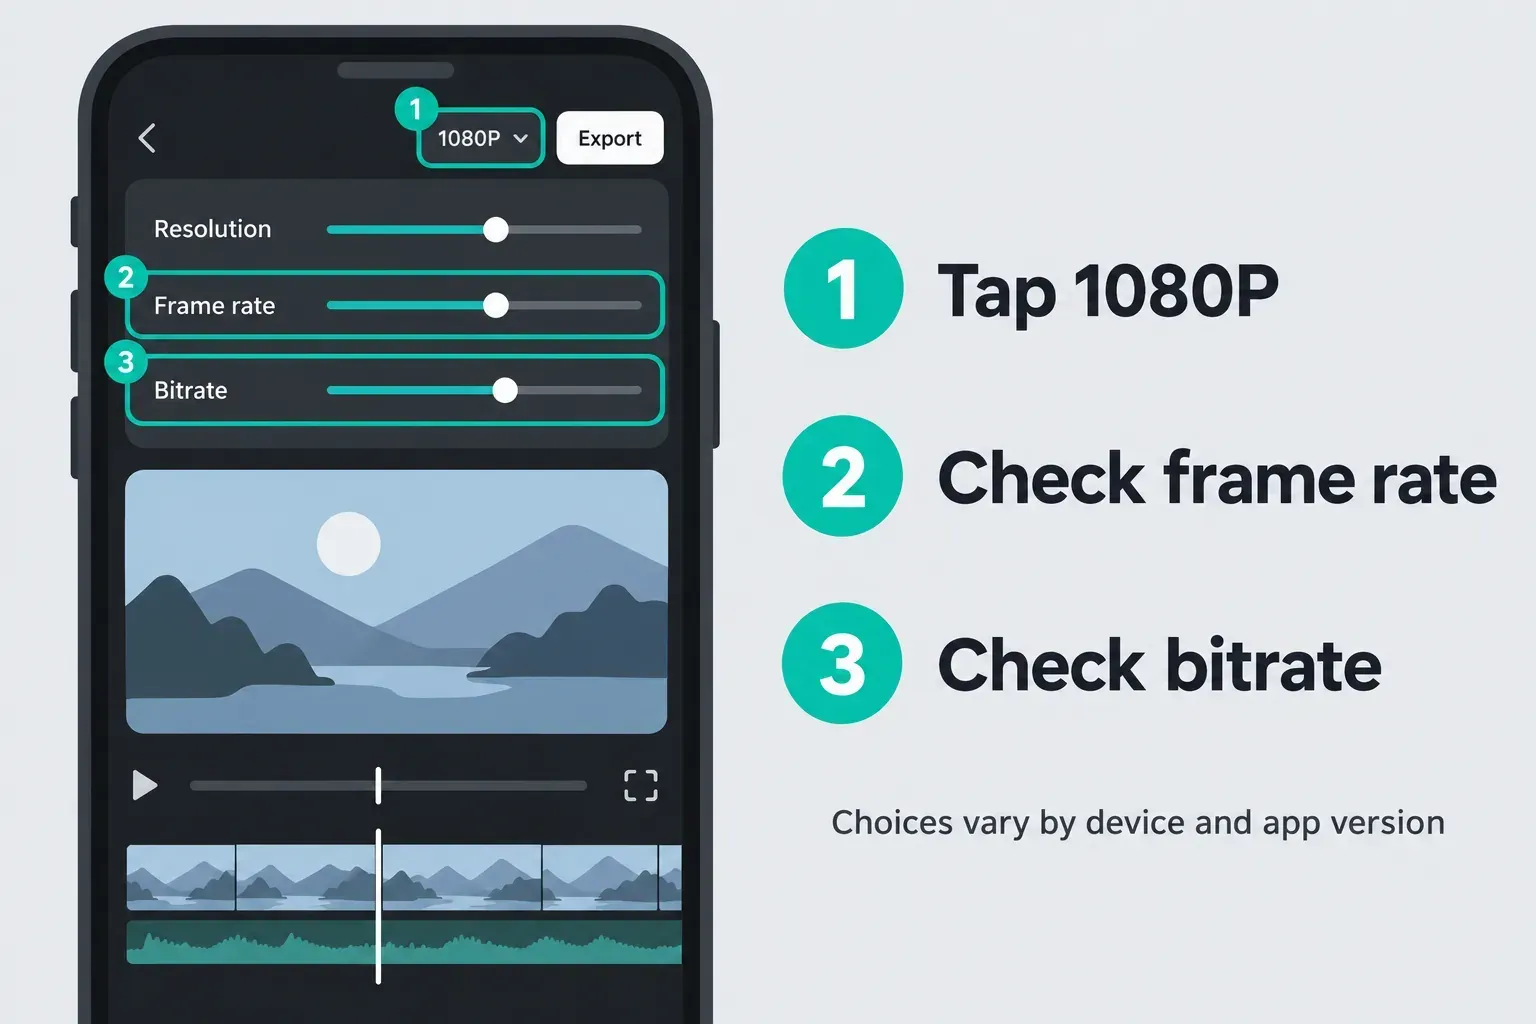
Mobile may hide controls that Desktop exposes. Don't assume a missing codec selector means the export is broken. Use the options that appear in the installed build, render a short representative section and inspect that file before committing a long project.
On Web, choose a file download
Open Export, then look for Download to save a local video. Review the resolution and other settings that appear before confirming. A presentation or review link is not the same deliverable as a downloaded MP4. CapCut’s Web export examples show that resolution choices depend on the available workflow.
Frame Rate: Match the Source, Then Check the Destination
Frame rate is a timing decision, not a generic quality slider. A camera recording at 60 fps captures more time samples than a 30 fps recording. Exporting a 30 fps source at 60 fps can repeat or generate frames, depending on the timeline and effects, but it can't recover unrecorded motion.
- 24 or 25 fps: preserve a deliberate cadence for a master or YouTube upload. Make a separate 30 fps copy only when your chosen uploader or delivery brief requires it.
- 30 fps: keep 30 for ordinary phone footage, talking clips, tutorials and a shared TikTok/Reels/Shorts file.
- 50 or 60 fps: keep the high rate when the source and timeline use it and the extra motion samples help sports, gameplay or fast camera movement.
If a local export still judders, check for mixed frame rates and variable-frame-rate phone or screen recordings. Test a short section in another player before blaming platform compression.
Bitrate and Code Rate Without a Magic Number
Bitrate is the amount of encoded data used over time. A higher bitrate can preserve texture, text edges and motion, but it also makes a larger file at the same duration. Export time depends on the codec, hardware and effects too; bitrate alone does not predict it. The destination will still produce its own delivery copies.
YouTube's current upload encoding page supplies exact reference values. For 1080p SDR, it lists 8 Mbps at 24/25/30 fps and 12 Mbps at 48/50/60 fps. For 1080p HDR, the table is 10 and 15 Mbps. Keep those tables separate.
CapCut’s export-quality help documents a Custom bitrate field in Kbps. Other panels use Mbps or presets such as Recommended and Higher. Read the unit next to the field before entering a number. For TikTok and Reels, start with Recommended, compare Higher if the local file loses detail, and check the processed upload. YouTube’s table is not a shared rule for those services.
Mbps and Kbps: enter the right number
8 Mbps = 8000 Kbps
12 Mbps = 12000 Kbps
Multiply Mbps by 1000 when the field asks for Kbps. Entering 8 into a Kbps field requests a vastly lower rate than 8 Mbps. If CapCut shows only preset labels, use those; do not hunt for a selector that your build does not expose.
CBR or VBR? CBR targets a constant data rate; VBR varies it with the content. Adobe’s encoding reference explains the distinction, while YouTube recommends VBR for its upload workflow. If CapCut offers that choice, VBR is a reasonable starting point for YouTube. CBR is not automatically sharper because the file is larger. The options and encoder behavior still depend on CapCut’s build.
An April 2024 CapCut discussion captures a common mistake: assuming CBR must look better because its file is bigger. Compare the same difficult section in both modes if your app offers them; the old thread’s numbers are not today’s default settings.
File-size check: video at an average 8 Mbps for 60 seconds is about 60 MB, before audio and container overhead. At 12 Mbps it is about 90 MB. These are decimal estimates, not promised CapCut output sizes; VBR’s actual average can differ from its target.
1080p vs 4K in CapCut
Keep a 4K master when the source and project have that detail and you need it for an archive, client delivery or a supported YouTube upload. Preserve the original 4K sources and project if you expect to reframe later. Don't upscale a 1080p source because a posted copy looked soft. A larger raster contains more pixels, not recovered source detail.
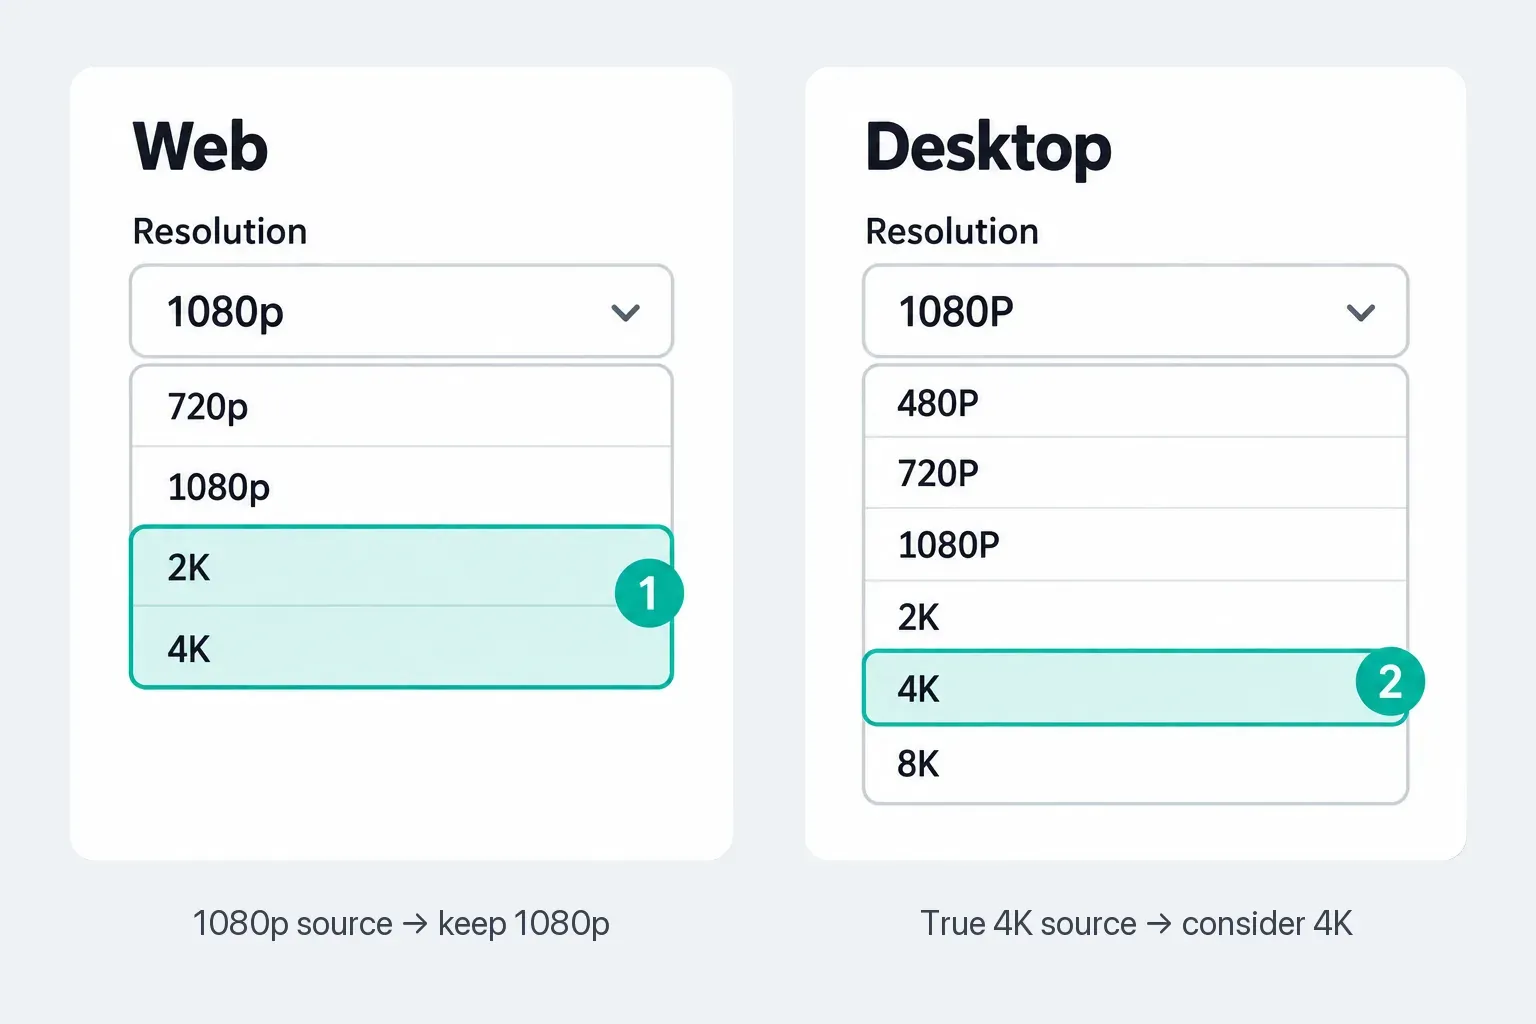
CapCut's current 2K and 4K export help says availability depends on the platform and device, and its missing 2K/4K guide adds source and system conditions. Treat the menu in your account as the current answer.
For YouTube 4K SDR uploads, the current reference is 35–45 Mbps at 24/25/30 fps and 53–68 Mbps at 48/50/60 fps. Those numbers belong to YouTube's upload table. They are not a TikTok or Reels specification.
H.264, HEVC, MP4, MOV, SDR and HDR
H.264 in MP4 is the conservative social-delivery choice. YouTube recommends that combination, playback support is broad and the file moves easily between phone, computer and browser workflows.
HEVC/H.265 can be useful for storage or a controlled client workflow, but hardware encoding, decoding, editor support and platform handling vary. Don't assume a fixed percentage saving. Apple’s HEVC compatibility guidance explains why older devices can have resolution and frame-rate limits. Test playback and the destination upload before using HEVC for a batch.
MOV is a container, not a quality level. Use it when another editor or client requests a MOV workflow. MP4 is simpler for ordinary delivery. A short silent loop is a different deliverable; our guide to exporting a GIF from CapCut covers the direct and MP4-to-GIF routes.
Keep normal projects in Rec.709 SDR. An HDR workflow needs compatible source, timeline, export, display and destination processing. When those stages disagree, color can look washed out, clipped or too bright. YouTube recommends BT.709 for SDR and has separate HDR requirements. If your source is HDR but delivery is SDR, use a proper HDR-to-SDR conversion and inspect highlights and skin tones. Changing a color-space label alone is not a substitute for that conversion.
Audio Export Settings
For video delivery, use AAC audio at 48 kHz if CapCut exposes those controls. YouTube currently recommends AAC-LC or other supported codecs at 48 kHz and lists 384 kbps as its stereo upload reference. CapCut may not expose a sample-rate or audio-bitrate selector. Do not confuse the video bitrate field with audio settings. If a client requires an exact audio specification, inspect the exported file and use a workflow that can meet it.
Play the rendered file on phone speakers and headphones. If the local file is silent, use the CapCut no-sound checklist before uploading. Platform processing can't restore audio that is missing from the master.
CapCut Watermarks and Plan-Gated Assets
Using your own footage avoids template branding, but does not by itself guarantee watermark-free export. Check the end of the timeline for a branded ending and inspect effects, transitions, fonts, stickers, music, stock assets and AI features for plan markers.
CapCut’s watermark troubleshooting page covers branded ending clips and template elements. Its Mobile watermark walkthrough also shows a Watermark setting with Visible and Hidden options and says Hidden requires Pro in that workflow. Check the export panel as well as the timeline.
If a prompt asks you to upgrade, review what triggered it before paying: the watermark option, an asset or another feature may be involved. Use our watermark guide to distinguish those cases. Do not assume either that every export is free or that every export requires Pro.
Why a Video Looks Blurry After Export or Upload
Separate the stages before changing settings. A soft editor preview, a soft local file and a sharp local file that becomes soft after upload are three different cases. If the completed local file is already soft, use the CapCut blurry-after-export diagnostic before changing platform settings. If the local file is sharp, continue here with the upload branch.
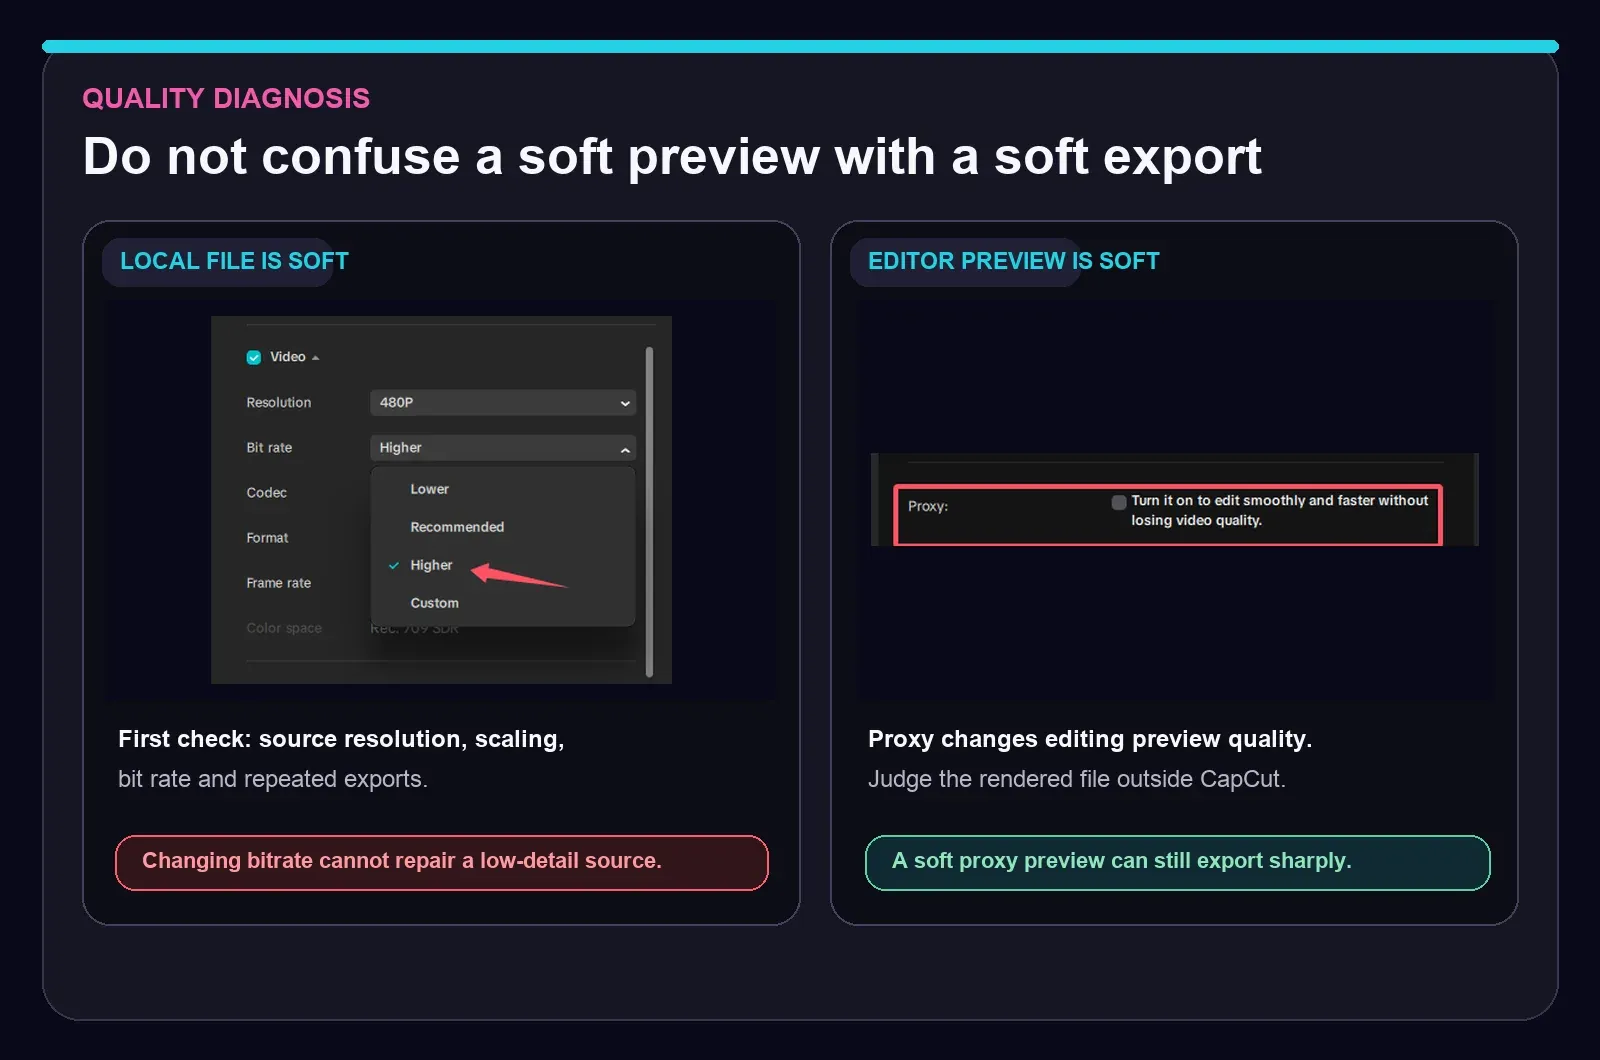
- Play the local export outside CapCut. Don't judge only from the editor preview.
- If the local file is soft: inspect source resolution, crop, scaling, bitrate, repeated exports and whether the project began with a low-resolution clip.
- If only the preview is soft: Proxy or preview optimization may be doing its job. Confirm the final rendered file before disabling performance features.
- If only the posted copy is soft: upload the original export, wait for processing and compare the completed post on another connection or device.
- If motion stutters: inspect mixed or variable frame rates and timeline conversion before increasing bitrate.
If the output is black rather than soft, use the CapCut black-screen fixes. If the export doesn't finish, return to the export-stuck guide. If the file finishes and looks sharp but motion stutters or freezes, use the CapCut laggy-export diagnostic instead of lowering every setting.
Captions, Safe Areas and the Final Upload
Export settings can't rescue text hidden beneath platform controls. Preview each destination's current posting screen and keep essential titles, subtitles, faces, logos and calls to action clear of the visible interface. There's no permanent pixel rectangle that stays correct across every device and app revision.
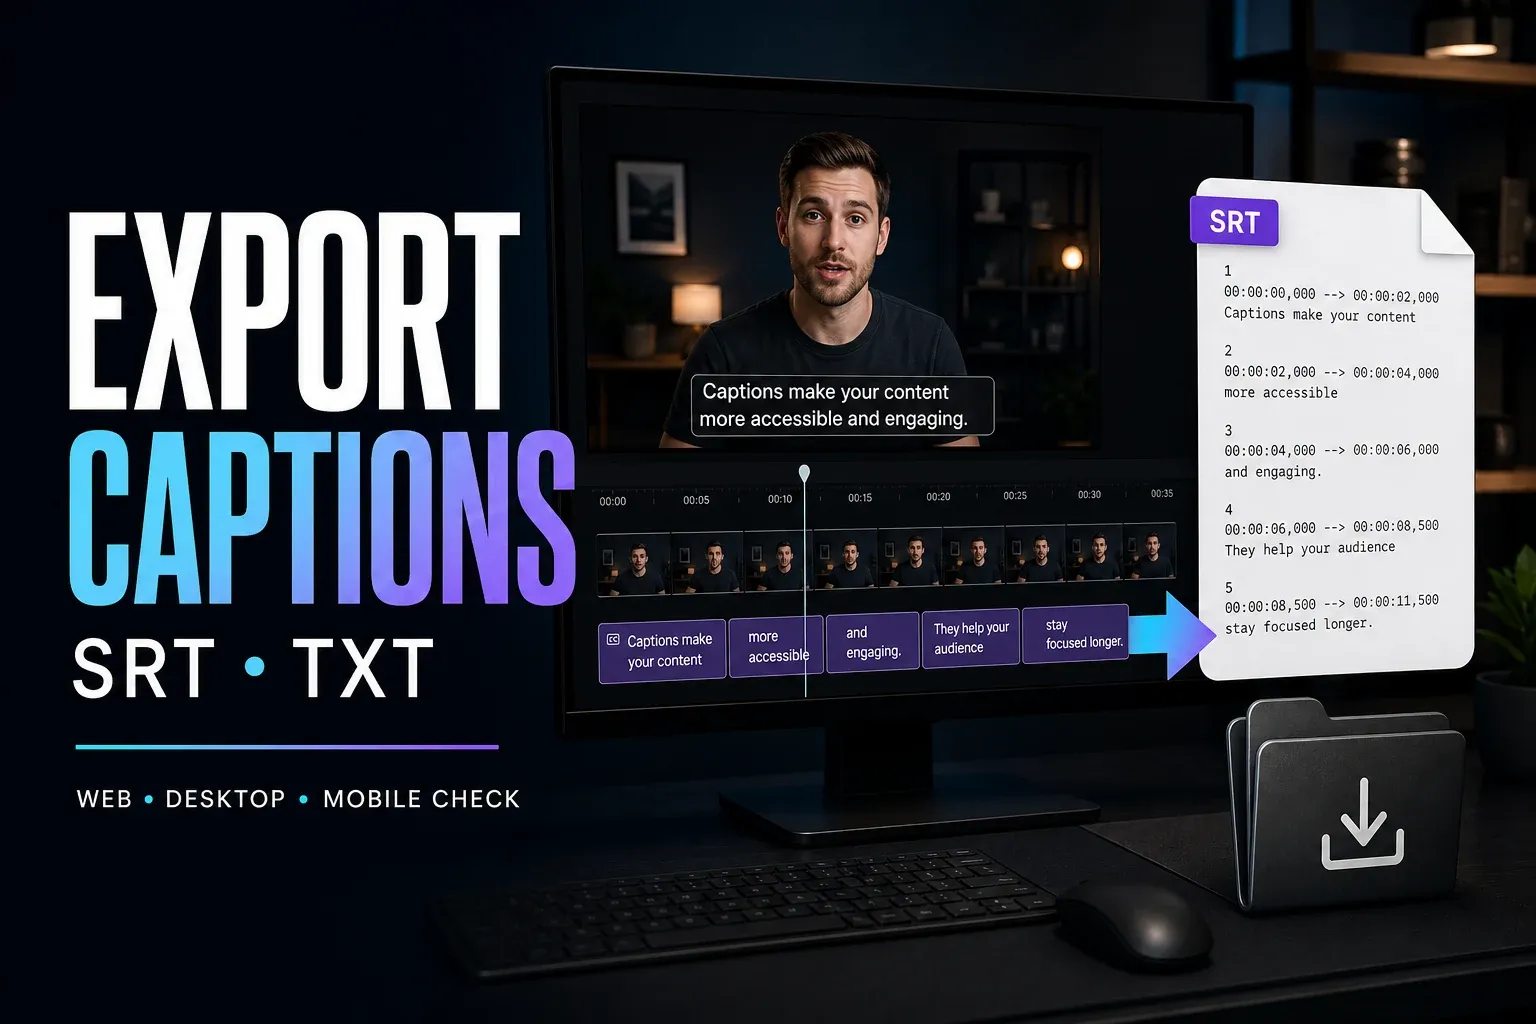
For burned-in subtitles, inspect every line at phone size. For editable subtitle files, follow the SRT and TXT export guide. A spelling error burned into the picture requires another video export.
Check music rights before cross-posting
A file that exports successfully is not automatically licensed for every destination. Check the actual track’s terms, territory and commercial-use permission. For example, CapCut’s Materials License Agreement limits Commercial Sounds to CapCut, TikTok and TikTok for Business; use elsewhere needs separate permission from the rights holders. CapCut serves region-specific versions of that agreement, including one for US users. Check the agreement governing your account and the track’s terms before cross-posting. If necessary, keep a clean version without the restricted track and add appropriately licensed music for each destination.
Final Pre-Upload Checklist
- Confirm the 9:16 canvas and crop before opening Export.
- Use original source files, not downloads from another social platform.
- Choose frame rate from the source, timeline and destination.
- Use 1080 × 1920 for the normal vertical master.
- Choose H.264, MP4 and a justified bitrate option.
- Keep Rec.709 SDR unless the full workflow is intentionally HDR.
- Check plan markers, watermark elements and the end of the timeline.
- Play the complete local export with sound outside CapCut.
- Check music and asset rights for each destination, then upload the appropriate original export.
CapCut Export Settings FAQ
What are the best CapCut export settings for short-form video?
Start with a 9:16 project at 1080 by 1920, MP4, H.264 and a frame rate that fits the source and destination. A 30 fps source and timeline can stay at 30 fps for TikTok, Reels and Shorts. Keep 60 fps only when the source and timeline use it. Choose Recommended, Higher or a sensible Custom bitrate, then inspect the local file before uploading.
Can I use a 24 or 25 fps export for TikTok, Reels and Shorts?
Keep a 24 or 25 fps master. YouTube supports those rates; Instagram’s API specification lists 23–60 fps, but that does not guarantee acceptance by every app or scheduler. If your actual upload route requires 30 fps, make a separate delivery copy and check motion after conversion.
What bitrate should I choose in CapCut?
YouTube’s 1080p SDR reference is 8 Mbps at 24/25/30 fps or 12 Mbps at 48/50/60 fps. In a Kbps field, those are 8000 and 12000. These are YouTube recommendations, not universal TikTok or Reels requirements. For those services, start with Recommended and compare Higher if the file loses detail.
Should I export at 30 fps or 60 fps in CapCut?
Match the capture and timeline unless a destination requires a separate delivery. Keep 30 fps footage at 30 fps. Keep 60 fps when the footage was captured and edited at 60 and the extra motion samples help. Exporting ordinary 30 fps footage at 60 fps doesn't recreate new captured motion detail.
Should I export CapCut videos in 4K for TikTok or Reels?
Usually not when the source and project are 1080p. Upscaling creates a larger raster but can't restore detail that was never captured. Keep a 4K master when the source and project contain that detail and the client, archive or supported upload workflow needs it. The visible 4K option can vary by device, platform, source, frame rate and build.
Why does my CapCut video look blurry after upload?
Play the local exported file outside CapCut first. If it is soft, use our completed-file blur diagnostic before changing platform settings. If it is sharp, upload that original file, wait for platform processing and compare the completed post. A soft Proxy preview inside CapCut does not prove that the rendered file is soft.
Is H.264 or HEVC better for CapCut social exports?
H.264 in an MP4 container is the safer delivery default because YouTube recommends it and playback support is broad. HEVC can be useful in a controlled storage or client workflow, but encoding, decoding and platform handling vary. Test the full path before using HEVC for a publishing batch.
Does CapCut export without a watermark?
Some workflows allow it; others show a paid watermark option or a feature-related upgrade prompt. Your own footage does not guarantee a clean export. Check the ending clip, branded elements, marked assets and the Watermark setting where present. CapCut’s Mobile example says Hidden requires Pro in that workflow.