

A TikTok edit can look clean in CapCut and still fail after upload. Text lands under the caption, the share controls cover a name, or a sharp export turns soft after TikTok processes it.
The reliable order is simple: set a 9:16 canvas, finish the cut, generate and correct captions, keep essential text clear of TikTok's interface, export the original file, then preview the upload on a phone before posting. For most projects, start with 1080x1920, MP4/H.264, and the frame rate of the source footage.
This guide was checked on August 16, 2026 against current CapCut help for captions, exports, TikTok account linking and template handoff, current TikTok posting and accessibility guidance, and the observable US English search result set. TikTok doesn't publish one permanent organic-video safe-zone rectangle or a required CapCut bitrate, so the working values below are editorial starting points, not platform rules.
How to Use CapCut for TikTok: The Five-Step Workflow
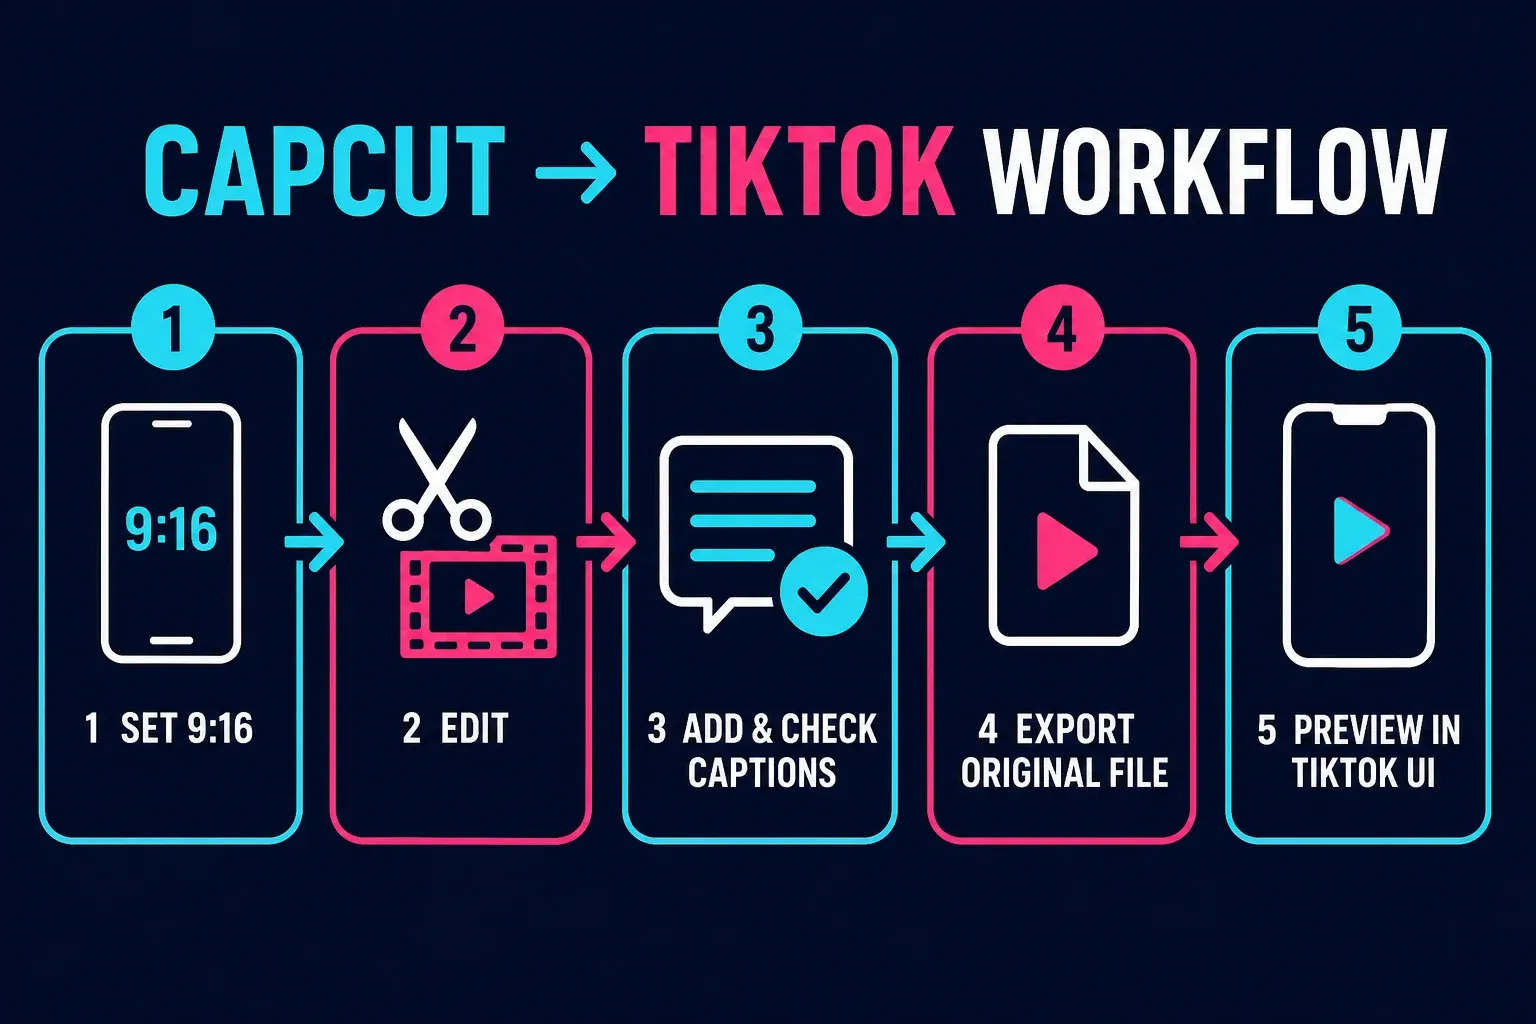
1. Set the project to 9:16 before placing text
Choose a vertical 9:16 canvas before you position captions, stickers or a face near the edge. If the source is horizontal, use the CapCut Auto Reframe workflow or crop it manually, then watch the whole clip for bad reframes. A subject can stay centred in one shot and drift out of view in the next.
Don't confuse the project ratio with export resolution. The ratio controls the shape of the canvas. The 1080x1920 choice appears when you export.
2. Finish the cut before styling captions
Trim the clips, settle the pacing, set the music level and finish any speed changes first. Captions created too early become extra cleanup when you shorten a pause or move a sentence. If the edit uses a popular sound, keep a copy of the original project audio and confirm that you have the right to use the track in the account and region where you'll publish.
3. Generate captions, then correct them
Choose the spoken language deliberately, generate the transcript, and read every line. Names, numbers, product terms and fast speech deserve extra attention. Auto Captions are a first draft, not proof that the video is ready.
4. Check placement against TikTok's live interface
Keep essential text away from the top navigation area, the bottom caption and account area, and the right-side controls. A downloaded overlay can help, but it can also be old. The final check must happen in the current TikTok app with the normal interface visible.
5. Export the original file and preview the upload
Watch the saved export outside CapCut before uploading it. Confirm the first and last frames, caption timing, audio sync and sharpness. Then open the TikTok draft or private preview and check the same points again with TikTok's controls on screen. This separates a CapCut export problem from a TikTok processing or placement problem.
CapCut TikTok Export Settings That Make Sense
Use this as a dependable starting preset, not a magic quality recipe. TikTok's Studio upload guidance accepts MP4 or WebM and requires at least 720x1280 for browser uploads. That makes 1080x1920 a practical quality baseline, not the minimum size TikTok accepts.
| Setting | Start with | What to check |
|---|---|---|
| Canvas | 9:16 vertical | Confirm the subject and text still fit after reframing. |
| Resolution | 1080x1920 | Use the source resolution as the ceiling for real detail. A 4K export can't invent detail missing from a 1080p clip. |
| Frame rate | 30 fps, or 60 fps for native 60 fps footage | A higher export frame rate alone doesn't restore motion that was never captured. |
| Format and codec | MP4 with H.264 | This is the predictable cross-platform baseline. TikTok Studio also accepts WebM. |
| Bitrate | High, or about 8 to 12 Mbps for 1080p H.264 | This is an editorial starting band, not an official TikTok requirement. Raise it only if the local export shows avoidable blocking or detail loss. |
| Audio | AAC with clean, unclipped speech | Listen to the exported file on a phone, not only inside the editor. |
CapCut's current export help says available resolutions and frame rates depend on the platform, device, source media and version. If 4K or 60 fps is missing, that doesn't automatically mean the app is broken. Use the highest setting the project genuinely needs, not the largest number in the menu.
If TikTok looks blurry, compare three files in order: the original clip, the local CapCut export and the processed TikTok draft. The first point where detail disappears tells you where to work. The dedicated CapCut export settings guide covers bitrate, HDR, codecs and platform differences without making this TikTok workflow twice as long.
Make CapCut Auto Captions Ready for TikTok
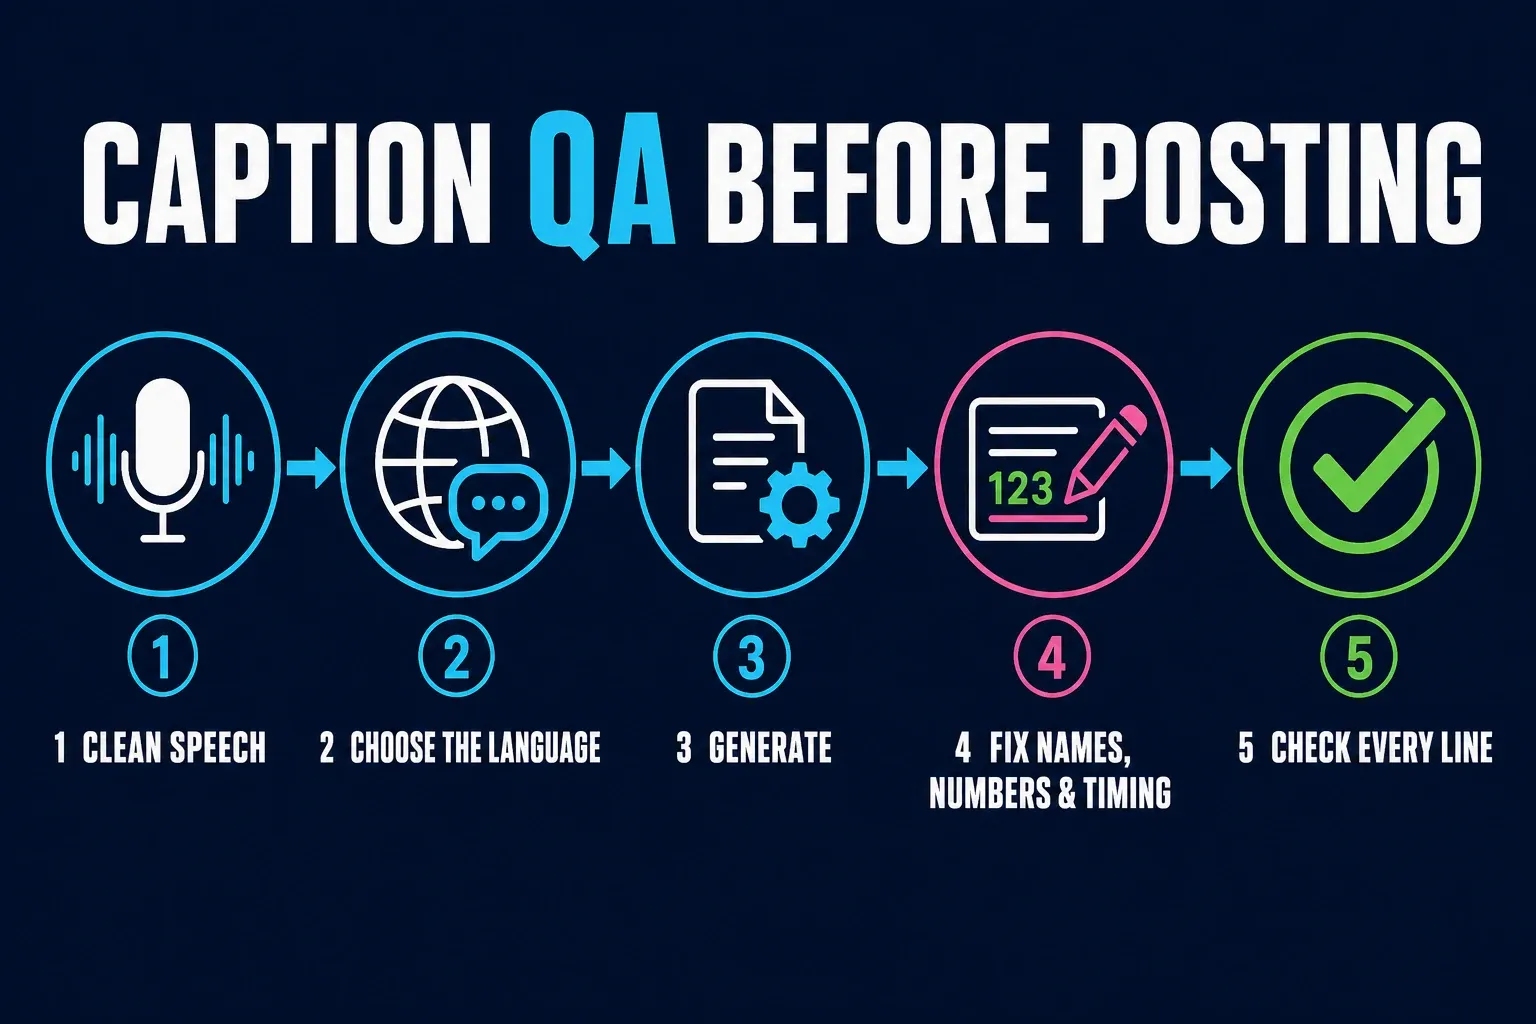
CapCut's subtitle-recognition guide documents Auto Captions on Mobile, Desktop and Web:
- Mobile: open Captions, choose Auto Captions, confirm the spoken language, then generate.
- Desktop: open Captions, choose Auto Captions, select the audio source and language, then generate.
- Web: open Captions, choose Auto Captions, then Recognise.
Labels can move between versions and regions, but the job doesn't change. Use the track that contains the cleanest speech, pick the right language, and review the result on the timeline.
When captions skip words or return nonsense, check the speech track before rebuilding the style. Mute competing music for the recognition pass, confirm that the voice is not clipped, and select the language instead of trusting a guess. CapCut's current troubleshooting page also lists poor audio, the wrong language, missing audio, an outdated app and an unstable connection as common causes.
Keep caption blocks short enough to read at phone size. Two lines are usually easier to scan than a paragraph. Use solid contrast, then preview over the busiest clip rather than a clean title card. The full correction, styling, translation and subtitle-export workflow lives in the CapCut Auto Captions guide.
CapCut captions and TikTok captions are not the same layer. Burned-in CapCut captions remain part of the video image. TikTok can also create accessibility captions for eligible uploads, according to its accessibility guide. You can use both, but don't assume TikTok's generated text will cover an error already burned into the video.
TikTok Safe Zone in CapCut: Use Caution Areas, Not a Fake Specification
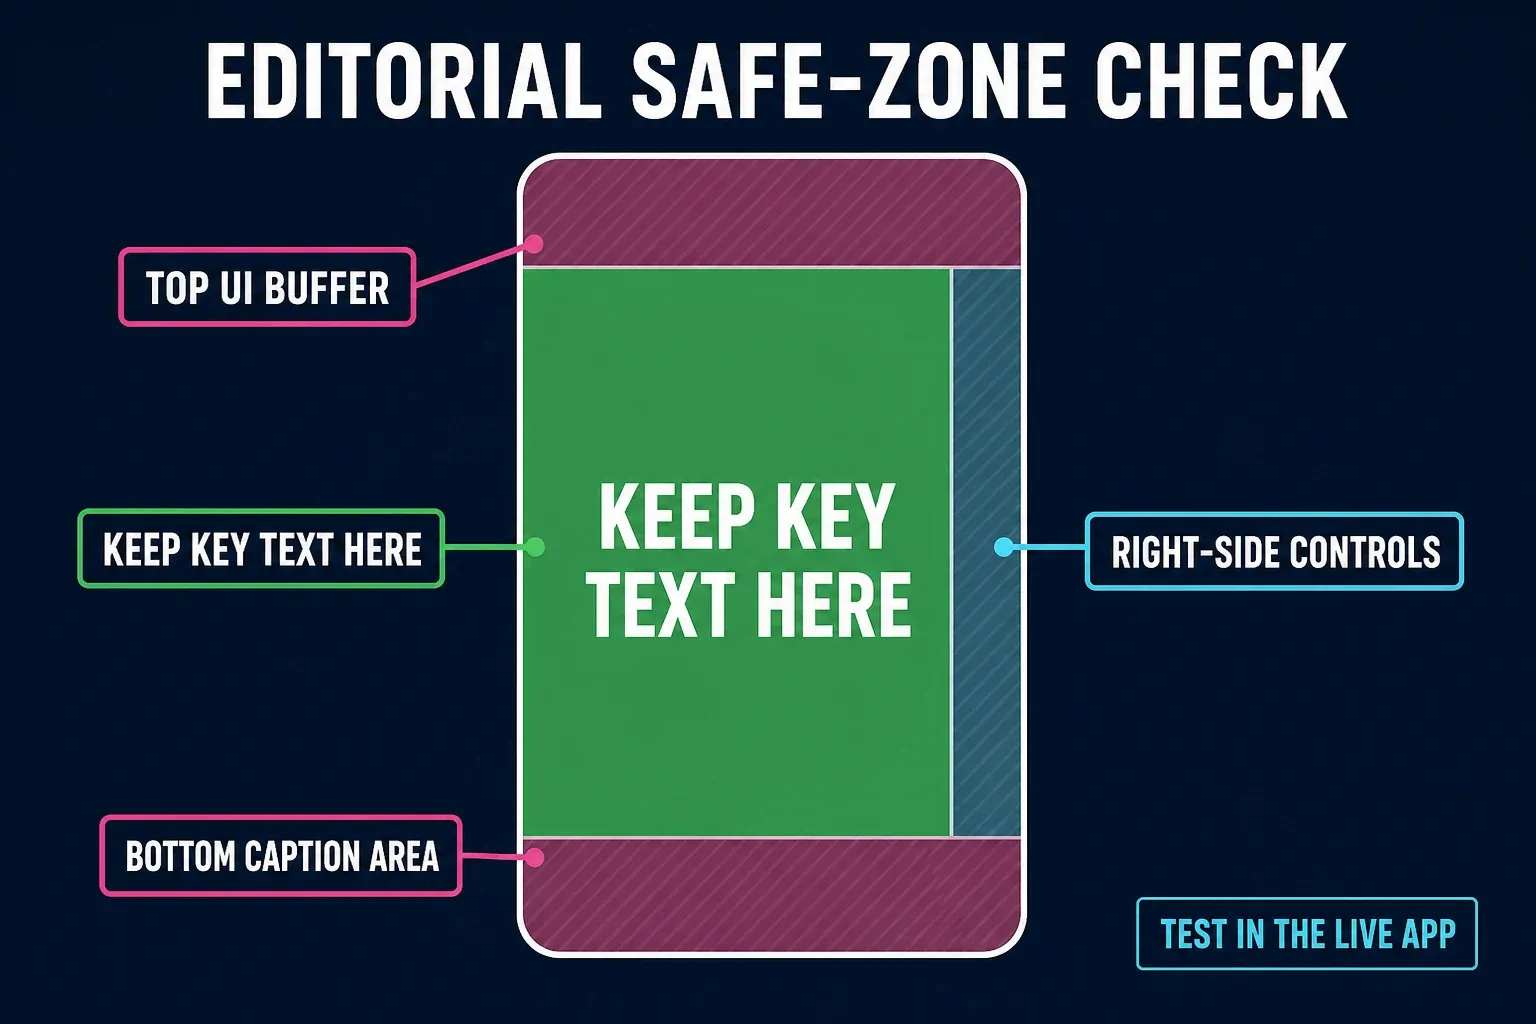
The safe-zone problem is real. TikTok places navigation near the top, account and caption information near the bottom, and engagement controls along the right edge. The mistake is turning one old overlay into a permanent organic TikTok specification.
TikTok publishes safe-zone guidance for advertising creative, and CapCut publishes searchable TikTok safe-zone templates. Neither proves that one pixel rectangle fits every organic post, device, caption length, shop label or interface update.
Use three caution areas while editing:
- Top: keep the first hook line and any small label away from the navigation strip.
- Bottom: leave room for the username, post caption, sound attribution and any extra account or commerce labels.
- Right: don't park a name, price or instruction under the profile, like, comment, save and share controls.
CapCut doesn't need a special safe-zone button for this. Add plain translucent blocks as temporary overlay layers, lock them, and stretch them across the full timeline. Keep important text in the clear centre. Hide or delete the overlays before export.
If you use a downloaded template, check when it was published and compare it with the current TikTok app. The safest test is a private or draft upload viewed on the phone and account that will publish it, with the normal controls visible.
Use a TikTok Template in CapCut Without Losing Control of the Edit
When TikTok exposes a supported CapCut template link, open it on the phone and choose the option to use the template in CapCut. Replace each media slot, then watch the result from start to finish. A template can be technically complete and still cut a face, leave old text, or make a caption unreadable over your footage.
CapCut's TikTok template handoff guide describes this deep link as a Mobile-only workflow. Desktop and Web can show their own template libraries, but they don't receive the same TikTok-to-CapCut community link.
Before export, check the canvas ratio, every replaced clip, text layers, music rights and any paid asset badge. If the template link opens the wrong page or does nothing, update both apps, try another current template, and check whether the format is available in your region. Don't reinstall CapCut until local projects are backed up or synced.
The CapCut templates guide covers discovery, editable controls, missing templates and platform catalogue differences. This page only needs the TikTok handoff and the quality checks that follow it.
Direct Publish or Upload the Saved File?
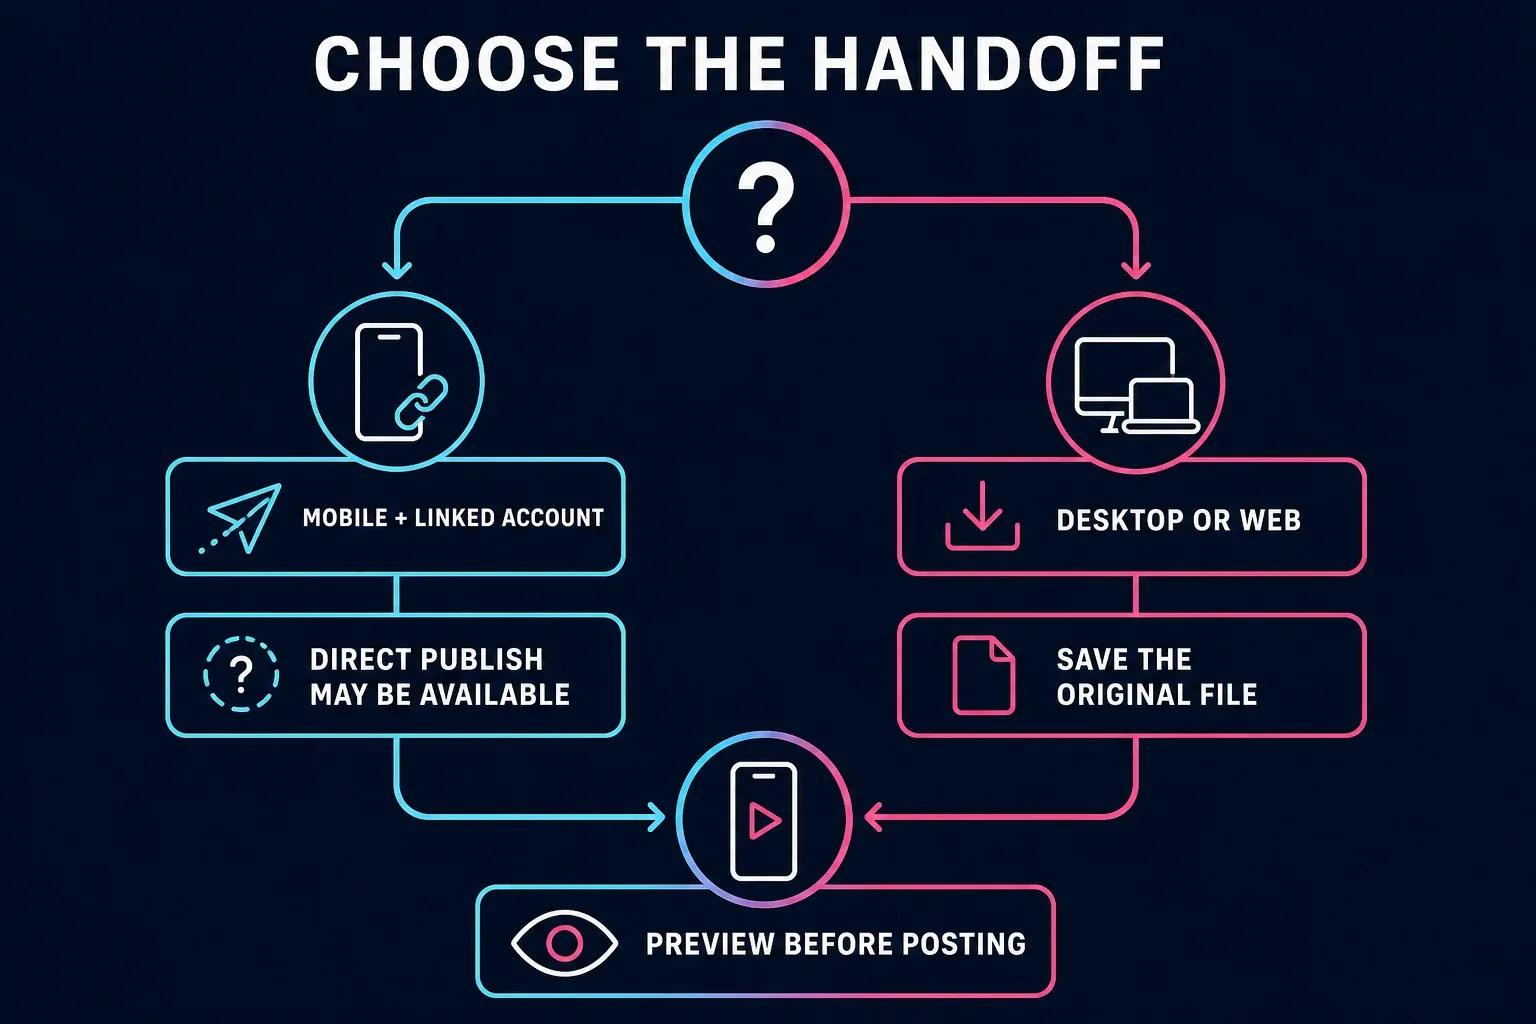
CapCut's account-linking guide documents TikTok linking in the Mobile app and says Desktop and Web don't support the same integration. A linked Mobile account can expose direct publishing, but the exact handoff can vary by account, region and app version.
Saving the original file is the safer default when the video matters. It gives you a clean master, lets you inspect the export outside CapCut, and avoids confusing a posting failure with an export failure. On Desktop or Web, save the file and upload it manually through TikTok or TikTok Studio.
Direct sharing is convenient for a quick Mobile post. It doesn't remove the need to check the final TikTok preview, choose the cover, confirm the post caption and review visibility settings. TikTok's posting guidance explains cover selection and draft behaviour. Remember that TikTok drafts are device-bound and can disappear after reinstalling the app or moving accounts.
Fix the Problems That Usually Appear After Export
The TikTok upload looks blurry
First play the local export at full size. If it is already soft, inspect the source resolution, crop, sharpening and bitrate in CapCut. If the local export is clean but the TikTok draft is soft, wait for processing to finish and compare a private test using the original file. Don't download a posted copy and upload it again because that adds another processing pass.
Text is covered or cut off
Move the text toward the clear centre, shorten long lines and test with the real TikTok interface. Don't solve a bottom-caption collision by pushing the same line into the right-side control column. Fix the layout, not just one overlap.
The template link won't open
Use the Mobile app, update TikTok and CapCut, and try a second current link. If only one template fails, it may have been removed or limited. If every link fails, check the app association and region before touching a working project.
A watermark appears
A manual project usually exports without a CapCut watermark, but templates, ending clips and particular assets can add branding or a paid restriction. Identify what you see before deleting anything. The watermark removal guide separates an ending clip, template branding and paid-asset lock.
The sound changes after upload
Listen to the local export first. If it is correct there, check TikTok's sound choice, mute state and rights notice. If it is wrong before upload, return to CapCut and inspect muted tracks, voice level, music level and audio sync. Don't keep exporting the same broken mix.
The 60-Second Pre-Publish Check
- Watch the first two seconds. The hook should be visible and readable with TikTok's controls on screen.
- Read every caption line. Check names, numbers, punctuation and timing.
- Scan the top, bottom and right edges for covered text or faces.
- Confirm that the safe-zone overlay is hidden.
- Listen once through the phone speaker and once through headphones.
- Compare the local export with the TikTok draft for sharpness and colour.
- Choose the cover, post caption, audience and interaction settings before publishing.
Once this workflow is stable, the CapCut Social hub leads to the matching Instagram Reels and YouTube Shorts guides.
CapCut for TikTok FAQ
What are the best CapCut export settings for TikTok?
Start with a 9:16 canvas, 1080x1920 resolution, MP4/H.264, and 30 fps for most footage or 60 fps when the source was captured at 60 fps. High bitrate, or roughly 8 to 12 Mbps for a 1080p H.264 file, is a practical editorial starting point rather than an official TikTok requirement. Check the local export before uploading.
Where is the TikTok safe zone in CapCut?
CapCut doesn't provide one permanent organic TikTok safe-zone specification. Use temporary overlays to keep essential text away from the top navigation area, the bottom account and caption area, and the right-side controls. Hide the overlays before export, then test the video in the current TikTok app.
Why does my CapCut video look blurry on TikTok?
Compare the source clip, the local CapCut export and the processed TikTok draft. If the local export is soft, fix the source, crop or export settings. If only TikTok is soft, wait for processing and upload the original export rather than a downloaded copy. A larger resolution or bitrate can't restore detail missing from the source.
How do I use a TikTok template in CapCut?
When TikTok shows a supported CapCut template link, open it on the phone, choose the option to use it in CapCut, replace every media slot and review the full edit. CapCut currently documents the TikTok deep-link handoff as Mobile-only; Desktop and Web use separate template libraries.
How do I export CapCut to TikTok without a watermark?
A standard manual project usually exports without a CapCut watermark. If branding appears, check for an ending clip, template branding or a paid asset restriction. Identify the watermark type before removing clips or paying for a plan.
Should I publish directly from CapCut or upload the saved file?
A linked TikTok account in CapCut Mobile can expose direct publishing, while Desktop and Web require a saved file. Saving the original export is the safer default because you can inspect it before upload and keep a clean master. Whichever path you use, review the TikTok preview before posting.
Do CapCut Auto Captions require an internet connection?
Plan on using a stable connection. CapCut's troubleshooting guidance says Auto Captions use speech recognition and cloud processing and lists an unstable connection as a common failure cause. Offline behaviour can vary by platform, region and app version, so test the exact setup before relying on it.