

Select the clip that contains the noisy recording, open its Audio controls and look for Reduce noise or Noise reduction. Turn it on, wait for processing, then compare the same spoken line with the effect on and off. Keep it only if the voice stays natural.
Noise reduction is worth trying for a steady fan, air conditioner or hiss behind speech. It can't reconstruct words that were never captured clearly. If turning it on makes the voice hollow, metallic or underwater, switch it off and compare against the original before you add another effect. When the recording matters and CapCut's tool can't save it, I'd move to DaVinci Resolve's noise-reduction workflow on desktop.
Test a short section before you change a long edit. Keep the original recording and a recoverable copy of the project, because the source file alone doesn't preserve your cuts, captions or mix. The project-backup guide explains the difference.
First identify the problem you can hear
“Noise” describes several different failures. They don't share one CapCut fix.
| What you notice | What it probably is | Start with |
|---|---|---|
| Constant fan, air conditioner, hiss or room bed under speech | Steady audio noise | Reduce noise / Noise reduction |
| Voice is present but dull, uneven or hard to follow | Speech clarity or level problem | Compare Enhance voice after a clean Reduce-noise test |
| Voice competes with background music | Source separation or mix problem | Lower or mute a separate music track; for music baked into the recording, test vocal isolation if available |
| Two people talk over each other in one recording | Overlapping voices, which noise reduction does not separate | Look for a separate microphone track; do not assume vocal isolation can keep only one person |
| Buzzing or crackling on loud syllables in the original file | Possible recording distortion or clipping | Compare the untouched source and a cleaner take before trying noise reduction |
| Long room reflections after each word | Echo or reverb | Test mild cleanup, but expect source/recording limits |
| Grain or speckles in the picture | Visual image noise | Use a video-denoise workflow, not an audio control |
| The editor or exported file is completely silent | Playback/export failure | Use the CapCut no-sound diagnostic |
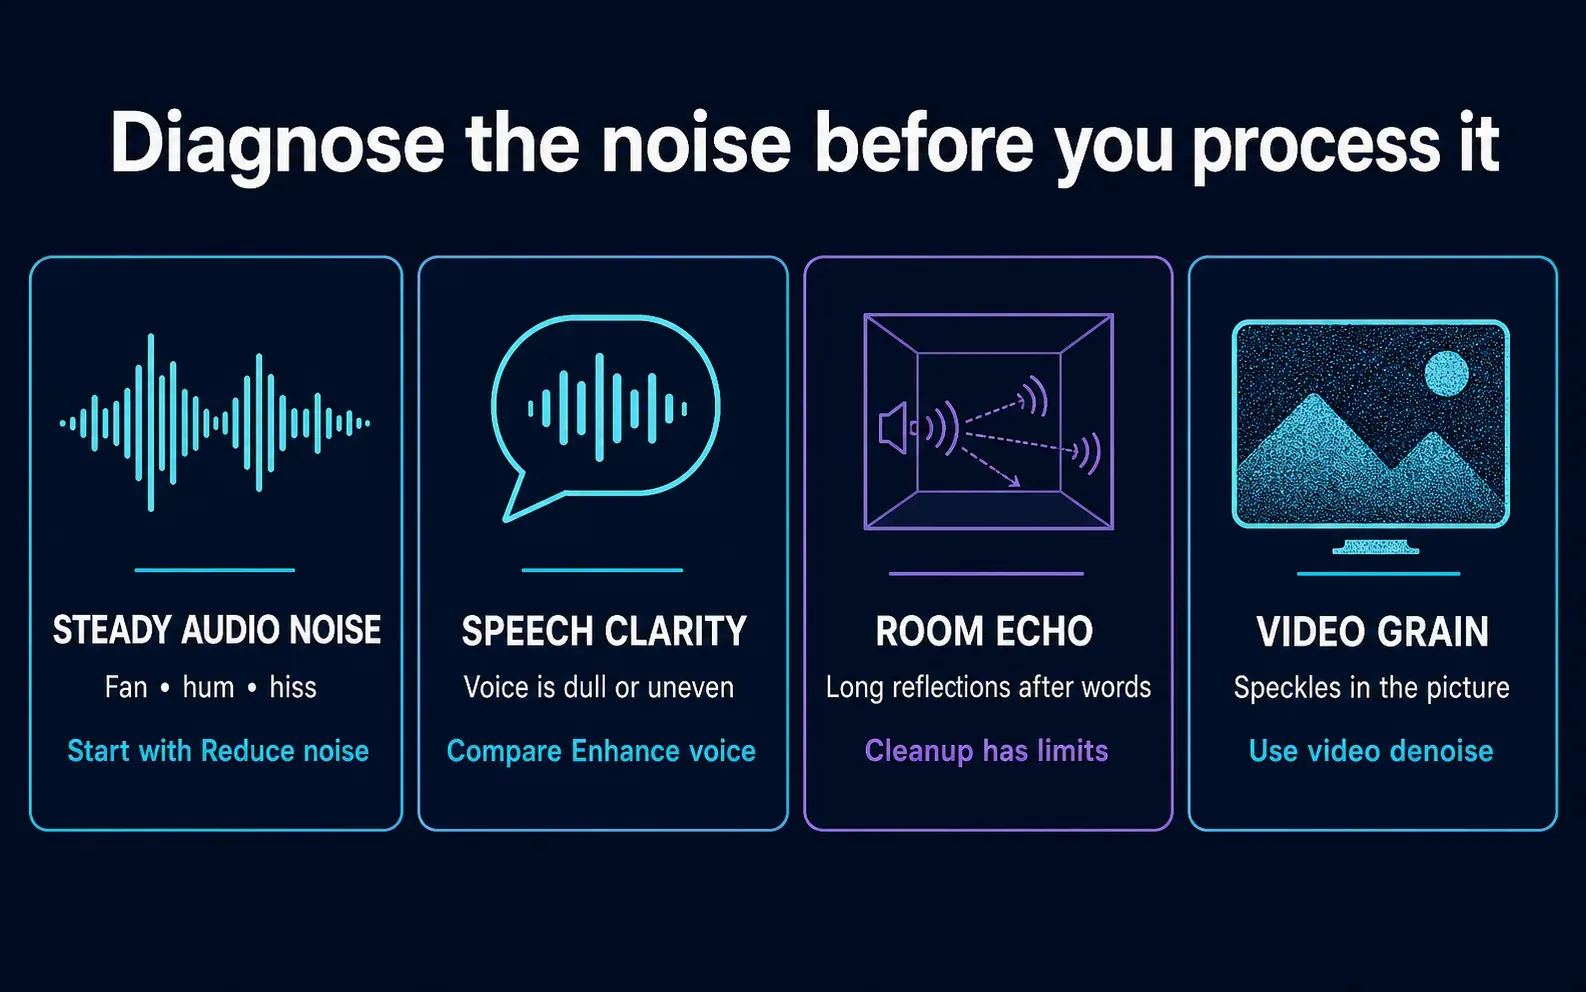
CapCut has a separate AI video denoiser for visual grain. Turning that on won't remove a fan from the soundtrack. And deleting the visible background behind a person has nothing to do with background audio.
Reduce noise, Enhance voice or voice isolation?
Start with the smallest fix that matches the symptom.
Use Reduce noise for a steady sound bed
Try Reduce noise or Noise reduction first when the unwanted sound is consistent: fan rumble, air-conditioning hum, microphone hiss or a stable room bed. CapCut's current audio-cleanup page describes it as a reduction workflow and doesn't promise perfect restoration. Keep your expectations modest. You'll get less distraction, not a rebuilt recording.
Apply it to the clip that has the problem, then listen to both the noise and the speech. A quieter pause isn't a win if consonants smear or the speaker sounds distant.
Use Enhance voice when speech itself needs help
CapCut's current voice-enhancer page describes broader speech processing: clarity, balance and voice-focused cleanup. That can help a spoken track, but it can also change tone more than a basic noise pass.
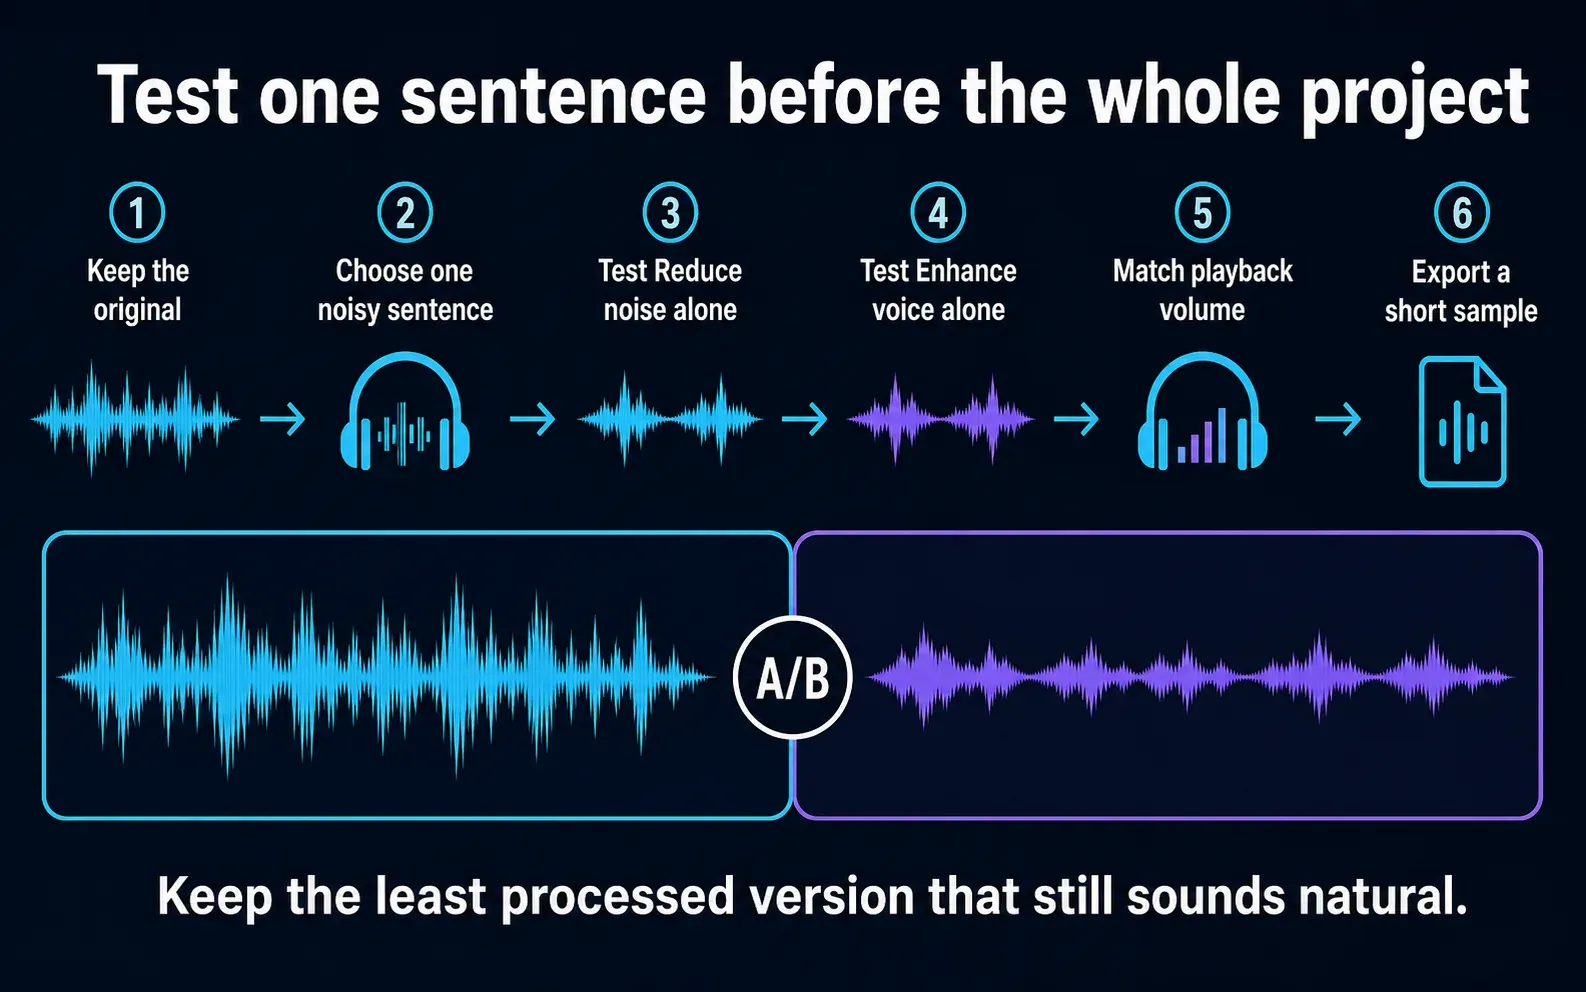
Don't stack every voice tool right away. Test Reduce noise alone, then Enhance voice alone, and try the combination only if each single version improves the same sentence. Keep the least processed version that makes the words easier to follow.
Use voice isolation for separation, when available
Vocal isolation helps most when speech or singing is mixed with music in the same recording. CapCut describes keeping or removing vocals. That's not a promise to separate one person from someone else talking over them. If you have separate microphone tracks, start with the cleaner one.
On Desktop, CapCut's instructions have you select the clip and open Audio → Basic → Isolate voice (its own Desktop examples show it as Vocal isolation). Choose Keep vocal if you want the voice; Remove vocal does the opposite. Listen for missing words or leftover music. If the option isn't there, use the controls your version offers, and don't install an unofficial build just to match a tutorial.
Remove background noise in CapCut Desktop
Start a new, empty test project with only the recording in it. CapCut documents splitting a clip at the playhead, so make two splits around the part you want to test. An export range alone doesn't isolate the effect.
- In a new test project, import the original recording and place it on the timeline. Leave the working edit untouched.
- Select the clip. Place the playhead just before a useful test section and choose Split; repeat just after it. Include a pause, normal speech and a noisy moment.
- Select only the middle segment containing the noisy audio.
- Open Audio in the properties panel.
- Find Reduce noise or Noise reduction and enable it.
- Wait for CapCut to finish analysing or processing the clip.
- Play one normal sentence, one quiet pause and the noisiest section.
- Toggle the effect off and on. Match the perceived voice loudness for a fair comparison; the same device-volume setting may still make one version louder.
- If your build exposes a strength control, increase it gradually. Stop when speech begins to lose detail.
- In the test project only, remove the outer segments from the timeline and export the remaining sample. Listen outside CapCut before applying the effect to the working edit.
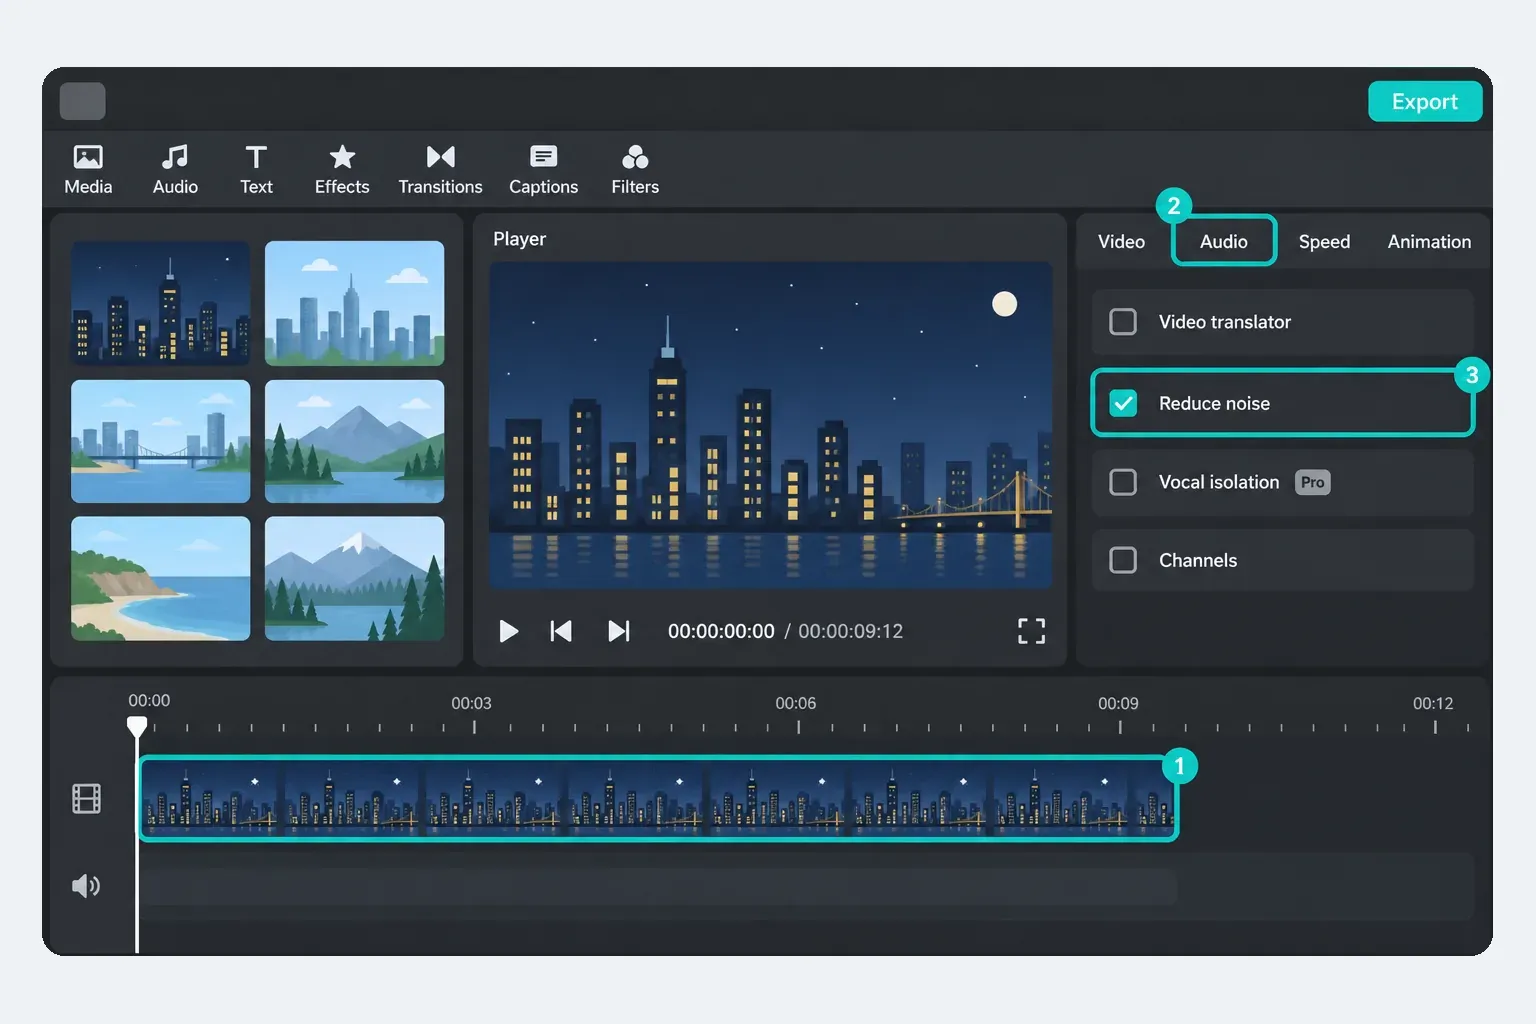
CapCut's Desktop noise-reduction instructions use the select-clip, Audio and Reduce-noise sequence. Its audio-cleanup tool page also describes a toggle or slider. If your panel only has an on/off switch, don't go hunting for a strength setting from another version. You also don't need to extract the sound first when the selected video already shows the audio control.
Remove background noise in CapCut Mobile
On iPhone or Android, select the noisy clip first, then scroll its editing toolbar for Reduce noise or Noise reduction. CapCut documents the selected-audio editing menu on Mobile, including split and noise reduction. Some versions group these under Audio, and the exact button order isn't the same everywhere.
Use this order:
- Start a separate test project with the source recording. Keep the existing edit and original media.
- Tap the clip and split at each end of the section to test; select the middle segment.
- Open the clip's audio controls and enable the live noise-reduction option.
- Let processing finish before judging it.
- Listen through phone speakers once, then headphones if available.
- Remove the outer segments from this test timeline, export the sample and compare it outside the app.
A small phone speaker can hide watery voice artifacts and low hum. Headphones make comparison easier, but the destination still matters. If most viewers will hear the video on a phone, check there again after the headphone pass.
If the control is missing or the sample export asks you to pay, work through the missing-control checks below before you change the main project.
Remove background noise in CapCut Web
In the browser editor, upload the recording to a test project, add it to the timeline and select it. The official Web cleanup instructions place Noise reduction under Audio → Basic on the right. Turn on whichever control your panel shows, let it process, then compare playback.
If it's missing, make sure the timeline clip is selected, save the project and refresh once. Then work through the availability checks. If you test the original recording in Desktop instead, hold on to the Web project, since that test won't carry over its edits or effects.
CapCut Web also means uploading the recording. Before you run private calls, client interviews or unreleased audio through it or any other online cleaner, check the service's privacy and retention terms and make sure you have permission to upload that material. And don't assume a Desktop AI feature works offline, either.
Compare cleanup without being fooled by loudness
Listen to the same sentence untreated, with Reduce noise alone, then with Enhance voice alone. Turn the first effect off before you try the second. Adjust playback so the voice sounds about as loud in each version, because a louder result can seem clearer even when it has more distortion.
Listen for the ends of words, breaths and the room sound between phrases. Use the least processing that still improves intelligibility, and combine the effects only if the combination beats both single-effect versions.
Once the voice works, bring music and effects back into the mix. The audio-mixing guide covers balancing those separate tracks without burying speech. Check captions against the original speech before you judge the finished export.
Keep the cleanest original recording in the project until delivery. Replacing it with one heavily processed file removes your easiest way back.
If the voice sounds robotic, muffled or underwater
If the unprocessed recording sounds natural but the cleaned version doesn't, the effect is a likely cause. CapCut's noise-removal guidance warns that aggressive cleanup can make speech robotic or underwater. And when the original already sounds distorted, a lower noise setting won't restore the missing detail.
Try these checks in order:
- Reduce the strength if your build gives you a slider.
- If it is a single toggle, compare Reduce noise alone with Enhance voice alone.
- Turn off voice effects, voice changer and other cleanup on the same test section.
- Use the original clip to confirm whether the lost detail existed before processing.
- Check different microphones separately; one setting may not suit both recordings.
- Keep mild steady noise when removing it would damage the speaker's intelligibility.
One user report describes muffled results from Enhance voice. It's a single anecdote and doesn't prove an update broke the tool for everyone. Recheck the same sentence in your own project instead of assuming an effect that helped before still improves this recording.
Wind, echo, crowd noise and sudden sounds need realistic expectations
Steady noise gives an automatic reducer something consistent to identify. Gusty wind, clattering dishes, applause, a second speaker and strong room echo overlap speech in changing ways. A one-click pass may help, but it can't reliably rebuild syllables buried under those sounds.
For heavy problems:
- cut to a cleaner microphone or camera track if one exists;
- lower or mute an overlapping music/effects track before processing the voice;
- add captions for words you can verify from the original, a cleaner track or the speaker; do not guess an inaudible word;
- rerecord your own narration when needed; do not replace an interviewee's words with something they did not say;
- improve the next recording with a closer microphone and a quieter, softer room.
The Audacity Noise Reduction manual explains why steady hum and hiss are easier targets for its tool than loud, irregular sounds overlapping speech. It also warns that noise reduction can damage wanted audio. Treat that as useful context. It isn't evidence that CapCut uses the same algorithm or requires Audacity's noise-profile step.
Clipped recording or overloaded mix? Start by listening to the original file outside CapCut. If it's clean but your edit distorts, lower the affected tracks and check the mix again. When the source itself clips on loud syllables, turning the volume down only makes the distortion quieter. Even a dedicated repair tool such as Audacity Clip Fix only attempts reconstruction, and it's meant for light clipping. A cleaner take is the safer fallback.
CapCut also warns that noise can cause caption errors. Generated text isn't proof of an unclear word. Check another recording or ask the speaker. If you still can't establish the wording, leave it unclear and don't invent a transcript.
If Reduce noise is missing, marked Pro or blocks export
Don't reinstall or clear app storage while an important draft exists only on that device.
- Select a single audio-bearing clip rather than several clips at once, then reopen its Audio controls.
- Save or back up the project and source media.
- Check the same feature in a short clean project.
- Update the official app or supported browser, then reopen the project.
- Check that the intended account is signed in, especially if you have already paid, and read the badge or upgrade message beside the exact action.
- If export specifically names Reduce noise as a paid effect, turn it off on the clips using it or check the relevant plan. Inspect video clips and detached audio individually; do not assume a bulk selection or simply muting a track removed the effect. Retry export after the change.
- If the export is silent rather than blocked, switch to the CapCut no-sound checks.
CapCut explains that premium project elements can trigger an export prompt. A control that isn't there is a different problem from a named paid effect. Don't buy a plan just to see whether a missing button appears.
If you've already paid, go through CapCut's account and subscription checks before you pay again. Its pricing help describes price differences by region, device and promotion, but it doesn't prove noise reduction is included in every plan.
Export and check the cleaned result
A short test helps you choose an effect. The final export still needs a full listen:
- Save the finished export locally before uploading it elsewhere.
- Play the local file in a second player or on another device.
- Compare it with the unprocessed source at similar volume.
- Listen for clipped consonants, pumping, metallic tails and changing room tone between cuts.
- Check the first and last word of every processed clip.
- Confirm that music and effects still sit where intended.
- Play the finished file all the way through instead of trusting the sample. Keep the project and original media until delivery is checked.
Our breakdown of CapCut export settings covers resolution, frame rate, codec and video-delivery choices. If you need MP3, WAV, AAC or FLAC rather than another video, see how to export audio only in CapCut. Voice generation, custom voices and character effects remain in the CapCut AI voice guide.
CapCut background-noise FAQ
Can CapCut remove background noise completely?
It can reduce many steady background sounds, but no current control can guarantee perfect restoration of every recording. Keep the original and compare speech before and after processing.
Where is Reduce noise in CapCut?
Select the video or audio clip that contains the noise, then open its Audio controls. Look for Reduce noise or Noise reduction. The location and control shape can vary across Mobile, Desktop, Web and app versions.
Is CapCut noise reduction free or Pro?
Check the badge or upgrade message beside the exact noise-reduction action. A premium effect used in a project can also trigger an export prompt. Do not use a general price list or an old tutorial as proof that the control is free or included in your plan.
Why does noise reduction make my voice sound robotic?
If the voice becomes robotic only after processing, the effect may be altering wanted speech along with the noise. Lower the strength if a slider exists; otherwise turn the effect off and compare Reduce noise and Enhance voice separately. Check the original for distortion too.
Should I use Reduce noise and Enhance voice together?
Test them separately first. Combine them only when the same representative sentence sounds clearer and still natural. More processing is not automatically better.
Can CapCut remove wind and echo?
It may help mild unwanted sound, but strong gusts and heavy echo can overlap speech beyond useful repair. Prefer a cleaner recording or rerecord your own narration. Captions help only when you can verify the words; they cannot recover an unknown transcript.
Why is Reduce noise missing from my clip?
Select one clip that contains audio and check its Audio panel. Back up the project before updating the official app/browser, then test a short project and read any account or plan message. Paying for a plan is not proof that an absent control will appear.
Can I remove noise and export only the cleaned audio?
Yes on CapCut Desktop when your live Export panel offers Export audio. Finish the cleanup, turn off video exporting, enable audio export and choose a format shown in that panel.
For the next edit, such as trimming a clip, adding an overlay or fixing captions, the CapCut tutorials offer step-by-step guides.