


To add text in CapCut, choose Text → Add text, type your words, then drag the text clip's edges on the timeline to set when it appears. On Mobile, start from the bottom Text toolbar. Desktop and Web put the same job in their text panel.
Before exporting, play the title at normal speed. Check that it stays readable as the shot changes and doesn't sit under the buttons TikTok, Reels or Shorts place around the frame.
Reviewed against public CapCut documentation on September 16, 2026. This is an editorial walkthrough, not a hands-on test of every build. CapCut's Mobile text guide documents adding, styling, positioning and timing text. The official-interface images below show specific Mobile, Desktop and Web controls from current CapCut help pages. Selection gives a text layer editing focus; it does not decide whether an otherwise visible layer appears during playback or export. Labels and asset libraries can still vary by version, account and region.
Choose Manual Text, Captions or a Template
- Manual text: titles, labels, calls to action, names and short explanations you type yourself.
- Auto captions: timed speech transcription. Generate them from the audio, then review every word, line break and timing boundary.
- Imported captions: timed subtitle files. CapCut documents SRT on Web and SRT or timed TXT on Desktop. Mobile cannot start a direct subtitle-file import. A compatible Desktop/Web project can carry imported caption blocks through Spaces, but verify that they remain editable after opening it on Mobile.
- Text templates: prebuilt styling and motion. Their selection can vary by platform, account, region and update.
- Text to speech: narration generated from written words. It creates audio, not visible captions.
For one heading, use manual text. For speech, use the Auto Captions workflow and correct the transcript. Use the text-to-speech guide when the goal is narration.
If client, personal or confidential footage would need to move through Spaces, obtain permission for cloud processing first. If that is not acceptable, keep the work in an approved local workflow and use nonsensitive practice media when comparing platforms.
How to Add Text in CapCut Mobile
- Open a project and move the playhead to the first frame where the title should appear.
- Tap Text in the bottom toolbar, then choose Add text.
- Type the message. Break a long idea into shorter screens instead of shrinking one paragraph.
- With that text selected, use the available Font or Style controls to choose its font, color, outline, shadow or background. Labels can differ from the illustration.
- Drag the text box in the preview and resize it without pushing important words against an edge.
- On the timeline, drag the text clip's left and right handles to set its start and end.
- Play through the title at normal speed and read it once without pausing. Check that animation or another layer does not hide it.
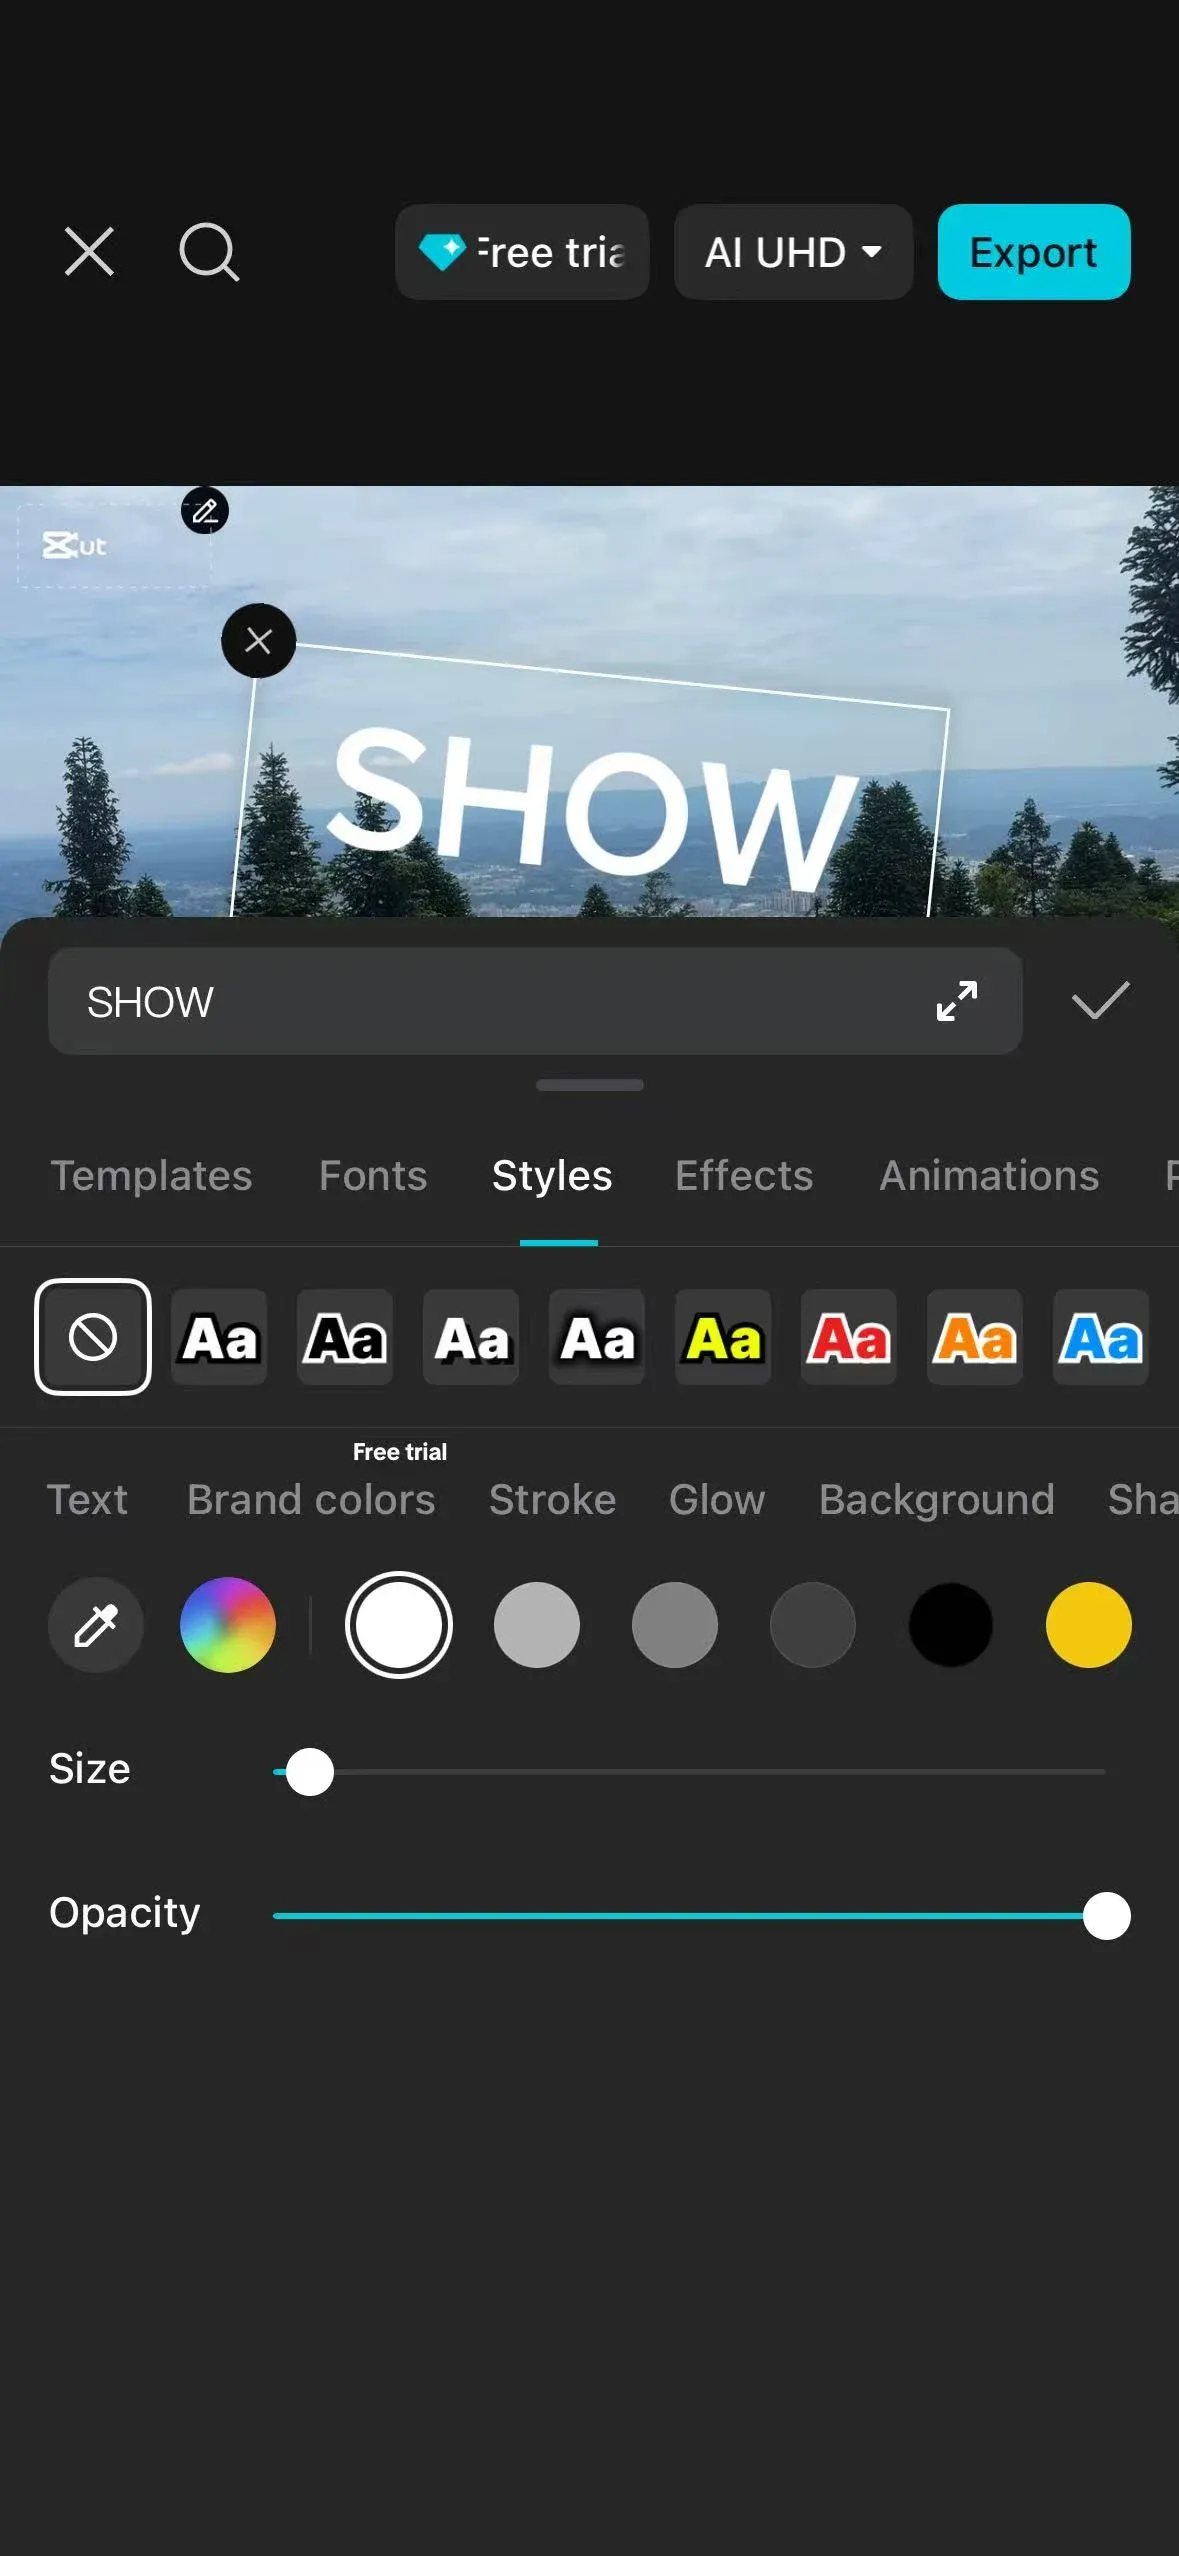
If you can't find Add text, confirm you're in the editor rather than the home-screen template browser, then scroll the toolbar. CapCut moves controls between releases, but selecting the Text category or an existing text track remains the reliable starting point.
How to Add Text in CapCut Desktop
- Open the project and place the playhead near the intended title.
- Select Text in the top tools, then choose Add text or the current default-text option.
- Click the new text layer. Type in the right-side Text or Inspector panel.
- Adjust font, size, color, alignment, stroke, shadow or background in the Inspector.
- Position the box in the preview. For exact repetition, use the same transform values or duplicate a finished text layer.
- Move and trim the text clip on its timeline track to set timing.
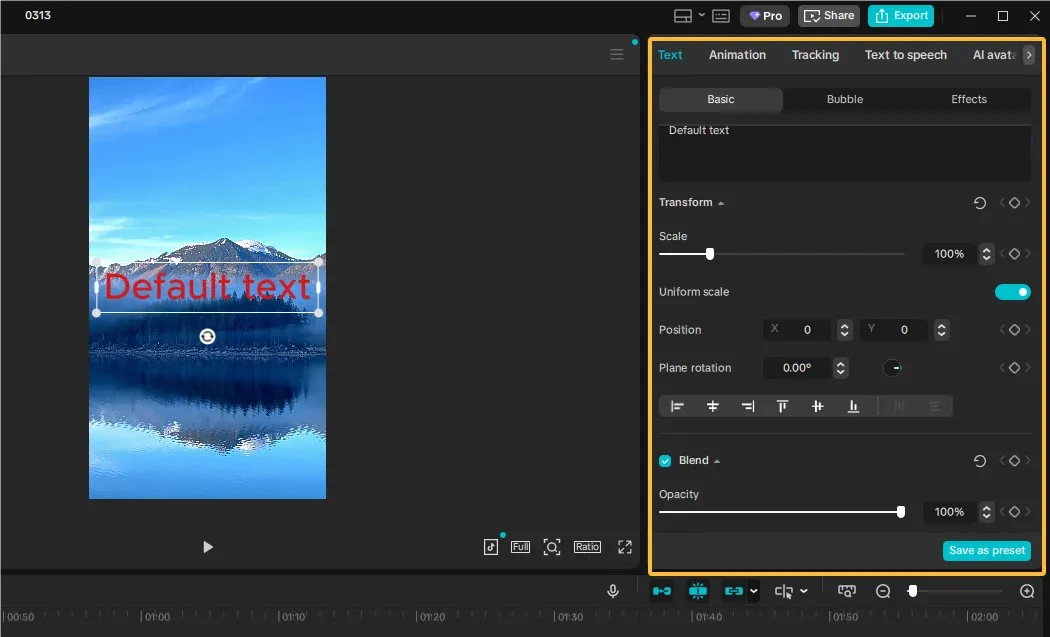
The CapCut for PC guide explains the full Desktop layout. When a project contains many titles, the larger timeline makes gaps, overlapping text and inconsistent duration easier to see than on a phone.
How to Add Text in CapCut Web
- Open the intended project and let required media uploads finish.
- Choose Text in the left panel and add a basic text element or a suitable template.
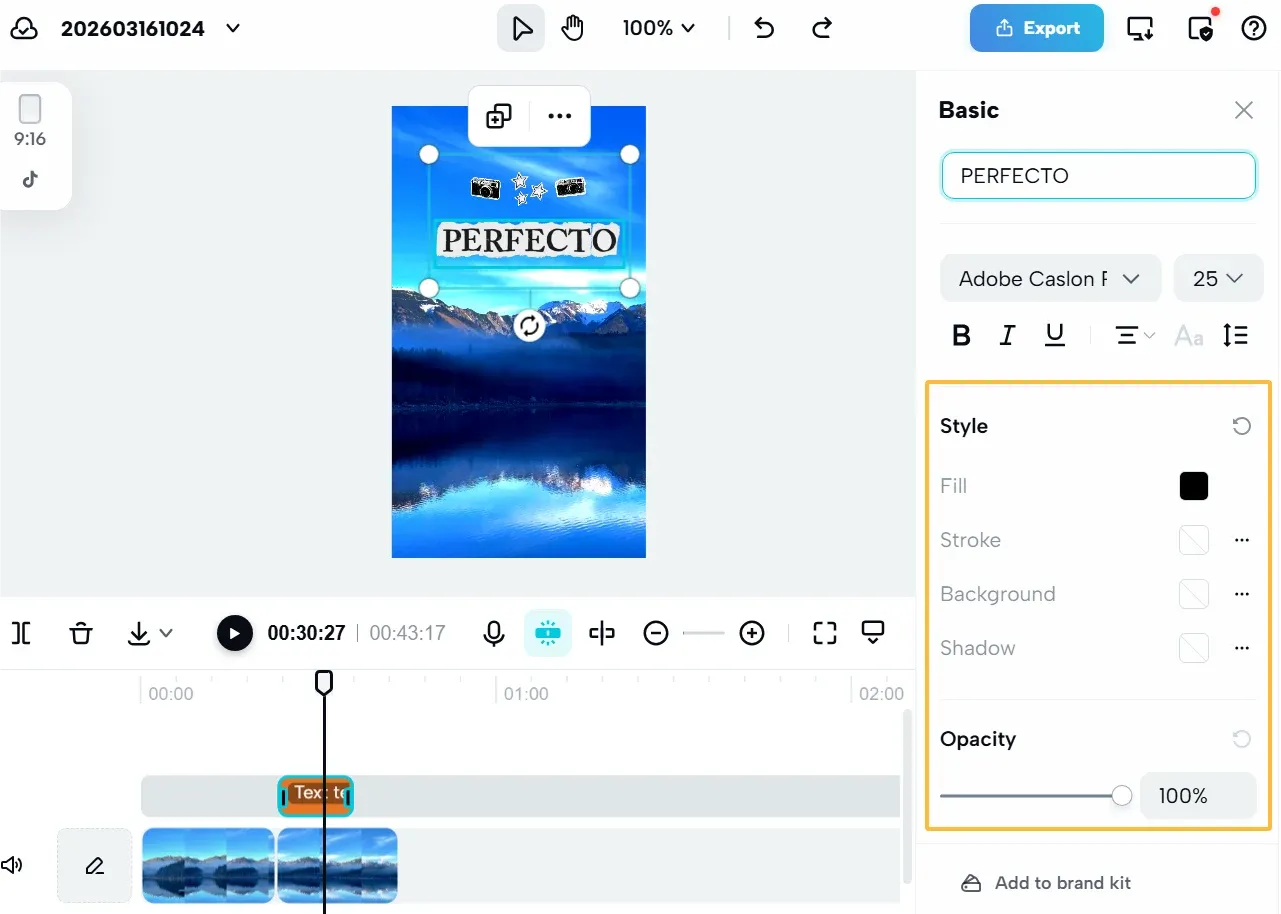
- Select the new text clip, then enter the wording and use the right-side controls for font, size, color and style.
- Place the box on the canvas. Drag the text clip on the timeline to change when it starts, and drag its edges to change its duration.
- Play the full title interval, including any In, Out or Loop animation, then inspect a short export.
CapCut's Web text-animation guide documents the left-side Text tool, right-side Basic controls and In, Out and Loop animation groups. Save before refreshing the browser. Do not clear browser storage as a first troubleshooting step for an unsaved edit. The Web Editor guide covers browser, upload and session limits.
Make CapCut Text Easy to Read
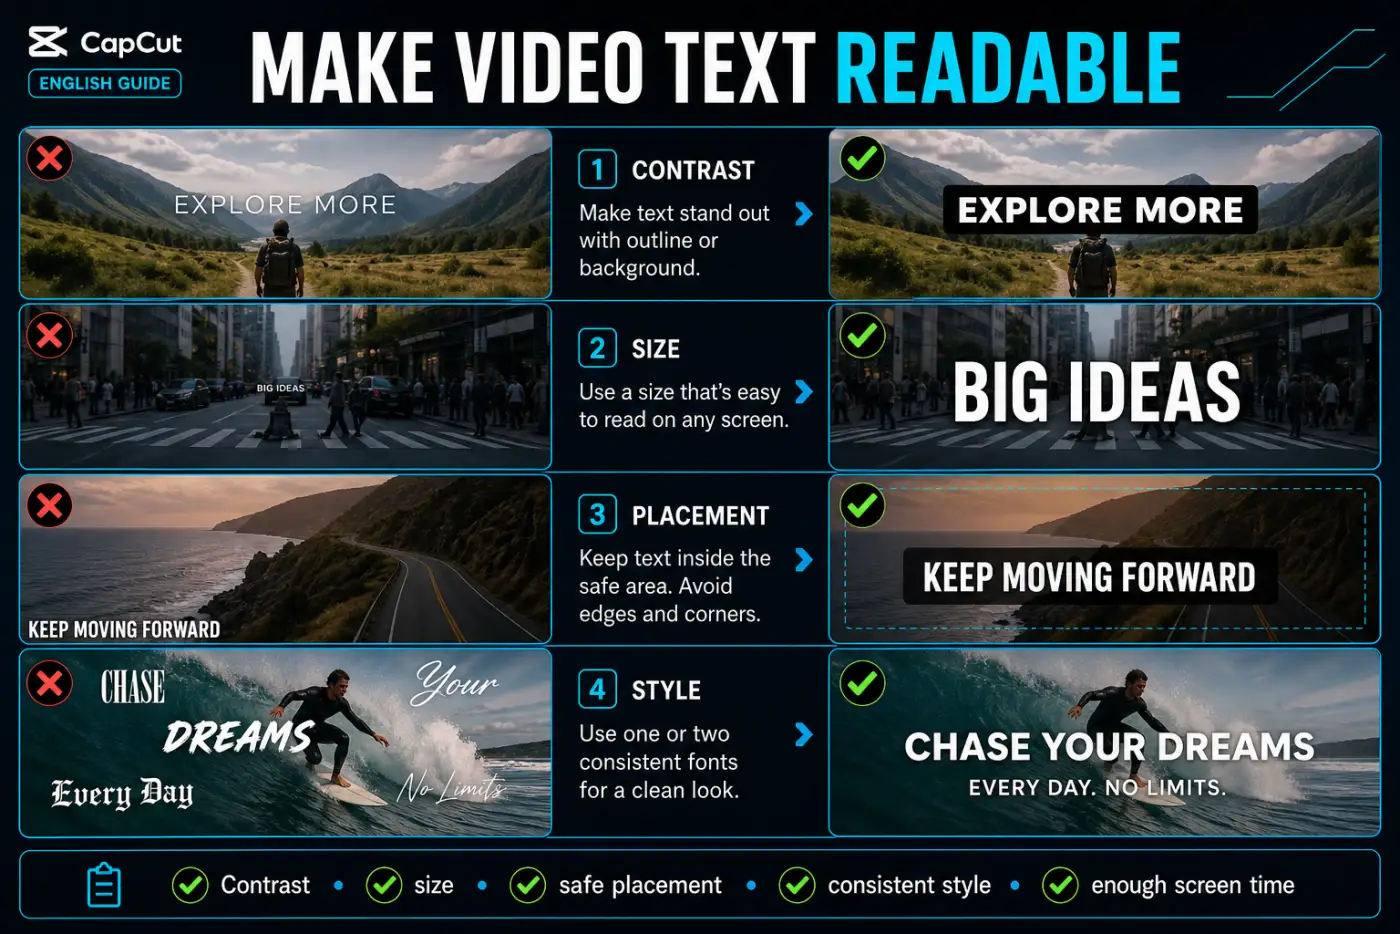
Use contrast that survives the whole shot
White text may work over a dark opening frame and disappear when the camera pans toward the sky. A restrained outline, shadow or semi-opaque background can maintain separation without turning every title into a sticker.
Judge size on the destination screen
A title that looks comfortable on a desktop preview can be tiny on a phone. Export a short test, view it at normal size and avoid solving every layout problem by adding more words.
Leave room for platform controls
Keep important words clear of TikTok, Reels and Shorts controls, and inspect the destination's upload preview when one is available. The dashed rectangle in the illustration is not an official safe-zone template. For example, TikTok's in-feed ad guidance says safe zones vary with dimensions, caption length and added formats; it also warns that preview and live placement can differ. Those are ad specifications, not a fixed rule for every organic video.
Keep the style system small
Start with one type family, one accent color and a repeatable background treatment. That gives you fewer settings to check across a series of titles. Add a different style only when it marks a different kind of information.
Set Text Duration and Timing
A text clip can appear only during its own timeline interval, and visibility also depends on its style, animation and layer position. Drag the right edge later to keep it on screen longer, or the left edge earlier to start sooner. Drag the whole clip when you want to shift its timing without deliberately changing its length.
To keep one title across several shots, extend its text clip from the first intended frame to the last. You do not need a separate title for every video cut underneath it. Replay each shot: a title that reads well over one background may disappear against the next.
For a title, try starting on a visual beat or after the viewer has enough context to understand it. For manual subtitles, place line changes near speech pauses. The cutting and splitting guide covers selection, playhead position and the extra restrictions that can apply to text or caption blocks; not every track behaves like an ordinary video clip.
Don't measure readability only by seconds. A familiar two-word label can appear briefly; a technical sentence needs more time. Read the line aloud while the project plays. If you can't finish naturally, shorten the wording or extend the clip.
Animate Text Without Hiding the Message
Select the text clip and open Animation. CapCut's Web guide describes In, Out and Loop groups, but the names and available presets vary. The animation-duration control changes how long a movement takes; the text clip's edges control how long the title exists on the timeline. Preview the whole interval, including the point where the words should sit still. If the title appears too briefly, check both settings.
- Use an entrance to introduce a title or connect it to a cut.
- Use an exit only when the departure adds something.
- Keep looping motion out of text the viewer needs to read carefully.
- Use keyframes for deliberate position or scale changes. You set positions over time; this is not automatic object tracking. CapCut's Desktop keyframe help also notes that some template elements do not support them.
One user reported finding a Mobile text animation but not its PC equivalent. That is a portability warning, not proof of a current universal bug. Choose a preset available in the destination editor or finish that title on the platform where it works, then inspect the final export.
Reuse One Text Style Across a Project
Finish one manual text layer first. Check font, size, color, outline or background, alignment, position, animation and duration. Then copy and paste that selected layer and replace only its wording. CapCut's current text-duplication help recommends this route because newly added manual text layers do not have one universal batch control for position, style or size.
After pasting, move the duplicate to the intended time and confirm its text, duration and canvas position. Do not assume Apply to all is a manual-title switch. That control belongs to supported caption groups, and imported or independently created blocks can behave differently. For supported Desktop caption groups, CapCut documents Ctrl/Cmd-click multi-selection as a fallback, but that does not prove every manual-text property can be changed in one batch.
Use Titles and Captions for Different Jobs
A title tells the viewer what matters: a chapter name, speaker label, measurement or next step. A caption represents spoken audio. Keeping those jobs separate makes the timeline easier to edit and the screen easier to scan. Use a manual text layer for the title, then generate or import captions on their own track.
Give the two systems a visible hierarchy. Titles can be larger and use the project accent color; captions should remain quiet, consistent and easy to follow from line to line. If both appear together, place them so they don't overlap and check the frame on a phone-sized preview. Avoid turning every spoken sentence into a title animation because constant movement competes with reading.
Auto captions are a starting transcript, not a finished proofread. Listen for names, product terms and words spoken over music, then correct punctuation and line breaks. CapCut's text-editing help page notes that the correct text or caption clip must be selected before edits appear. When one correction seems to change nothing, check the selected track before rebuilding the caption.
For a recurring series, keep a short master project with a finished title, speaker label and caption treatment. Duplicate that project before major changes, then replace the content and check timing. A duplicate inside CapCut is not an independent backup. Exporting and re-importing creates a flattened video rather than restoring separately editable title layers, so retain the master and its source files. The project safety guide covers a restorable copy.
Custom Fonts and Missing Text Templates
Font and template libraries can change with platform, region, connection, account and app version. Start with the selected text's font list, search and favorites. CapCut's missing-font checklist also recommends checking filters such as Commercial or Licensed Content where they appear. Turning off a catalog filter may reveal an asset; it does not grant a commercial license.
For a custom font, inspect the destination editor for a current Local, System, My fonts or upload control. Use only a font file you are licensed to use. If the control is absent, choose an available licensed font in that editor. Reopen the project and inspect a short export before relying on that font in a final video or cross-platform handoff.
Why CapCut Text Is Not Showing
Start with timing, layers and style. Selecting the correct text clip is necessary to edit that clip, but unselected text layers can still be visible.
- Timing: put the playhead inside the text clip and extend its left or right edge if the intended frame sits outside the clip.
- Layer: unhide the intended text layer if your build exposes visibility controls. Move it above an element that actually covers the words.
- Style: check color, opacity, size, scale and canvas position. Remove a delayed entrance animation while diagnosing.
- State: save the project before refreshing Web or restarting the app. Compare preview and a short exported file.
- Version: if the issue affects several projects, protect the project and source media before updating. Do not clear Mobile app data or reinstall before you have a verified restorable copy; CapCut warns that those actions can delete local projects.
CapCut's text visibility guide covers timeline placement, covering layers, color, opacity and rendering state. Its text-editing checklist warns that clearing Mobile app data or reinstalling can delete local projects. Use the project safety guide to protect the edit and its media before either action; restarting and reinstalling are not equivalent fixes.
Edit Existing Text Without Rebuilding It
Select the existing text clip, then edit its words in the available text field or Inspector. Do not add a second layer unless you want two titles. If a template restricts the part you need to change, try an ordinary text layer on a copy of the project; duplicating a template does not necessarily remove its restrictions.
If the words are already burned into an imported video or image, they are pixels, not an editable CapCut text layer. Open the original project that contains the title to change its wording. Adding a new title over the render does not recover the old text layer.
Before export, check spelling, names, line breaks and every title boundary. If text looks soft only in the editor, CapCut's preview-quality guidance allows for reduced-resolution playback; that does not prove the output is sharp. Use a short export test to inspect the actual file, then watch the complete final export outside CapCut. With sound muted, look for duplicate titles, one-frame flashes, clipped letter tails and words hidden by the canvas edge. With sound on, check that captions match the speech.
CapCut Text FAQ
How do I add text in CapCut Mobile?
Open the project, tap Text, choose Add text, type the words, then style and position the box. Set its screen time by dragging the text clip edges on the timeline.
How do I add text in CapCut on PC?
Open Text in the top tools, choose Add text or the current default-text option, then edit the words and style in the right-side panel. Move and resize the box in the preview, and set its duration on the timeline.
How do I add text in CapCut Web?
Open the Web editor, choose Text in the left panel, add a text element, and type in the side panel. Position it on the canvas, then drag its timeline edges to set the start and end.
How do I make text stay longer in CapCut?
Select the text clip and drag its right edge later, or its left edge earlier. To cover several shots, extend that one text clip across them. Check animation as well: its duration controls the movement, not the full interval in which the title can appear.
Why is my CapCut text not showing?
Check the playhead, text clip duration, animation, layer visibility, covering elements, color, opacity, size and canvas position. Selection determines what you edit; multiple text layers can remain visible together. Confirm the project has saved before refreshing or restarting, and inspect a test export.
Can I use my own font in CapCut?
Check your current editor's font chooser for a local-font or upload option. If offered, use a font you have permission to use and test the export. Font-import controls can differ between Mobile, Desktop and Web. Do not assume that a font available on one platform will appear on another.
What is the difference between text and auto captions in CapCut?
Manual text is for titles, labels, and short callouts you write yourself. Auto captions turn speech into timed caption blocks and still need a full accuracy review. Their creation and batch-style controls are different even though both are edited on the timeline.
How do I add text animation in CapCut?
Select the text clip and open Animation. Choose an In, Out, or Loop option only if it helps the message, then preview the full duration. Names and available presets can differ between Mobile, Desktop, and Web.
Once the full export passes the text check, return to the CapCut tutorial path for the next editing step.