

CapCut has a native Windows app, so you don't need an Android emulator. Use it when a phone timeline feels cramped or when local media, separate tracks and precise mouse control matter more than a touch-first workflow.
Quick answer: Download CapCut for PC from the official CapCut Desktop page or the Microsoft Store listing published by BYTEDANCE PTE. LTD. Check the published requirements in CapCut's Desktop guide and make sure your Windows device is compatible. Back up important local projects before you update or reinstall. CapCut's guide lists 64-bit Windows 10 or later, so Windows 11 meets the operating-system minimum (ARM laptops need the extra check below). There's no separate CapCut Pro installer for Windows. CapCut's Pro download guide has you install the same Desktop app, sign in and click Join Pro below your name.
On a work or school PC, get permission before you install CapCut or use its Web editor. An administrator block isn't a reason to switch installers or bypass device policy.
How to Download CapCut for PC Safely
You have two sensible routes on Windows. CapCut's Windows installation guide covers both the website and Microsoft Store methods, and each one leads to the native Windows app.
Option 1: use CapCut's official Windows installer
- Open the official CapCut Desktop page in your browser.
- Select Download for Windows. Don't use a similarly named result from a download mirror.
- Open the downloaded installer from your Downloads folder. If Windows asks for permission, check the app and verified publisher before approving a change you intended. Stop if the source or publisher is unexpected.
- Let installation finish, then launch CapCut from Start or the desktop shortcut it creates.
If the Store queue gets stuck on a PC you manage, the official website is your other route. On a managed device, ask IT instead. The installer's filename and size can change, and neither one proves a download is genuine.
A User Account Control prompt asks permission for elevated access. That's a different thing from a SmartScreen reputation warning or a malware detection, and even a signed new file can trigger SmartScreen. Don't disable Windows protection, restore a quarantined installer or force past a security block to finish these steps. Write down the warning and ask IT or CapCut Support to verify the approved route.
Option 2: install from Microsoft Store
- Open Microsoft Store on Windows and search for CapCut.
- Check that you're viewing the CapCut video editor rather than an unrelated tutorial or template app.
- Select Install, then open the app when Windows finishes.
The Store is an official installation route, and for updates you follow CapCut's in-app instructions below. On the public listing, check that the app name is CapCut and the publisher is BYTEDANCE PTE. LTD. If a normal download fails, switch to the other official route only when your device and organization allow it. Don't use mirrors to bypass availability or security restrictions.
First launch and sign-in
You can reach the editor without setting up every cloud feature first, but sign-in matters for Spaces, cross-device projects, online materials and account entitlements. CapCut's current login instructions list Google, TikTok, Facebook and QR code on PC, though the exact choices you see can vary. Sign in the same way you did when you created the account. Two profiles tied to different sign-in methods can look like missing projects or a missing Pro subscription.
CapCut PC System Requirements: Minimum vs Comfortable
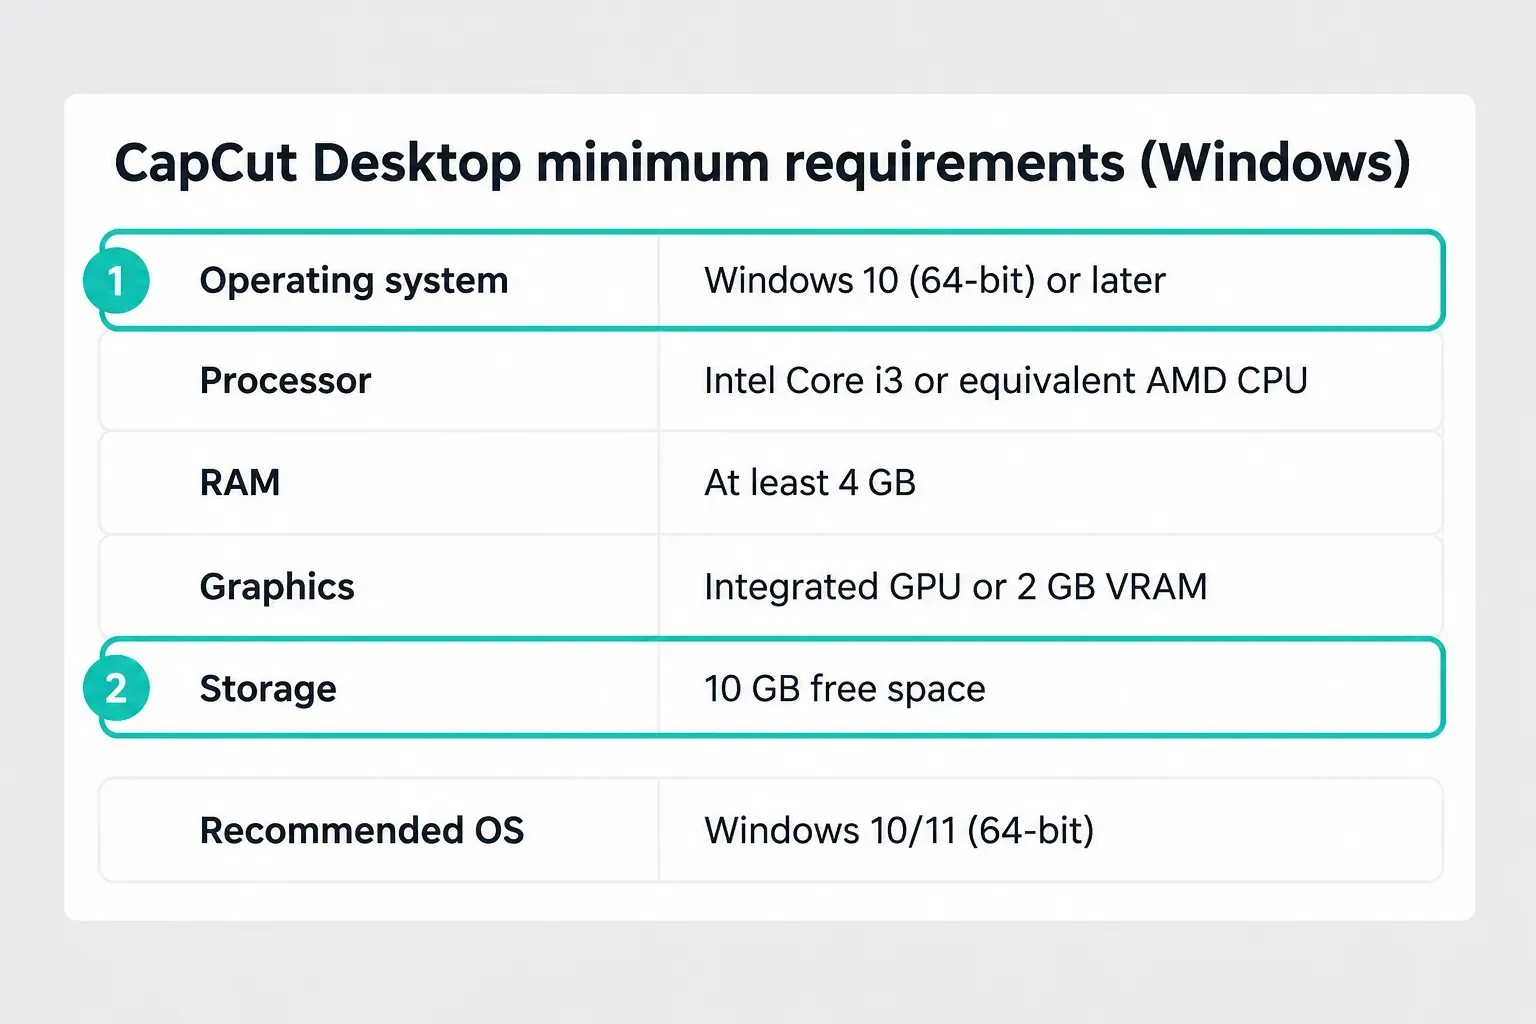
CapCut's Desktop download guide lists Windows 10 64-bit or later, a Core i3 or equivalent AMD processor, 4 GB RAM, integrated graphics or 2 GB VRAM, and 10 GB of free storage. Those are the guide's published minimums. They aren't a promise of smooth playback for every project or device.
Treat the requirements as a starting point. If you install from Microsoft Store, check the compatibility it shows for your device, then try a short project with your own footage before you commit to a long edit.
| Component | CapCut Desktop guide | Practical target |
|---|---|---|
| Windows | Windows 10 64-bit or later | A supported Windows 11 release |
| Processor | Intel Core i3 or equivalent AMD CPU | A faster CPU for layered projects |
| Memory | 4 GB RAM | More RAM for heavier timelines; 16 GB is a planning target, not a requirement |
| Graphics | Integrated GPU or 2 GB VRAM | Check the guide’s recommendations for effects and 4K work |
| Storage | 10 GB free | SSD with room for footage, cache and exports |
Compatibility is not security support. Windows 10 is still in CapCut's specifications, but ordinary Windows 10 support ended on October 14, 2025. The safer choice is a supported Windows 11 release. If you stay on Windows 10, check the security-update coverage for your edition and any Extended Security Updates enrollment that applies. Being able to install CapCut doesn't prove you have that coverage.
On an ARM laptop: CapCut's linked guide specifies 64-bit Windows, but it doesn't say whether the current app package runs natively on ARM. Before you install, check compatibility for your exact device through the official download route. Don't read ARM support into the x64 requirements.
The last column is an editing target, not a CapCut guarantee. A short 1080p talking-head edit and a layered 4K project put very different loads on the same laptop. Leave free SSD space beyond the installation minimum, since source files, cache and exports need room too. If playback stutters or the app closes under load, work through the CapCut crashing and performance checklist before you rebuild the project.
Your First CapCut Desktop Edit
Start your first project with a short, non-sensitive clip. Before you import client or confidential material, make sure you have permission and read CapCut's applicable privacy policy, which describes collection that can include pre-uploading content at creation or import. Keeping a project local doesn't guarantee the content stays on the PC.
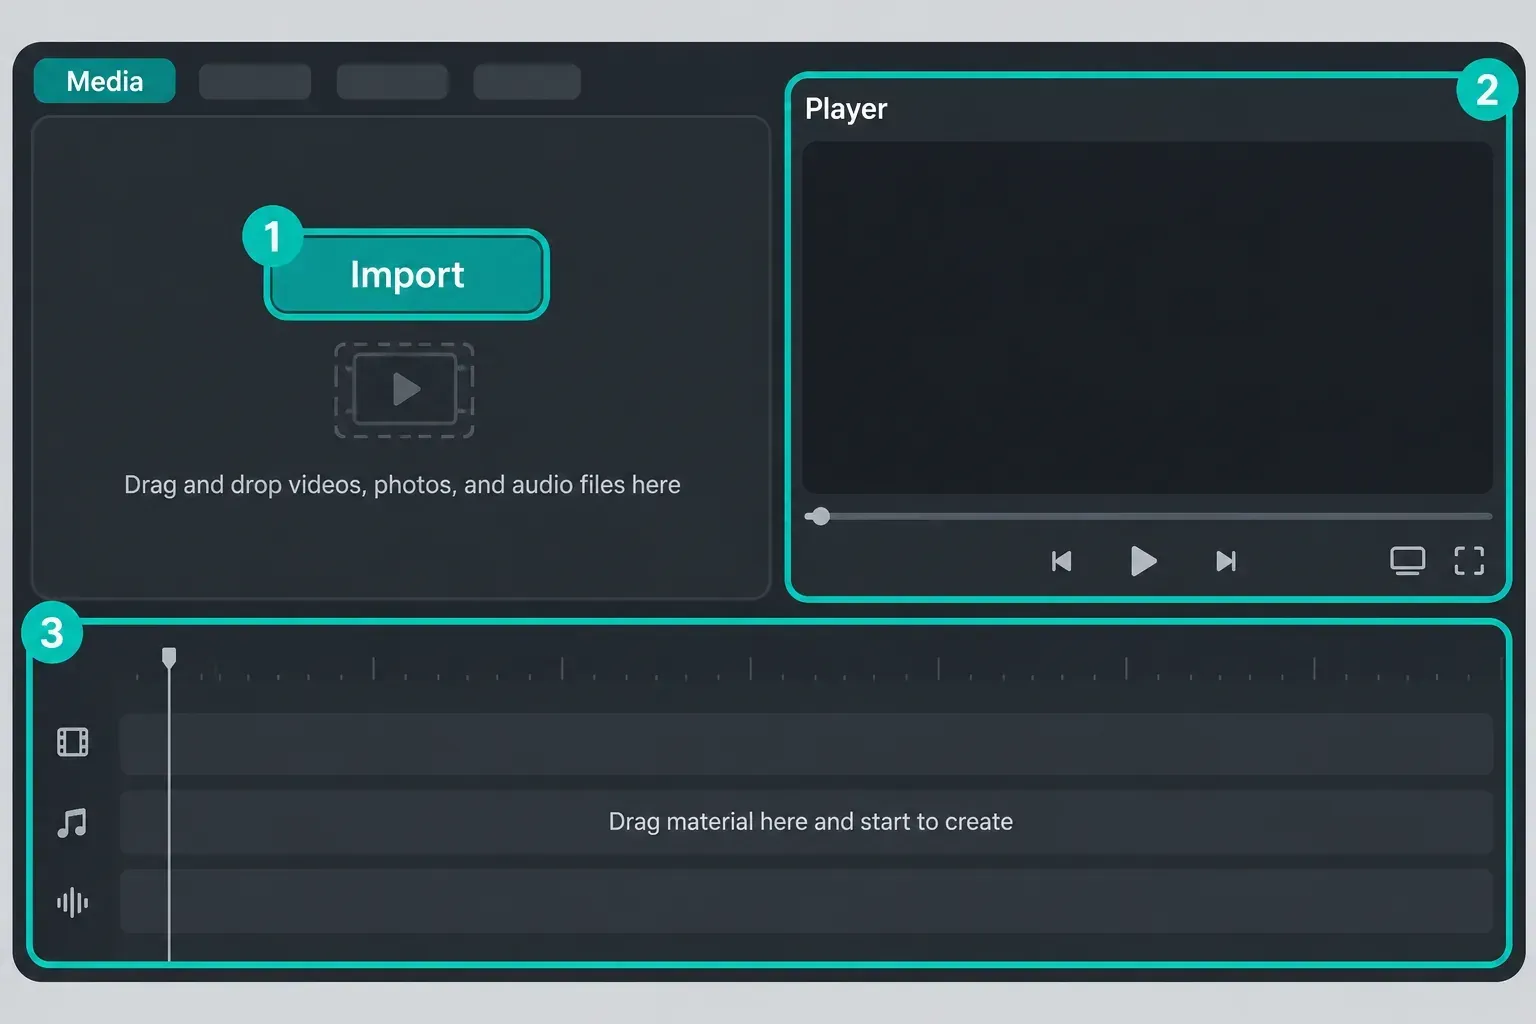
- Create a project. Start with New project and choose a suitable canvas: 16:9 for a landscape video or 9:16 for a vertical video. Choose the ratio your intended destination needs.
- Import local media. Add the video, images and audio you have permission to use. Keep source files in a project folder instead of moving them after import.
- Build the main track. Drag the primary clip to the timeline. Move the playhead, split where the shot should change, and remove the unwanted section.
- Add supporting tracks. Put captions or title cards above the video, then add voiceover, music and sound effects on separate audio tracks.
- Export and check the file. Preview the full timeline and listen for clipped speech. Open Export, choose an available resolution and frame rate, confirm the destination folder, then start the export. Wait for completion and play the saved file from beginning to end in a separate video player. Check the audio, captions and final frame; a good preview does not prove that the exported file is correct.
For splitting, arranging and finishing your clips, use the complete CapCut tutorial, auto captions, green screen and export settings.
What CapCut Desktop Does Well
Track visibility and selection are the clearest desktop advantage. Video, overlays, text, voiceover and music can each stay on their own row, and locking a finished track cuts down on accidental moves while you work underneath it.
Mouse and keyboard control make small timing changes, keyframes, masks and curve work less fiddly. You can inspect properties on the right without covering the preview with touch controls.
Local-media workflow suits longer recordings and asset-heavy projects. Desktop can edit downloaded footage without first uploading every source clip into a browser session.
Captions and AI-assisted tools are available, but what you see isn't a permanent, universal feature list. CapCut regularly changes labels, moves controls and gates some operations by account, credits, subscription, region or rollout. The CapCut AI Tools hub breaks down each tool and its current limits.
CapCut Desktop vs Mobile vs Web
Choose Desktop for precise multi-track work, local source media and keyboard-heavy editing. Choose Mobile for capture, vertical edits and CapCut's broadest community-template flow. Choose Web for a browser session when your organization and content permissions allow it; our CapCut Web Editor guide explains the browser and project tradeoffs.
Desktop has a Templates section, but CapCut still says some templates are mobile-only. A PC template can also fail because of the app version, account or region restrictions, network access, cache, or the media the template expects. Run through CapCut's PC template checklist before you assume a template was removed, and switch to Mobile when the template isn't supported on Desktop.
Is CapCut for PC Free?
CapCut Desktop is free to download, and a basic project made from your own footage can use core timeline tools without a subscription. “Free” doesn't mean every effect, font, stock item, template, AI action or export choice is unlocked.
Watch the asset badge before you add something, and check the project again when you open Export. CapCut's export entitlement explanation says premium materials or settings in the project can trigger a Pro prompt. I'd try removing or replacing that item before subscribing for a single export.
Don't rely on an old promise that every free PC account exports 4K. CapCut's current 2K and 4K export guidance says availability depends on hardware, operating system, app version and platform. Account entitlement and premium materials can also affect the final export. The Free vs Pro guide covers plans without freezing a promotional price into this download page.
Does CapCut PC Work Offline?
Partly. Once Desktop is installed and the required materials are local, you can continue ordinary timeline work with local footage without a constant connection. That doesn't turn CapCut into a fully offline editor.
Sign-in, cloud sync, Spaces, online stock assets, template discovery and many AI features depend on network services. A project can open offline and still show a missing material if that effect or media was never downloaded. Before you travel, make a separate editable copy while you're connected and download the materials it needs. Then disconnect from the internet, reopen that copy, play the timeline and try a short export. Check the exported file in another player. Reconnect to resolve missing assets or entitlement checks, and don't assume a project that opened online will work offline. Leave the original untouched. CapCut's PC connection checklist confirms that templates, syncing and AI tools are common network-dependent points.
How to Update CapCut on PC Without Risking Projects
CapCut's current Desktop update instructions go through Settings in the top-right → Version → Check for updates. Some builds also show a top-right arrow with the current version status. Stick with CapCut's in-app update check, since how updates arrive can depend on the installation route and package.
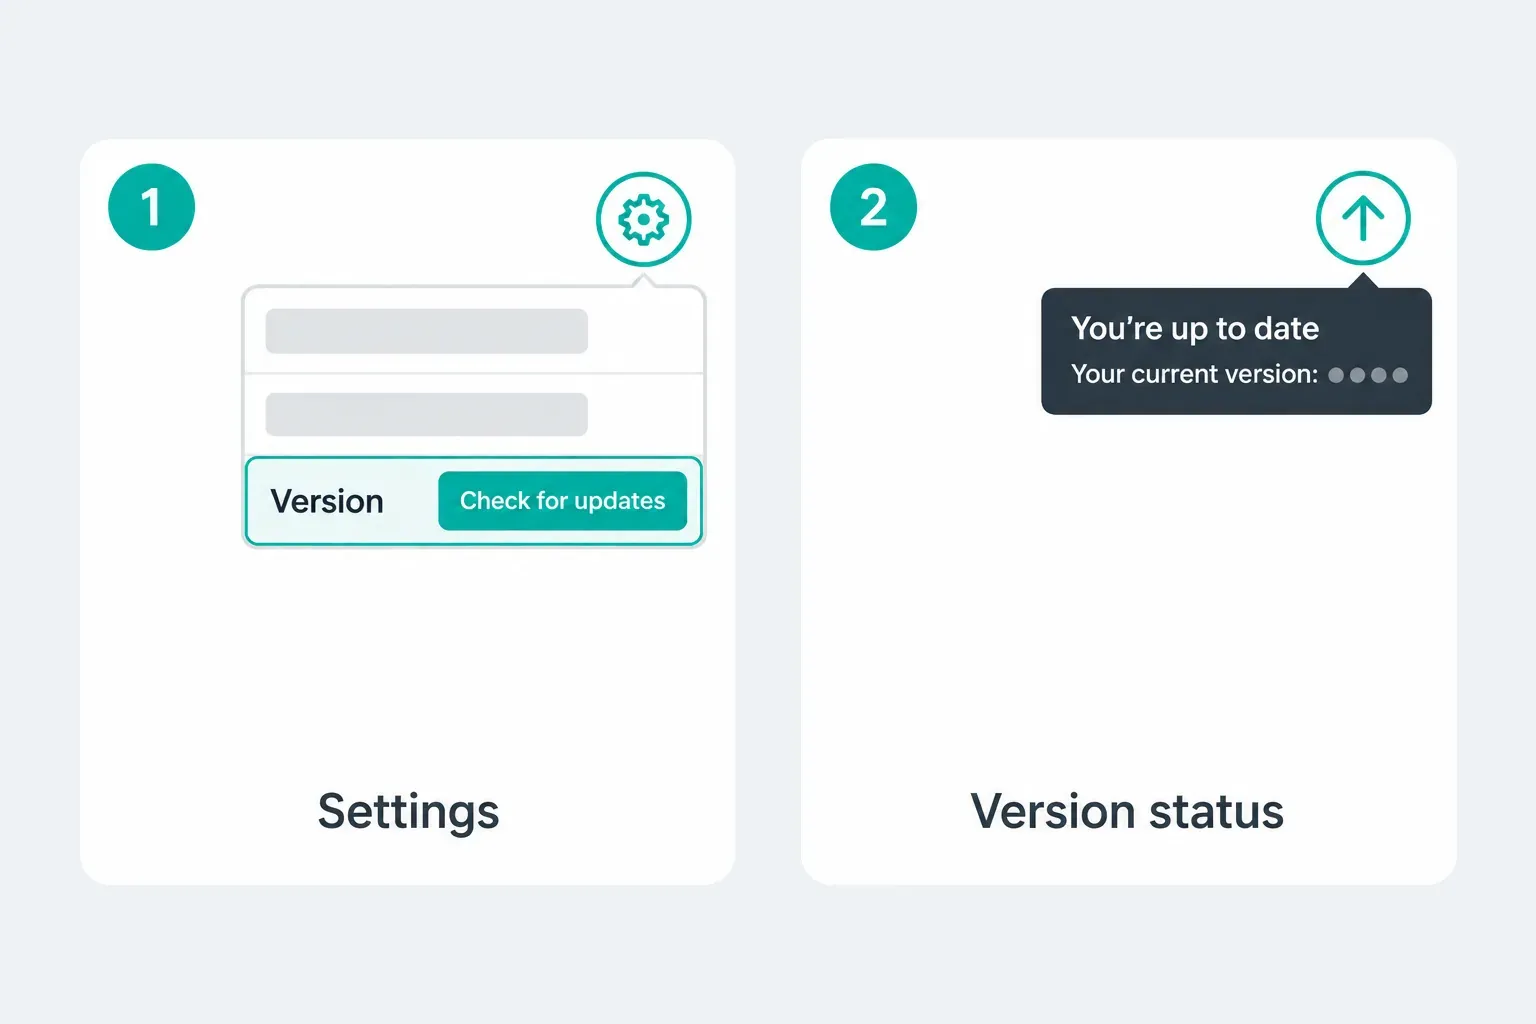
CapCut warns against uninstalling the app during an update because you could lose local projects. Project sync helps, but it isn't an independent backup. Start by checking where CapCut saves projects: which ones are Local and which are uploaded to Spaces or cloud storage. For important work, keep the source media and a separate project backup outside CapCut's cache folders, using our steps to back up and transfer CapCut projects. Before you count that second editable copy as a backup, open it, check its media and make a short test export. An MP4 on its own can't restore the editable timeline. If you can't verify the copy, don't uninstall, reset the app or remove project folders. Ask Support first.
If an update fails with a message saying CapCut is still open, first confirm CapCut isn't still actively installing. Save your work, close CapCut normally and look in Task Manager for a leftover process. Only restart Windows after you've saved other work and confirmed no update is running, then retry the approved official installer. Don't delete program or project folders as a first step, and don't use an old-version archive to bypass the updater.
If CapCut Will Not Download or Install
- Confirm the source. Start again from CapCut or Microsoft Store. A damaged or repackaged installer adds a variable you can't diagnose.
- Check Windows and free storage. Installation needs room for temporary files as well as the application. Leave useful headroom beyond the published minimum.
- Restart only after a failed attempt. Save other work and confirm that no installation or update is still progressing before restarting.
- Try another permitted official route. For a stalled download, the website or Store may be an alternative. Do not switch routes to evade an administrator restriction or malware warning.
- Record the exact error. CapCut's official installation checklist asks users to consider compatibility, storage, network, source and system permissions. Give Support the Windows version, CapCut version if visible and the error message. Redact account details, local paths and private thumbnails from screenshots; never share passwords or login QR codes. Keep protection enabled even if a generic checklist suggests disabling it.
If the app installs but can't connect, use our general CapCut troubleshooting guide. If it opens to a blank preview, start with the CapCut black-screen fixes. Keep installation, connectivity and project-rendering problems separate; they usually have different causes.
Old Versions, Portable Builds and “Pro” Downloads
Searches for an older CapCut build, a portable edition or a free “CapCut Pro” PC download mostly lead to mirror sites, videos and crack posts. We found no official CapCut page offering older Windows installers or a portable edition when we checked on October 1, 2026. CapCut's update instructions cover moving to the latest version, not rolling back, and its installation help says to download CapCut only from official sources to avoid corrupted files.
The usual reasons for wanting an old build have safer answers:
- A new release crashes or stutters: work through the crashing checklist from the requirements section, then send CapCut Support your Windows version, CapCut version and the exact error. Keep a tested project backup before any reinstall.
- The PC barely meets the minimum: use CapCut Web in a supported browser for lighter edits, or keep Desktop projects short and close other heavy apps while editing.
- A tool now asks for Pro: an old installer is not a documented way around paid features. Replace the premium item with a free one, or compare the plans before paying.
Treat cracked or “pre-activated” Pro installers as untrusted software, not a discount. CapCut Pro is a subscription you buy while signed in to your CapCut account, and a modified installer doesn't come from CapCut or Microsoft Store. Don't run one on a PC that holds client, school or work files.
What About Mac?
CapCut also ships a macOS desktop app, but its download package, OS requirements, permissions and App Store route are different. Follow the dedicated CapCut for Mac guide instead of applying Windows instructions to a Mac. If you want every platform in one place, the CapCut Download hub points to Desktop, Mobile and Web.
If the Windows build isn't the right fit, pick by workload. Our Clipchamp review is for quick conventional edits, the Filmora review covers a friendlier step up on desktop, and the DaVinci Resolve review goes into the deeper professional route. For the official download steps, see the Resolve Windows install guide on DaVinci Resolve Club.
CapCut for PC FAQ
Which CapCut version should I install on Windows?
Use the current stable build offered by CapCut's official Desktop page or Microsoft Store. Avoid old-version archives unless CapCut Support gives you a specific rollback route for a documented problem.
Is CapCut available for Windows PC?
Yes. CapCut provides a native Windows desktop app, so you don't need an Android emulator. Use the official CapCut desktop page or Microsoft Store route described above.
Is there a separate CapCut Pro download for Windows 11?
No. Install the regular CapCut Desktop app from CapCut or Microsoft Store; its 64-bit Windows 10-or-later requirement covers Windows 11. Pro is a subscription you join inside that app after signing in, so a separate “CapCut Pro” installer from another site is not an official route.
Can I use CapCut on a laptop without downloading it?
Yes. CapCut Web runs in a supported browser, provided your organization permits it and you have permission to process the footage there. The desktop app is usually the better fit for local media, longer timelines and precise mouse-and-keyboard editing.
Does CapCut for PC work offline?
Local editing can continue without a constant connection after the app and required materials are available. Sign-in, cloud sync, online assets, template discovery and many AI features still need internet access, so offline support is partial rather than complete.
Can the free CapCut PC app export in 4K?
CapCut's current help pages say 2K and 4K availability depends on hardware, operating system, app version, platform and account entitlement. Check the Export panel in the project you're finishing instead of assuming that every free account has the same option.
How do I update CapCut on PC?
Open Settings in the top-right, choose Version, then select Check for updates. Keep the app open while it updates, and protect important local projects before making a major change.
Will uninstalling CapCut delete my PC projects?
It can put unsynced local work at risk. CapCut explicitly warns against uninstalling during an update. Confirm which projects are Local and which are in Spaces or cloud storage, then make a separate backup before reinstalling.