

Rechecked September 4, 2026: CapCut's current Script to video product page, mobile walkthroughs, Desktop rollout note, text-to-video page, export help and legal terms. Feature names and availability can still differ by account, platform and region.
CapCut's Script to video tool can turn a written script into a narrated, captioned, multi-scene first draft. That last phrase matters: first draft. The tool can assemble a useful starting cut, but it can't confirm that the chosen footage proves your claims, that every caption is correct or that a stock clip is licensed for your intended use.
If you already have a script, this guide takes you through the shortest safe route: prepare the text as visual beats, choose stock or local media, generate once, then fix the draft in the timeline. If the button is missing, or the result contains voice and captions but no usable footage, the recovery section explains what to try without risking a working project.
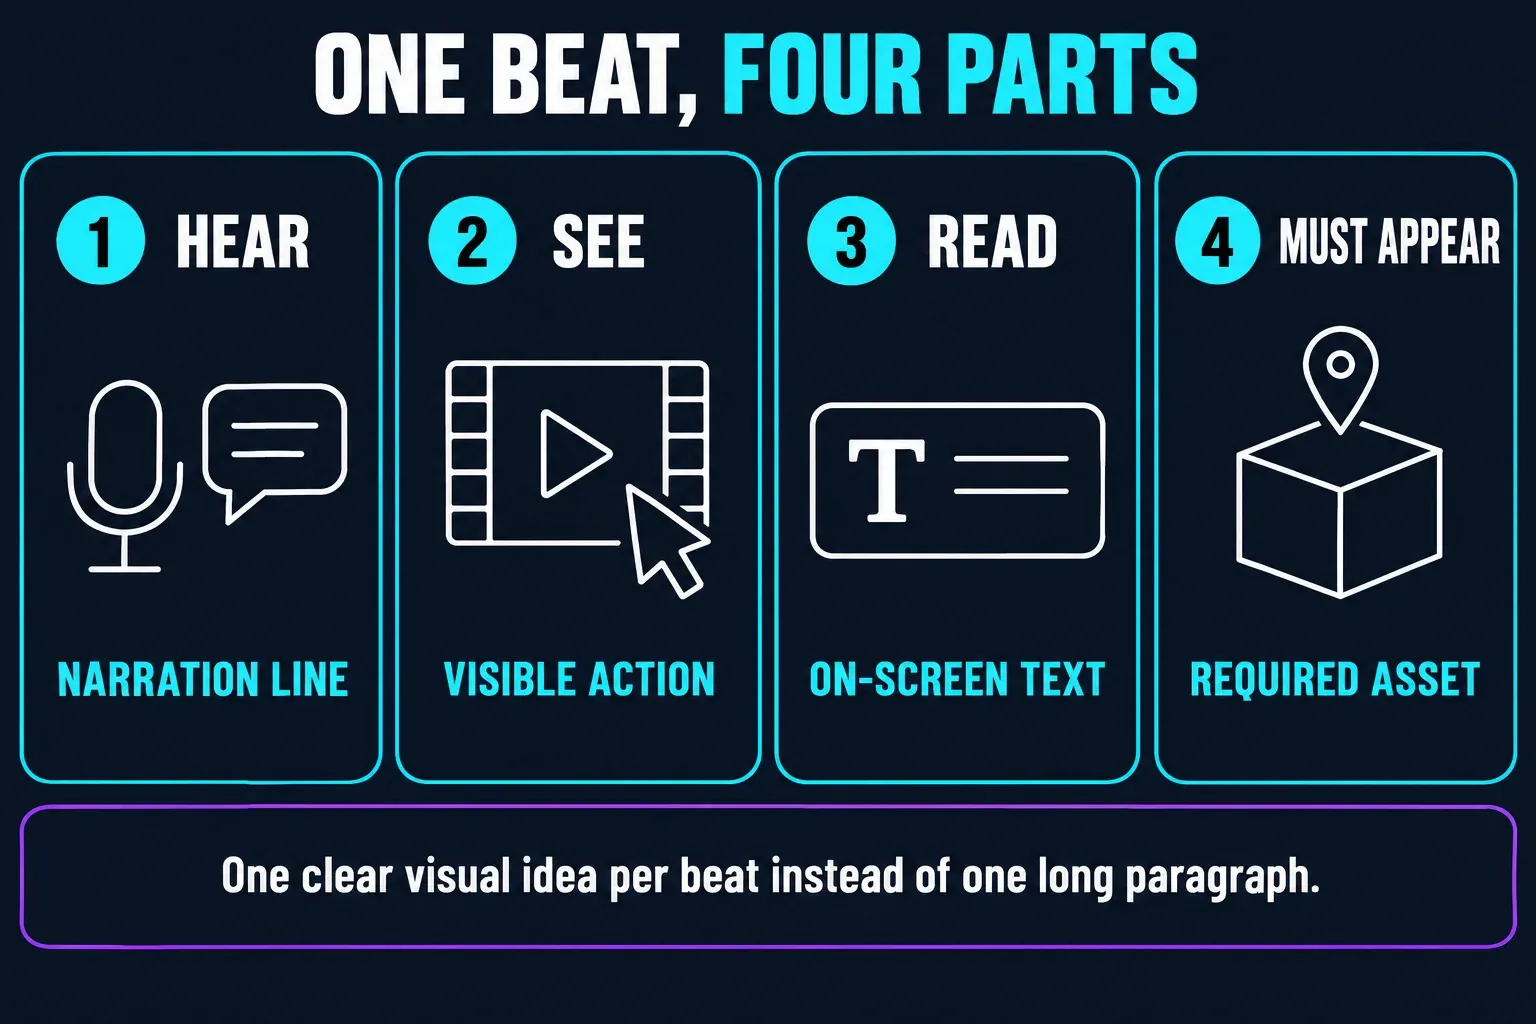
Use one clear visual idea per beat instead of one uninterrupted essay.
Scenes, narration, captions and music may be assembled for you; each still needs review.
Products, people, places, demonstrations and evidence should not be left to a generic stock match.
Use AI media → Text to video when the job is one model-generated clip rather than a complete script.
Choose the right CapCut route first
CapCut uses overlapping names for three different jobs. Picking the wrong one is why many tutorials seem to contradict the screen in front of you.
- Script to video starts with a complete script or an AI-written script and assembles a multi-scene draft. This is the route covered here.
- AI media → Text to video starts with one prompt and generates one short shot with a selectable model. Our CapCut AI video generator guide owns that workflow.
- Video Studio / AI video maker starts with a broader brief, develops a storyboard and builds a full draft. Use the CapCut Video Studio workflow when planning is part of the job.
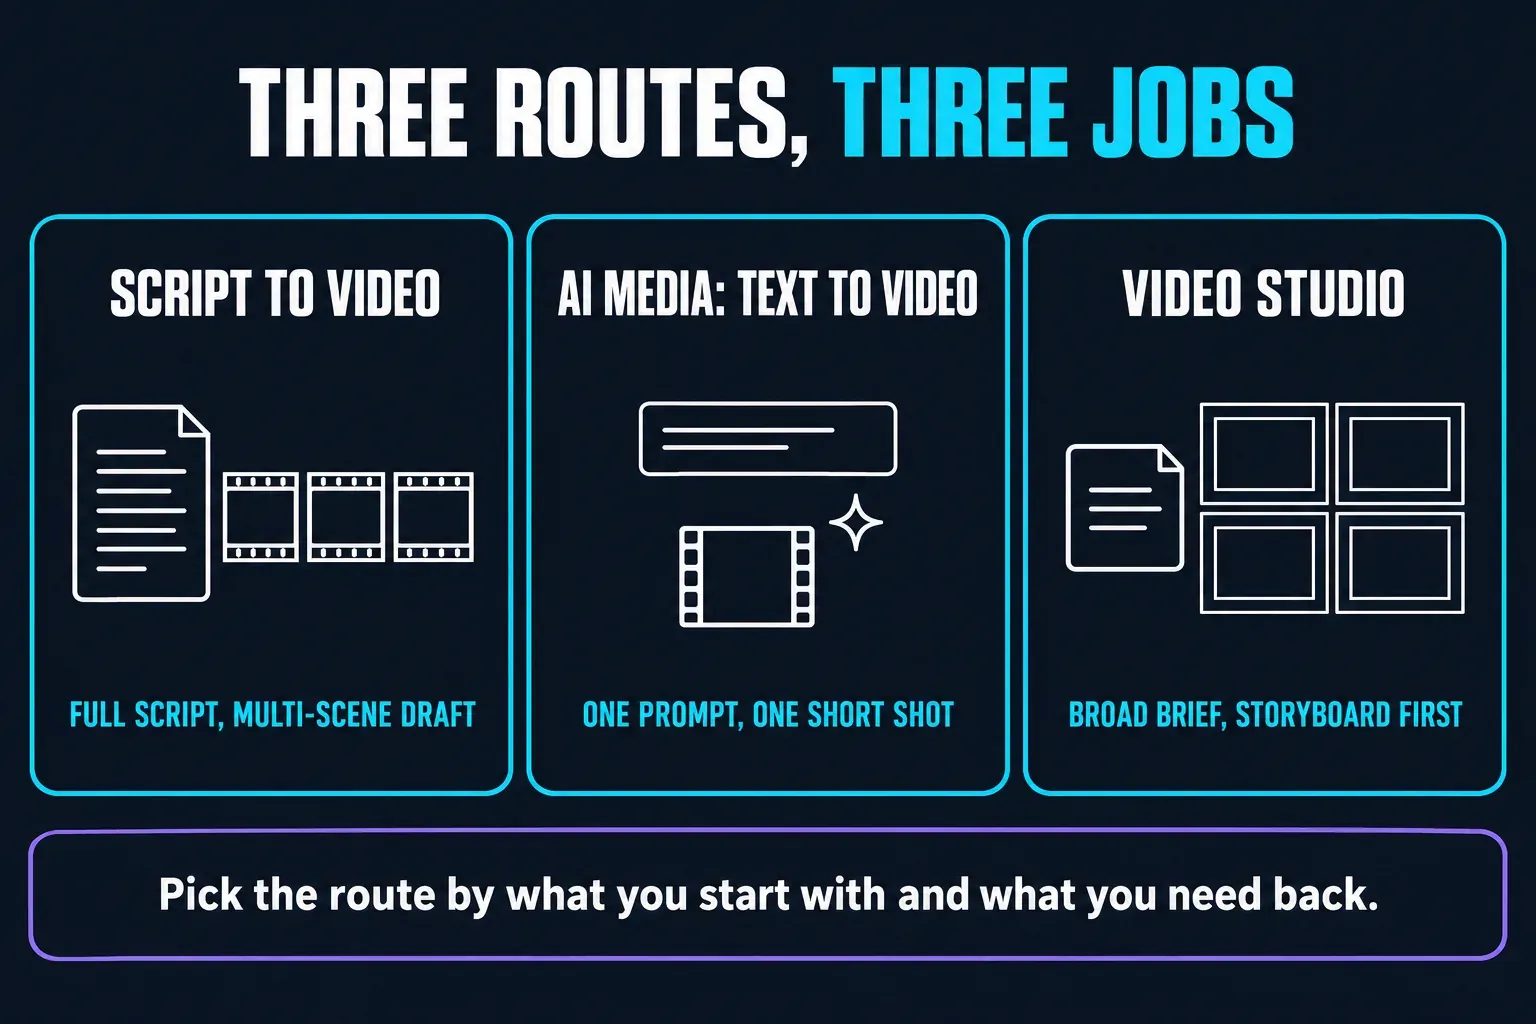
CapCut's current text-to-video page tells Desktop users to open Script to video, while its separate AI video page routes one-shot generation through AI media. This guide uses “text to video” only for the full-script meaning and names the one-shot route explicitly whenever the distinction matters.
Prepare a script CapCut can visualize
A clean paragraph may read well and still generate poor scenes. The editor needs visible actions and sensible cut points. Before opening CapCut, split the script into beats and give each beat four things: the narration, the visual, any on-screen text and any asset that must appear.
A practical script template
[BEAT 1 — PROBLEM]

Narration: Name the problem in one sentence.

Visual: Show the problem happening.

On-screen text: One short label.

Must-use asset: Approved clip or “stock is acceptable.”


[BEAT 2 — EXPLANATION]

Narration: Explain one cause or idea.

Visual: Demonstrate it or show relevant evidence.

On-screen text: The key term, not the whole sentence.


[BEAT 3 — ACTION]

Narration: Tell the viewer what to do.

Visual: Show the action in the same order.


[BEAT 4 — CLOSE]

Narration: State the result or next step.

Visual: Show the checked result.
Write names, numbers and product claims exactly as they must appear. AI can improve phrasing; it can't decide whether a claim is true. For client or brand work, approve the script before generation so the video draft doesn't quietly become the source of record.
How to use Script to video on CapCut Mobile
CapCut's current mobile walkthrough documents the route below. Treat the live labels in your account as final because the tool can move during rollouts.
- Open All tools. From the CapCut App home screen, tap All tools, then find Script to video under the AI tools section.
- Choose the script source. Tap Write your own script to paste approved copy, or open AI writer if you only have a topic and highlights.
- Review the words before the visuals. Read every generated version. Fix facts, pronunciation-sensitive names, transitions and the call to action now. Don't expect the footage picker to repair a vague script.
- Choose the material route shown in your account. Smart generation asks CapCut to match available stock. Local materials uses media you select. If this choice is absent, continue with the route shown and plan to replace weak scenes later.
- Generate one first draft. Let the assembly finish without repeatedly pressing the button. Save the project before making a second version.
- Tap Edit more. Move the draft into the regular timeline, then replace incorrect visuals, repair captions, adjust narration and check the audio mix.
How to use it on Desktop or Web
CapCut also documents Script to video and AI video maker routes on Desktop. The current Desktop Script to video walkthrough starts from the home screen, while a newer AI video maker route may show Instant AI video and an Enter script box. These are rollout variants around the same broad job, not proof that every account has both buttons.
- Check the home dashboard. Look for Script to video or AI video maker. If AI video maker opens, choose the full-video or instant-video route that accepts a script rather than AI media's one-shot generator.
- Paste a sceneable script or use AI Writer. Keep your approved facts in the text. If AI Writer produces alternatives, compare them line by line before selecting one.
- Set only the controls you can see. Choose the offered style, aspect ratio, voice and material source. Don't copy a duration or menu label from an old tutorial when your panel shows something else.
- Create the draft, then open the timeline. Use Edit more or the current equivalent to replace media, fix pacing, listen to the complete voice track and correct captions.
- Export a short proof first. Watch it outside CapCut before committing to a final render or another paid generation.
CapCut's Desktop help page says AI Video Maker is in testing and may not yet appear for every user. Update the app, sign out and back in, and check CapCut Web. For another blocked AI route, CapCut's current access checklist separates region, credits, plan status, sign-in and platform causes. CapCut also states that its text-to-video feature is available only in specific regions. Don't reinstall over an important local project merely to chase a server-side feature flag.
Smart generation or Local materials?
Use Smart generation when a general stock match is acceptable: a skyline, a person typing, a forest path or another non-specific establishing shot. It is faster for a rough cut, but “relevant” doesn't mean accurate. A generic lab image can't prove that a particular product passed a test.
Use Local materials when the viewer must see a specific person, product, place, screen recording, result or piece of evidence. Rename and group those clips before starting. A small approved folder is easier to review than a camera roll full of near-duplicates.
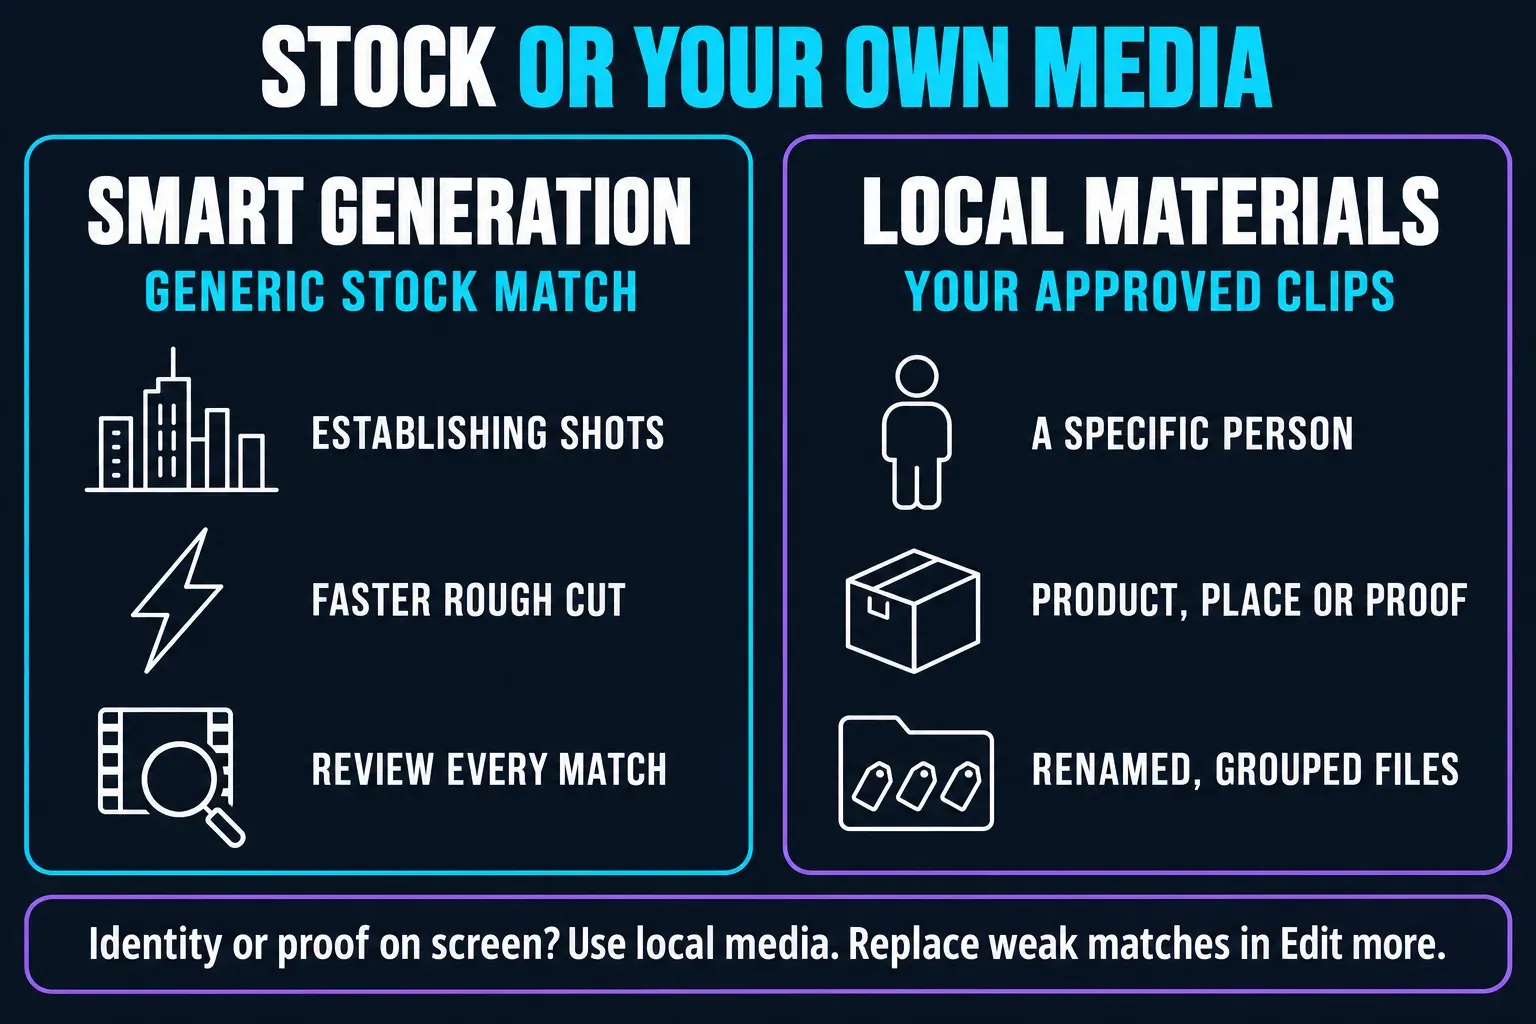
The official pages describe stock matching and personal uploads as available routes, but the exact choice can move or disappear. If CapCut generates the structure without the correct footage, keep the project and replace the scene clips in Edit more. Rebuilding the entire video is rarely the first fix.
Check the generated draft scene by scene
Play the whole draft once without editing. Then review it again one scene at a time. The first pass tells you whether the story works; the second catches quiet failures that polished transitions can hide.
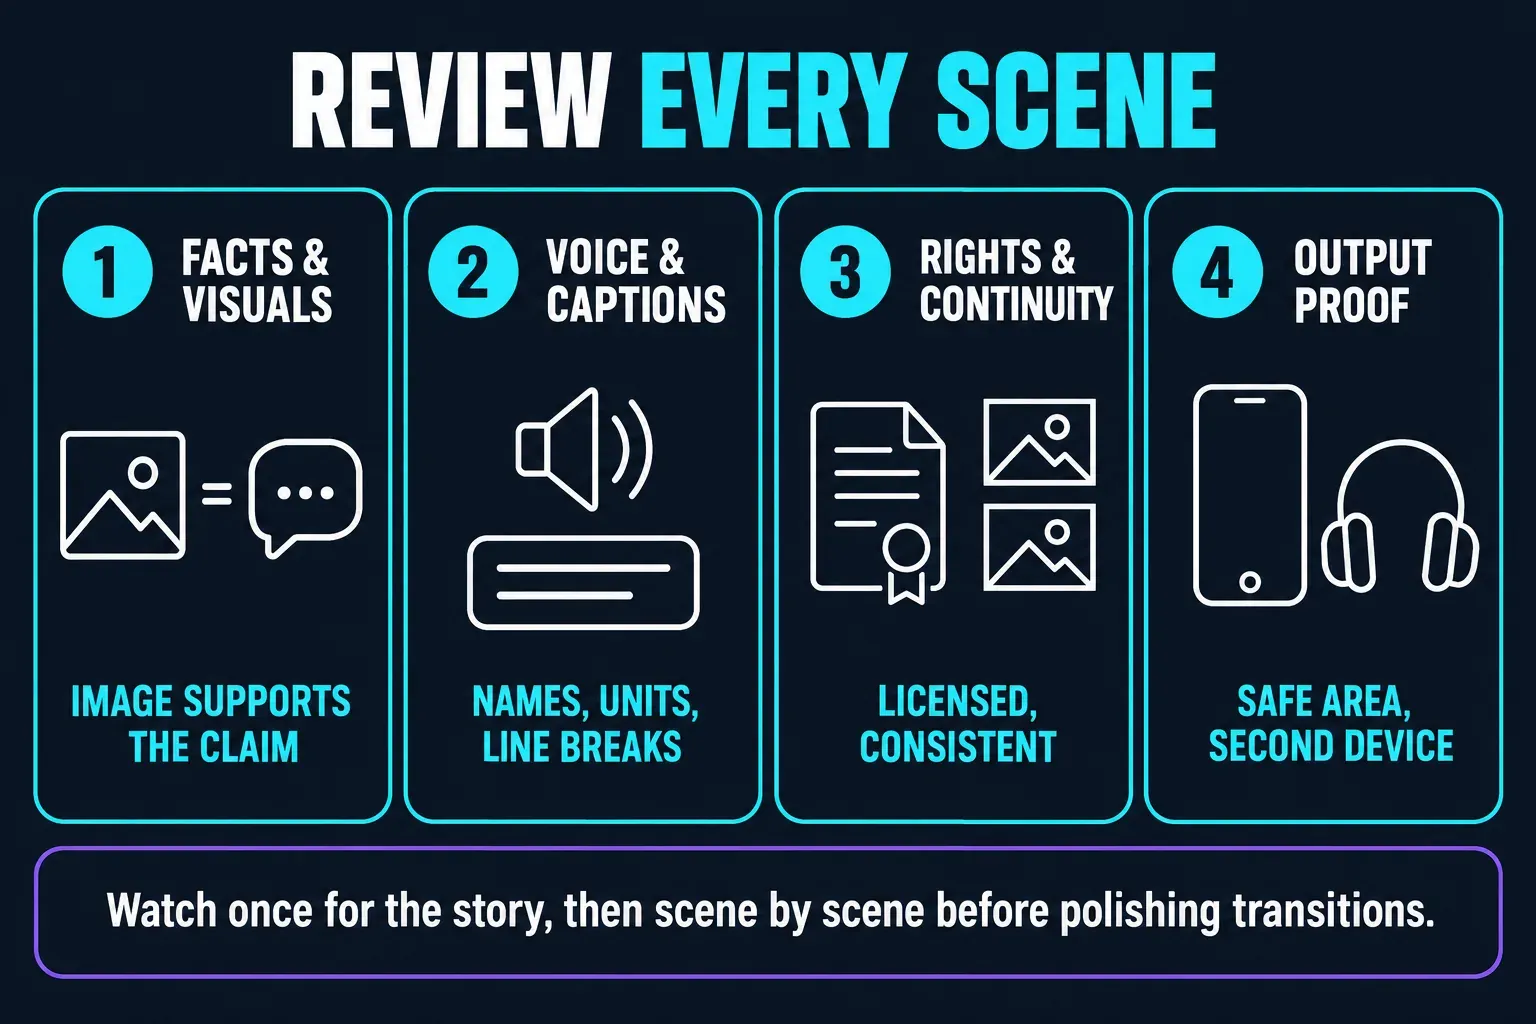
Facts and visual match
- Does the image support the exact spoken claim?
- Are names, numbers and on-screen labels correct?
- Did generic stock accidentally imply evidence it doesn't provide?
Voice and captions
- Listen for names, units and clipped words.
- Read captions aloud and fix line breaks.
- Remove captions that cover faces, products or controls.
Rights and continuity
- Confirm that local uploads and stock assets fit the intended use.
- Check that people, products and locations don't change identity between scenes.
- Remove accidental logos or misleading interface footage.
Output proof
- Check music against narration at normal phone volume.
- Keep key text inside the target platform's safe area.
- Watch one export on another device with and without headphones.
Fix Script to video problems without starting over
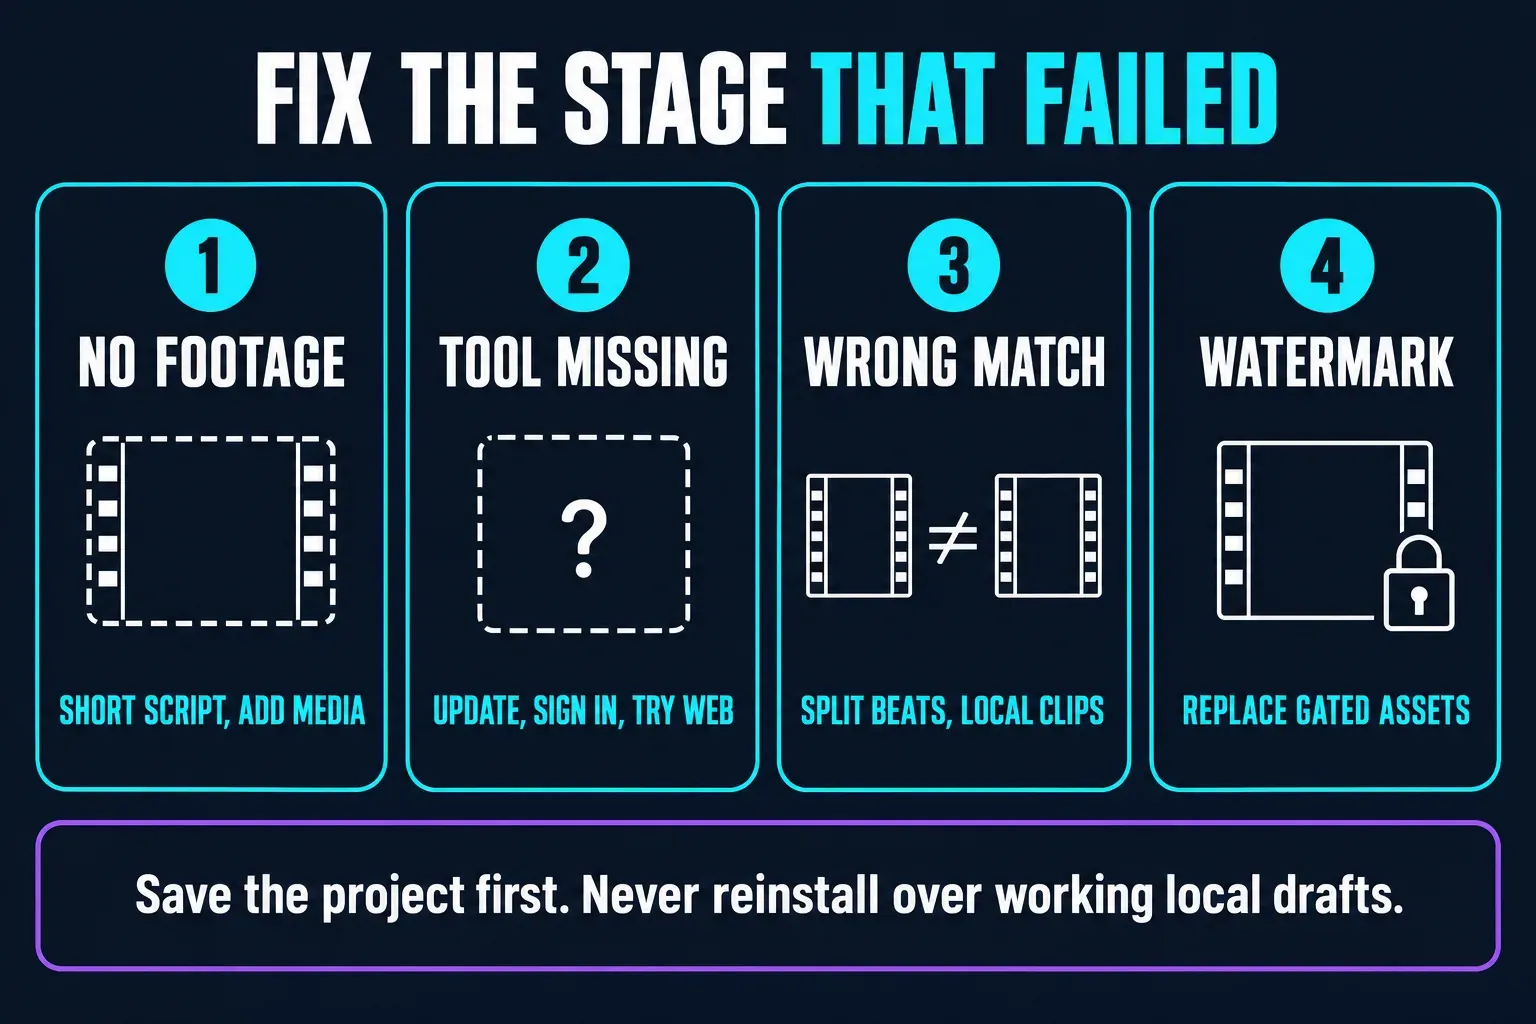
Voice and captions appear, but there is no footage
A current community report describes this failure, but one report doesn't prove a universal CapCut defect. Save the project, then test a much shorter script with one obvious visual beat. If Smart generation and Local materials are both available, switch the material route once. If the structure, narration and captions already exist, open the timeline and add or replace the scene media manually instead of paying for repeated full generations.
The tool disappeared or moved
Update CapCut and refresh the account session. Check the home dashboard, All tools and Web. If the help page says a feature is still being rolled out, an older installer won't reliably restore server-side access. Keep a working editor and local drafts intact.
The visuals don't match the script
Return to the script and split any sentence that asks one shot to show two different actions. Name the subject, visible action and setting. For exact people, products, places or proof, use approved local clips and replace the weak stock scene in the timeline.
Cost, watermarks and commercial use
Don't assume “free” on a landing page means every account, asset and export is permanently free. Plans, regional offers and AI actions change. Read the live generation and export screen before committing to the project. If CapCut flags a paid asset, replace it or decide whether the current upgrade is worth it; our CapCut pricing guide keeps plan claims separate from this workflow.
CapCut's current watermark help says templates and premium assets can affect the result. Preview the end of the timeline, check every branded or gated element and export a proof. Never promise a client a clean export based only on an old tutorial.
For commercial work, check each asset's license as well as the app's terms. CapCut's legal hub says materials expressly labeled for commercial use may be used for that purpose, while its terms point users to the Materials License Agreement for the actual permissions. Keep your script, source licenses and approvals with the project. AI assembly doesn't transfer rights you didn't have.
CapCut Script to Video FAQ
Can CapCut turn a full script into a video?
Yes. CapCut documents Script to video workflows that can assemble a script into a first-draft video with scenes, narration, captions and other editing elements. Availability and labels can differ by platform, account and region, and the result still needs scene-by-scene review.
Where is Script to video on CapCut Mobile?
CapCut's current mobile instructions start at Home → All tools → AI tools → Script to video. If it is absent, update the app, refresh the account session and check whether the feature is available for your region and account.
Is CapCut Script to Video the same as Text to video?
Sometimes CapCut uses “text to video” for the full-script workflow, but AI media → Text to video is a different route that generates one short shot from one prompt. Use Script to video for an assembled multi-scene draft and AI media for a single generated clip.
Should I use Smart generation or Local materials?
Use Smart generation when generic stock is acceptable. Use Local materials when the video must show a specific person, product, place, demonstration or piece of evidence. In both cases, review and replace weak scene matches in Edit more.
Why did CapCut generate narration and captions without video?
Save the project and test a shorter script with one visual beat. Switch the material route if that choice is available, or keep the existing narration and captions and replace the missing scene media manually in the timeline. Community reports are warning signals, not proof that every account has the same defect.
Is CapCut Script to Video free and watermark-free?
Don't treat that as a permanent guarantee. Access, AI actions, assets and export rules can vary by plan, platform and region. Read the live generation and export screens, then replace any gated or branded element before the final export.
Can I use a generated Script to Video project commercially?
Only after checking the rights for your script, uploads and every CapCut material used. CapCut says commercial permissions depend on asset labels and the Materials License Agreement. Generated assembly doesn't clear third-party music, footage, trademarks or claims for you.
Verdict: let CapCut assemble, then take back control
Script to video is useful when the script is ready and the blank timeline is the slowest part. Give it visual beats, choose local media whenever identity or proof matters, and treat the generated result as a draft you're responsible for. The strongest workflow is not “paste and publish.” It is script → first cut → scene check → Edit more → proof export.
Use the CapCut AI tools hub when you're still deciding which AI route fits the job. Return here when the input is a script and the output should be a complete, editable first cut.