

Checked September 4, 2026: CapCut's current pages document preset presenters, talking avatars made from a photo, and custom routes built from a photo, video or AI-generated image. Mobile currently points to All tools → AI tools → AI avatars; Web uses Free AI video maker → Avatar video. Labels and availability can still differ by platform, account, region and rollout, so use these routes as search clues and the live panel as the final authority.
If you want one on-screen presenter to read a script, AI Avatar is the right place to start. If you want CapCut to build a whole video from several scenes, stock clips and narration, it is not. That distinction saves more time than any prompt trick: an avatar is a speaking layer, not a finished story.
Pick a presenter, add a short script or audio, generate one test and continue editing.
Start with a clear, permitted portrait and inspect identity, mouth movement and hands before reuse.
If CapCut offers photo or video capture, follow that live upload and consent gate exactly.
Use Dialogue Scene for a conversation, Script to Video for B-roll, or Video Studio for a full draft.
Which CapCut avatar tool do you need?
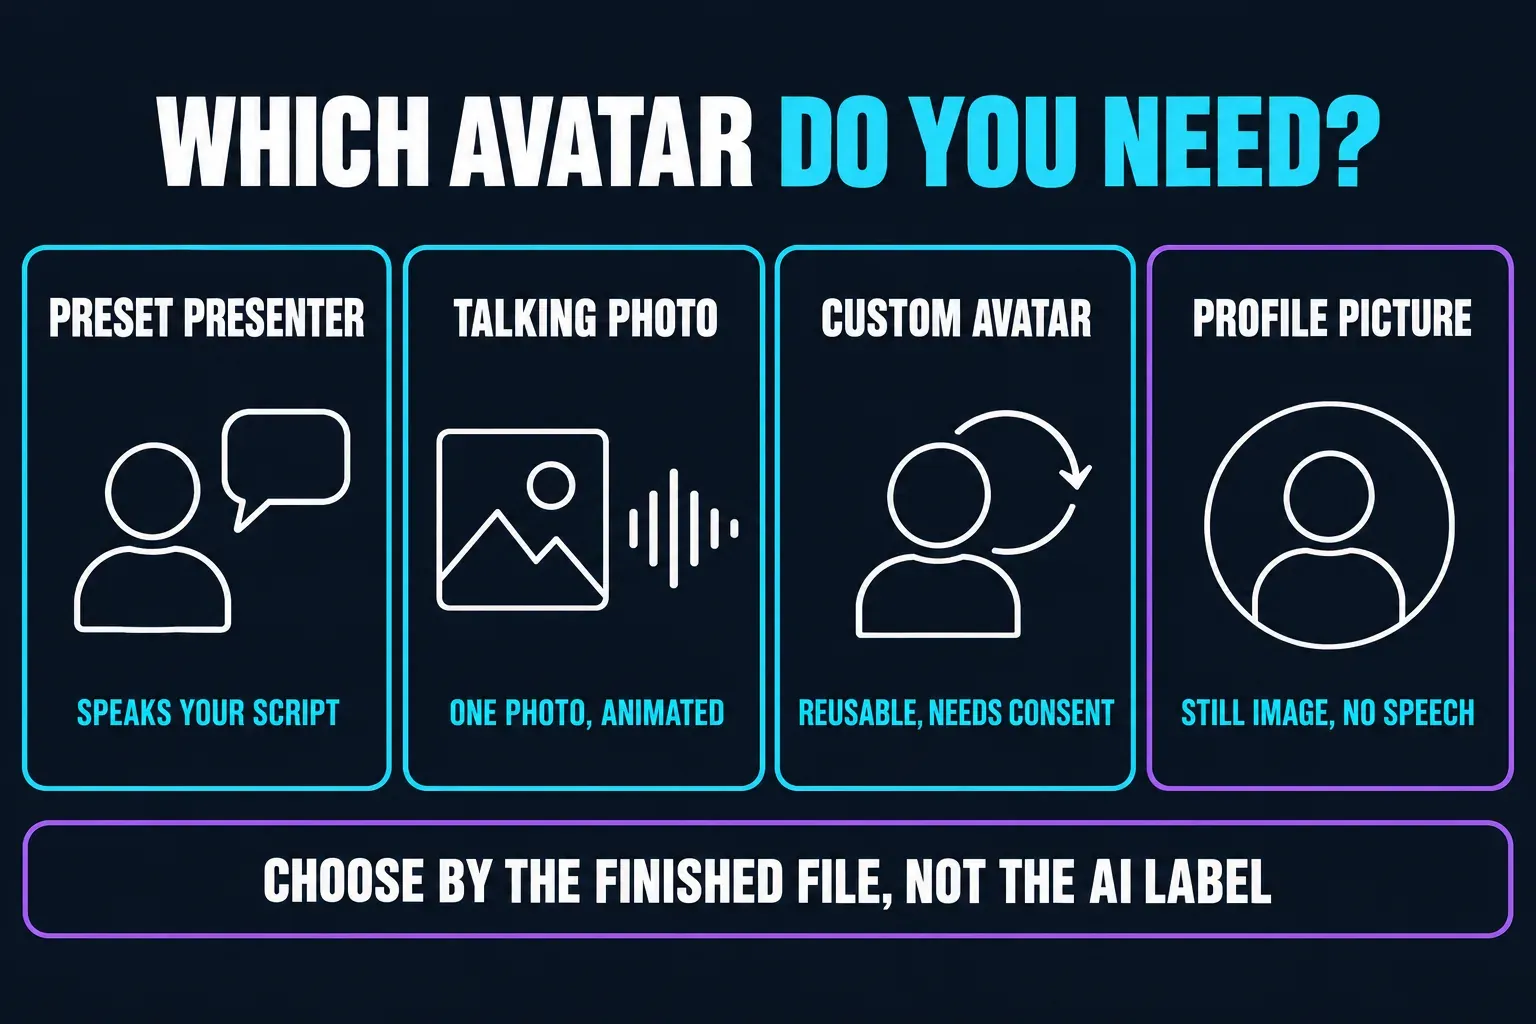
“Avatar” means several different things inside CapCut. Choose by the file you want at the end, not by the first AI label you see.
| What you want | Start with | What it produces | Watch for |
|---|---|---|---|
| A quick talking presenter | AI Avatar / Avatar library | A preset person speaking your script or audio | Voice fit, lip-sync, credit gate |
| Make one picture talk | Photo to avatar / talking photo route | An animated speaking clip based on the uploaded image | Face angle, teeth, eyes, permission |
| A reusable version of yourself | Create your avatar / custom avatar | A saved presenter made from the accepted photo or video input | Live capture rules, consent, likeness drift |
| A still icon or stylized portrait | Avatar Maker / AI Design | A non-speaking image for a profile, thumbnail or character | This is not the talking-avatar workflow |
| Change your CapCut account picture | Mobile: Me → Settings → Edit profile | Your account avatar | It doesn't create an AI presenter |
CapCut's own pages currently document more than one entry. The main AI Avatar page describes AI avatar → Avatar library in the editor and Free AI video maker → Avatar video on Web. Its newer custom-avatar guide also points mobile users to All tools → AI tools → AI avatars. Treat those as search clues, not a promise that every build uses identical wording.
That is a different task. CapCut's current account help puts profile avatar changes in the Mobile app under Me → Settings → Edit profile. It doesn't make a talking character.
Prepare the photo, video, script and rights
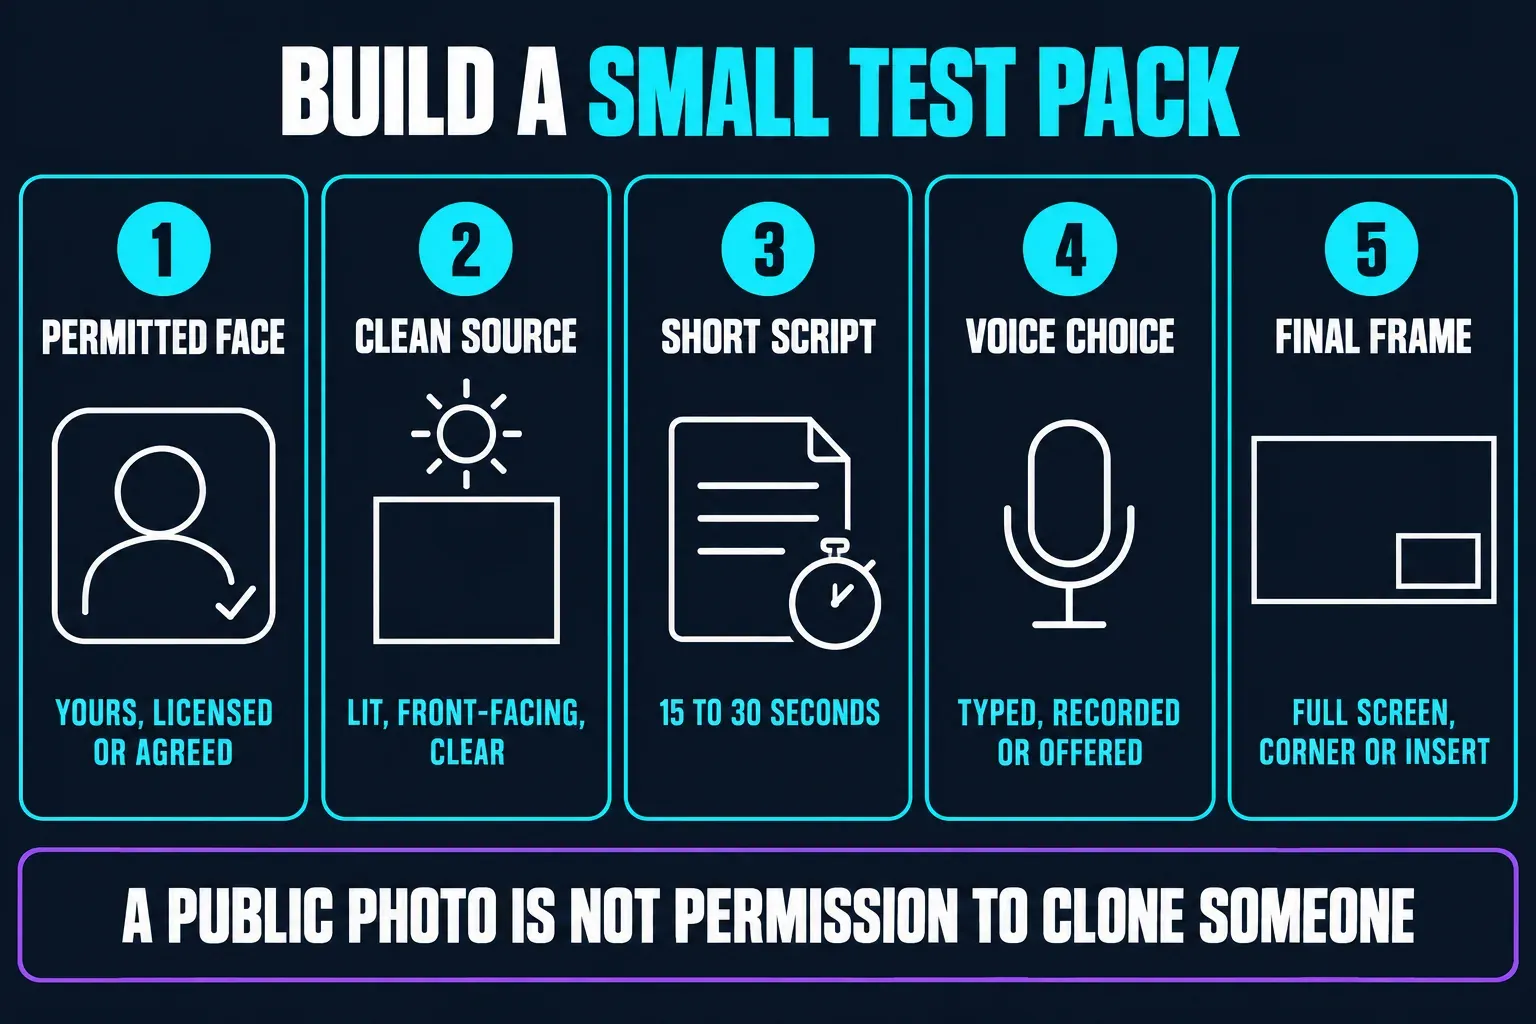
Generation is the expensive place to discover that the source was wrong. Build a small test pack before opening the avatar panel:
- A permitted face. Use yourself, a licensed character, or a person who agreed to this specific use. A public photo is not permission to clone someone.
- A clean source. For a photo, keep the face well lit, reasonably front-facing and unobstructed. For a video route, follow the capture instructions on the live upload screen rather than an old tutorial's fixed duration or format.
- A short spoken script. Start with 15–30 seconds. One difficult name, one number and one natural pause tell you more than a long promotional paragraph.
- A fallback voice. Decide whether the route should use typed text, your permitted recording or one of the voices offered.
- A review target. Know the final frame: full-screen presenter, lower-corner host, product explainer or a short insert between B-roll.
A custom avatar can involve a face, voice and cloud AI processing. Confirm that the person and project allow that use. Keep the original photo or recording outside the generated project, and never use an avatar to impersonate a real person or make them appear to endorse something they didn't approve.
How to make a CapCut AI Avatar on Web
This is the most stable route to describe because CapCut's current product page names the Web workflow directly. The panel may still differ by account.
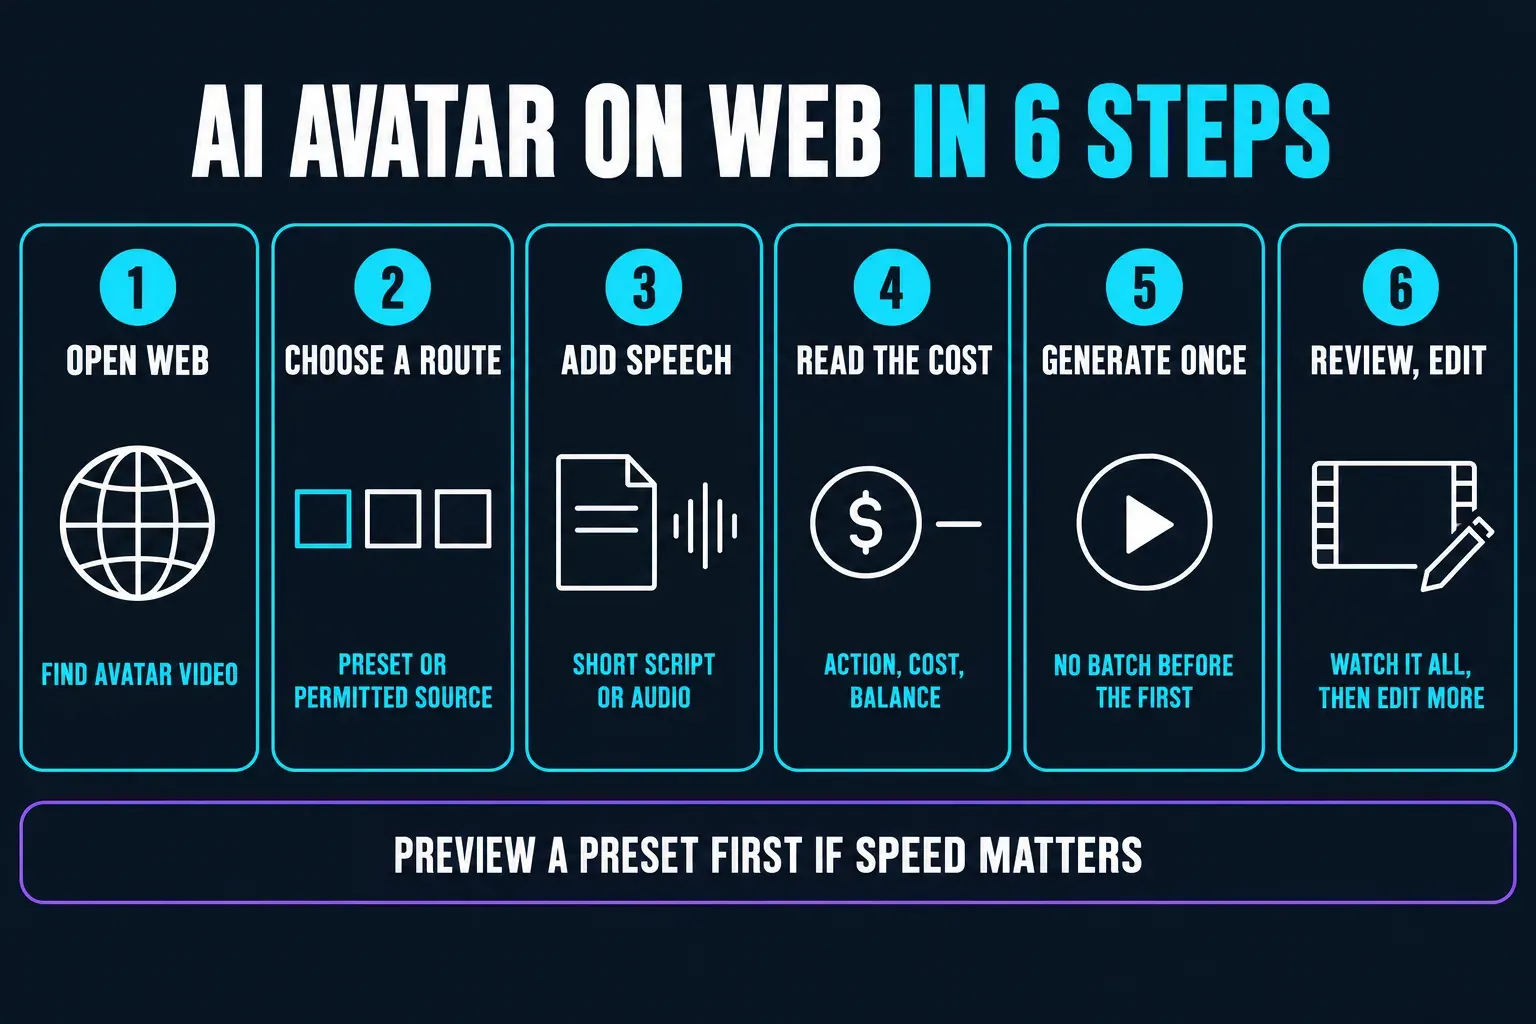
- Open CapCut Web and sign in. Start from CapCut's official domain, then open the AI video maker or search the current tools list for Avatar video.
- Choose the avatar route. Preview a preset if speed matters. Use the custom option only when you have a permitted source and the live upload gate explains what it needs.
- Add one test script or audio clip. Use the speech control shown. Keep the first test short and include a name or term the voice may mispronounce.
- Read the generation gate. Check the action name, displayed cost, available balance and any expiry note before confirming.
- Generate once. Don't batch five versions before hearing the first result.
- Review the complete clip. Watch the mouth on consonants, listen for pronunciation and check whether the head, teeth or eyes jump between frames.
- Continue editing. If CapCut offers Edit more, move the result to the normal editor for captions, background, framing and the final export check.
Make a talking avatar from a photo on Mobile
A single photo is the quickest custom route, but it gives the model less information than a clean video capture. Start with a sharp image where the face is large enough to inspect. Avoid sunglasses, a hand over the mouth, heavy motion blur, an extreme side angle and another face close to the subject.
- Open the current AI Avatar panel. CapCut's current Mobile photo-avatar guide uses All tools → AI tools → AI avatars.
- Choose Create with photo. The same panel currently separates Create with video, Create with photo and Create with AI image. If you only see still portrait styles, you are probably in Avatar Maker or AI Design instead.
- Select the permitted portrait and tap Add. CapCut processes it into My avatars; inspect the saved face before spending credits on a long line.
- Add speech and generate one short test. Enter or paste the script, choose the voice shown and generate. Use a difficult name, a number and a natural pause so the first clip exposes pronunciation and timing problems.
After generation, compare the result with the source at normal speed and frame by frame around difficult syllables. Similarity means more than “does it look like the person?” Check eye spacing, teeth, hairline, skin texture and any distinctive accessory. A convincing still frame can still break during speech.
Create a reusable custom avatar from video
CapCut currently advertises custom avatars made from a photo or video. Its current Mobile custom-avatar guide describes Create with video as a 10-second recording and the script field as up to 3,000 characters. Treat those as September 2026 documentation, not permanent account-wide limits: when Create your avatar appears, its consent, framing, file, duration and script requirements outrank any tutorial.
Record against a simple background, keep the camera still, light the face evenly and speak naturally. Don't trim away any required consent or calibration section. Before submission, confirm that the account, subject and intended use are correct; a reusable clone is a more sensitive asset than one disposable talking-photo test.
If CapCut only offers presets or a photo route, don't hunt for an unofficial upload page. Feature availability can depend on the product surface, account, region or rollout. Use the preset to validate the script, or postpone the clone until the supported route appears.
Write a script that sounds spoken
Avatar problems often begin in the text box. A paragraph that reads cleanly can sound robotic when spoken. Write for one breath and one idea at a time:
Hook: Name the viewer's problem in one sentence.
Point: Give one concrete action or fact.
Proof: Add the number, example or screen cue they should check.
Next step: Tell them what to do after this clip.
Spell out ambiguous abbreviations on the first pass. Add punctuation where a human would pause. If a name, URL or product term is wrong, rewrite it phonetically only when the voice needs that help; keep the visible caption spelled correctly. Read the script aloud before generation. If you run out of breath, the avatar delivery will probably feel rushed too.
Review lip-sync, voice and framing
Don't approve an avatar from the thumbnail. Watch once at normal speed for the overall impression, then make four focused passes.
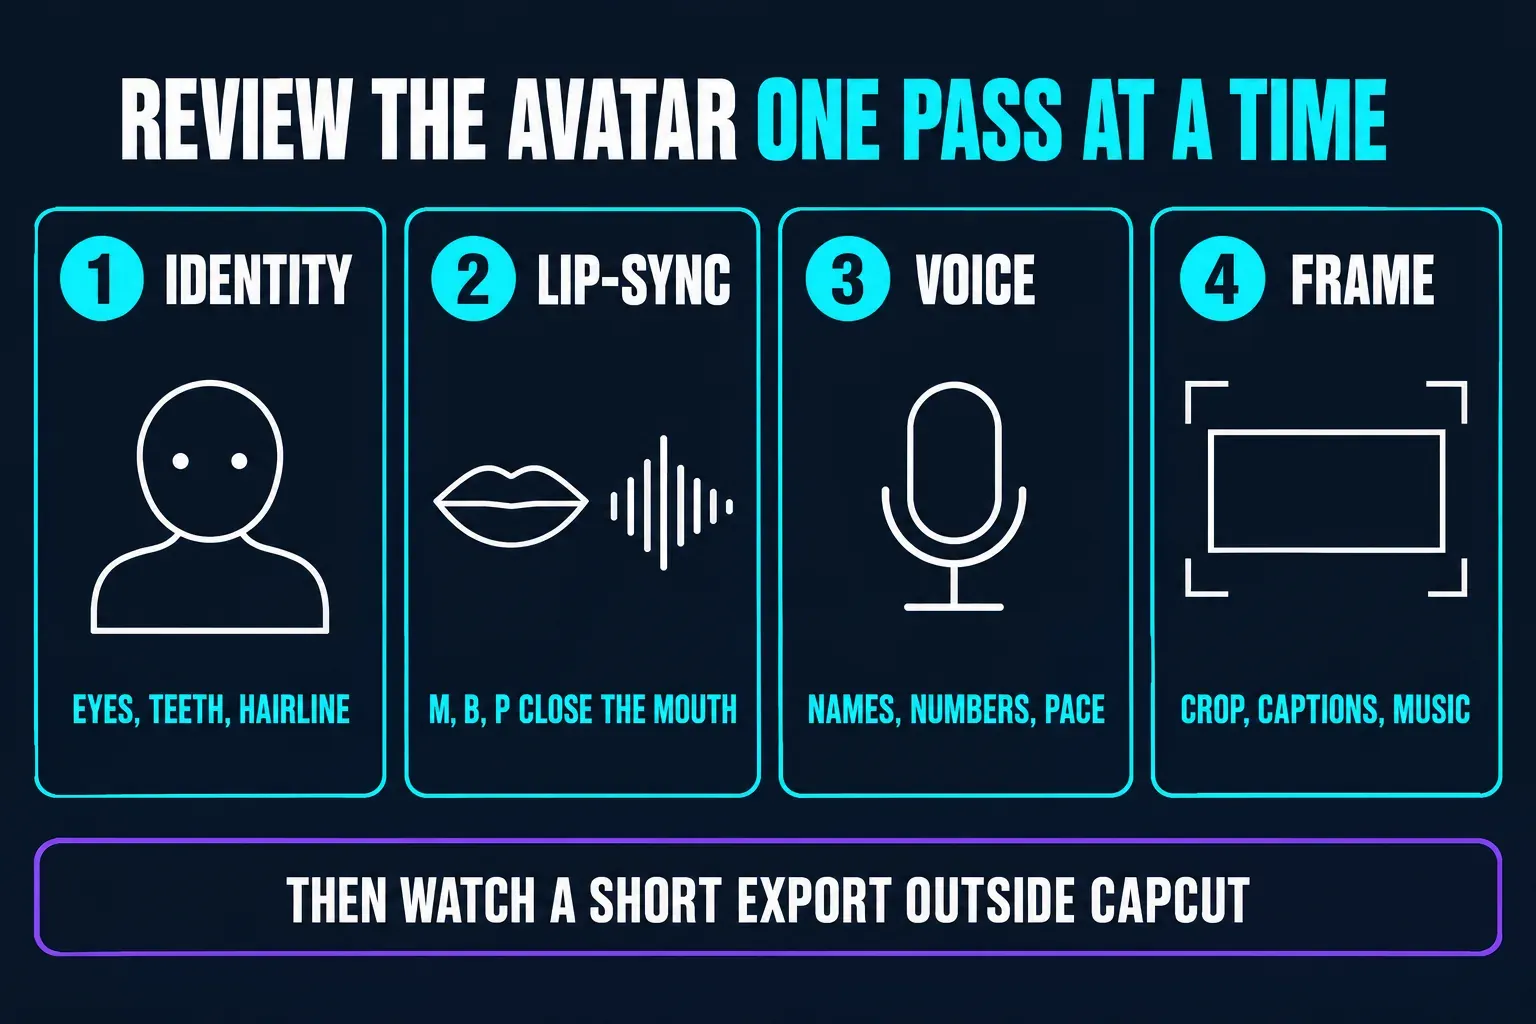
Identity
- eyes and face shape stay stable;
- teeth and hairline don't flicker;
- skin and accessories match the source.
Lip-sync
- mouth closes on m, b and p sounds;
- long vowels don't freeze;
- pauses look like pauses, not dropped frames.
Voice
- names and numbers are correct;
- pace leaves time to understand;
- tone fits the subject and presenter.
Frame
- head and hands are not cropped accidentally;
- captions avoid the face;
- background and music don't overpower speech.
Then export a short proof and watch it outside CapCut on the device where the audience will see it. The editor preview can hide compression, caption-safe-area and audio-balance problems.
Credits, price and the live gate
Check the credit cost shown for your generation. CapCut's current credits overview values one credit at US$0.01, while its AI Avatar product page says the generation charge is driven mainly by duration. That still does not reveal the price of your clip. The live-credit workflow says the action should show its required credits and your balance before confirmation.
CapCut's current Help pages also conflict on Mobile: one documents Mobile credit deduction, while another says Mobile does not support credit-consuming features. Do not resolve that contradiction by guessing. The avatar action and balance shown in your signed-in account are the evidence that matters for this generation.
- Check what the action says it will consume before generating.
- Record the balance and any expiry information shown in your account.
- Generate one representative test before a long script or a batch.
- After generation, check the activity/history route offered by your account.
A Pro badge doesn't prove that every generation is included. A “free” landing page doesn't prove that every custom route, voice or export is free in your account.
Fix CapCut AI Avatar missing or not working
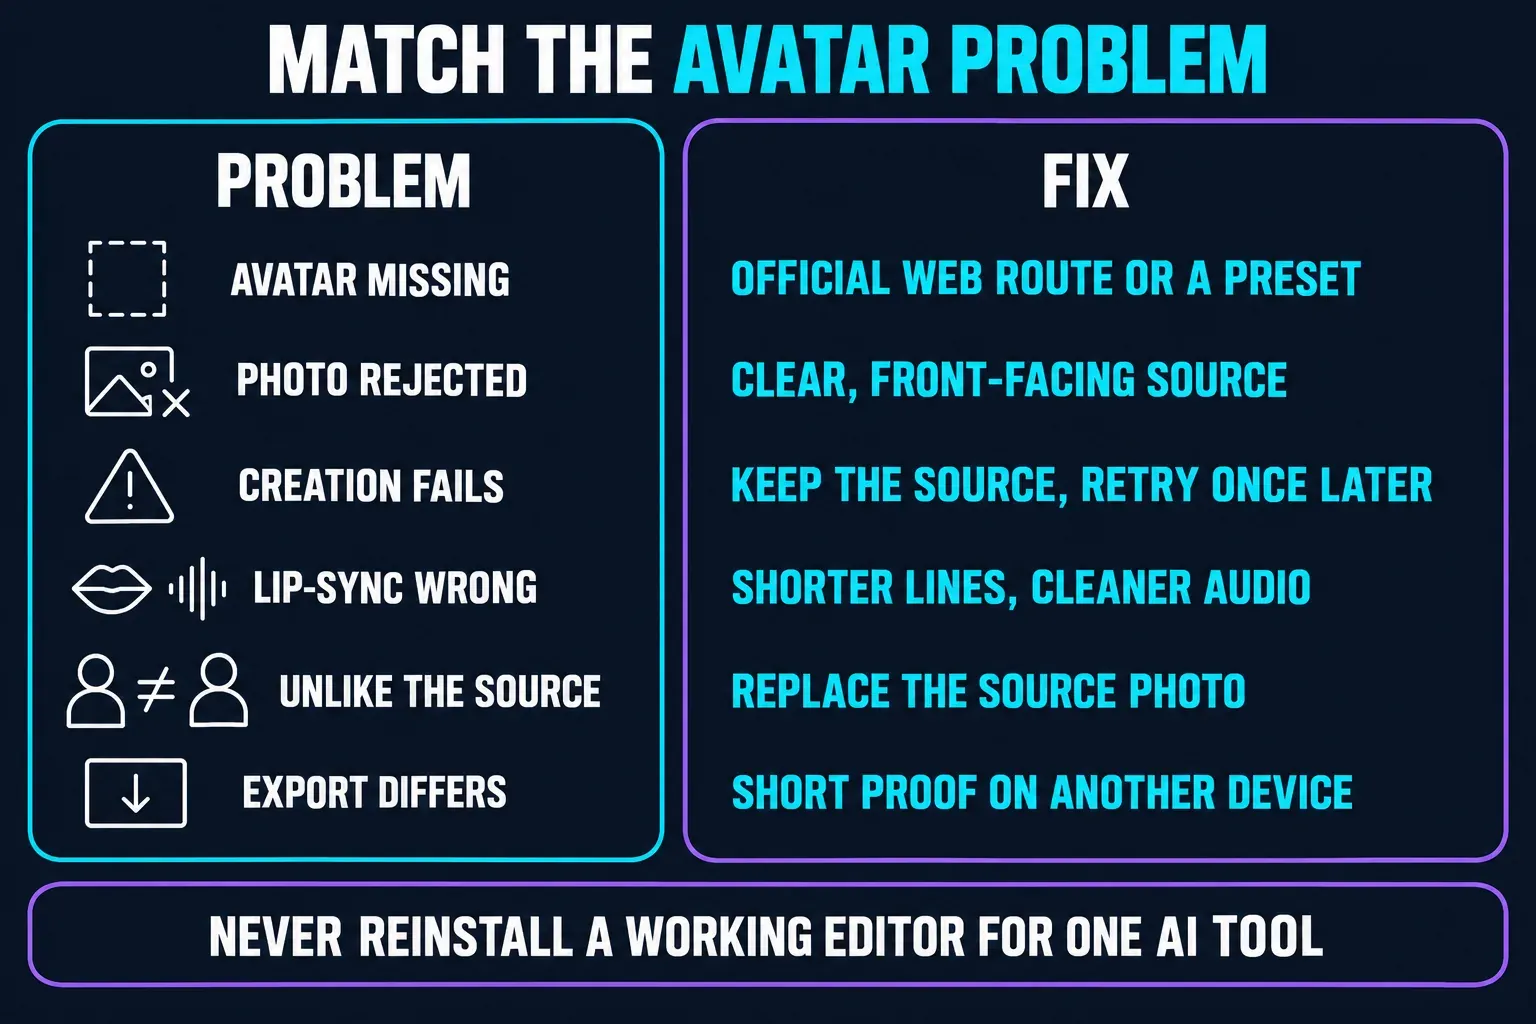
| Problem | Check first | Safe next move |
|---|---|---|
| AI Avatar is missing | Web AI video maker, current All tools/AI area, app update, correct account and region | Use the official Web route or a preset; don't install a modified build |
| Photo is rejected | Face size, lighting, obstruction, file integrity and permission | Use a clear front-facing source; follow the panel's exact input rules |
| Generation stops or fails | Connection, displayed balance, account state and service retry message | Keep the source, retry once later, then use CapCut support if credits were consumed |
| Lip-sync looks wrong | Long sentence, difficult name, noisy audio, hidden mouth or side angle | Shorten the line, fix pronunciation, use cleaner audio or a better source |
| Avatar looks unlike the source | Small face, heavy filter, extreme angle, poor light | Replace the source instead of stacking more effects on a bad generation |
| Export differs from preview | Canvas size, captions, music level and final export panel | Move to the normal editor, make a short proof and test it on another device |
CapCut's current AI-access checklist names region, available credits, Pro status, sign-in, browser compatibility and app version as separate possible gates. Read the message on the failing platform before choosing a fix.
Community reports can warn about failure modes, but they cannot prove a universal bug. In January 2026, one user reported in a Reddit thread about AI avatar editors that AI Avatar consumed credits without producing a usable result. If that happens, save the displayed cost, balance, error and activity history before retrying or contacting support. Do not delete local projects or reinstall a working editor just to chase one AI tool; test the official Web route first and protect the source media.
AI Avatar vs Dialogue Scene, Script to Video and Video Studio
Choose the smallest tool that matches the output:
- AI Avatar: one presenter speaks a script or audio.
- AI Dialogue Scene: characters speak or act in a conversation.
- Script to Video: a finished script becomes a multi-scene narrated or B-roll first cut.
- AI Video Generator: a prompt or reference becomes one generated shot.
- Video Studio: a broader idea or brief becomes a storyboard and fuller draft that may include an avatar.
The CapCut AI Tools guide keeps the routes together when you know the job but not the product name.
Consent, privacy and commercial use
A technically successful avatar can still be unusable. Get permission for the face, voice, script, background, music and any product claims. Label synthetic or altered media when the platform, client, law or audience context requires it. Never use a clone to fake an endorsement, impersonate a colleague or create deceptive evidence. If the avatar will present a promotion, our CapCut UGC ads workflow covers script truth, product proof and the publishing disclosure that this avatar setup guide leaves out.
CapCut's Trust Center says users retain rights in their work while CapCut materials have their own license conditions; materials intended for commercial projects should carry the relevant commercial-use label. That doesn't clear a third person's likeness, music or trademark for you. Keep approval records with the project.
CapCut AI Avatar FAQ
Is CapCut AI Avatar free?
CapCut advertises free entry points, but an avatar generation, custom route, voice or export can still be plan- or credit-gated. Read the live confirmation for the exact action instead of relying on a general “free” label.
Can CapCut make a photo talk?
Yes. CapCut currently advertises a photo-to-talking-avatar workflow. Use a clear, permitted portrait, add the speech input offered by the route and review identity and lip-sync before export.
Can I create a custom avatar of myself in CapCut?
CapCut advertises custom avatars made from a photo or short video. The available input and capture requirements can vary, so follow the live Create your avatar panel and its consent instructions.
Why is AI Avatar missing in CapCut?
The entry can differ by Web, Desktop or Mobile build, account, region and rollout. Check the official Web AI video maker and the current All tools/AI area before changing a working installation.
How do I fix bad lip-sync in a CapCut avatar?
Shorten the sentence, correct difficult names, use clean audio and replace a photo where the mouth is hidden or the face is at an extreme angle. Regenerate one short test before the full script.
Is AI Avatar the same as CapCut AI Dialogue Scene?
No. AI Avatar is the better starting point for one speaking presenter. Dialogue Scene is for character interaction or conversation, while Video Studio and Script to Video build broader multi-scene drafts.
Can I use a CapCut AI avatar commercially?
Commercial use depends on the rights to the face, voice, script and every CapCut or third-party material in the project. Use only permitted likenesses and materials, check commercial-use labels and keep the approval record.
Bottom line
Start with a preset and a 15–30 second script. That cheap test tells you whether the voice, lip-sync and framing suit the job before you create a reusable avatar or commit to a longer production. Read the live gate, review the result outside the editor and keep AI Avatar in its lane: one presenter, one message, one carefully checked clip.