

First, check the finished file outside CapCut. Export a short section from a project copy and compare it with the original at the same display size. If the saved file is sharp but the upload is blurry, work on the upload, not the timeline. If the saved file is soft too, start with crop, resolution and bitrate.
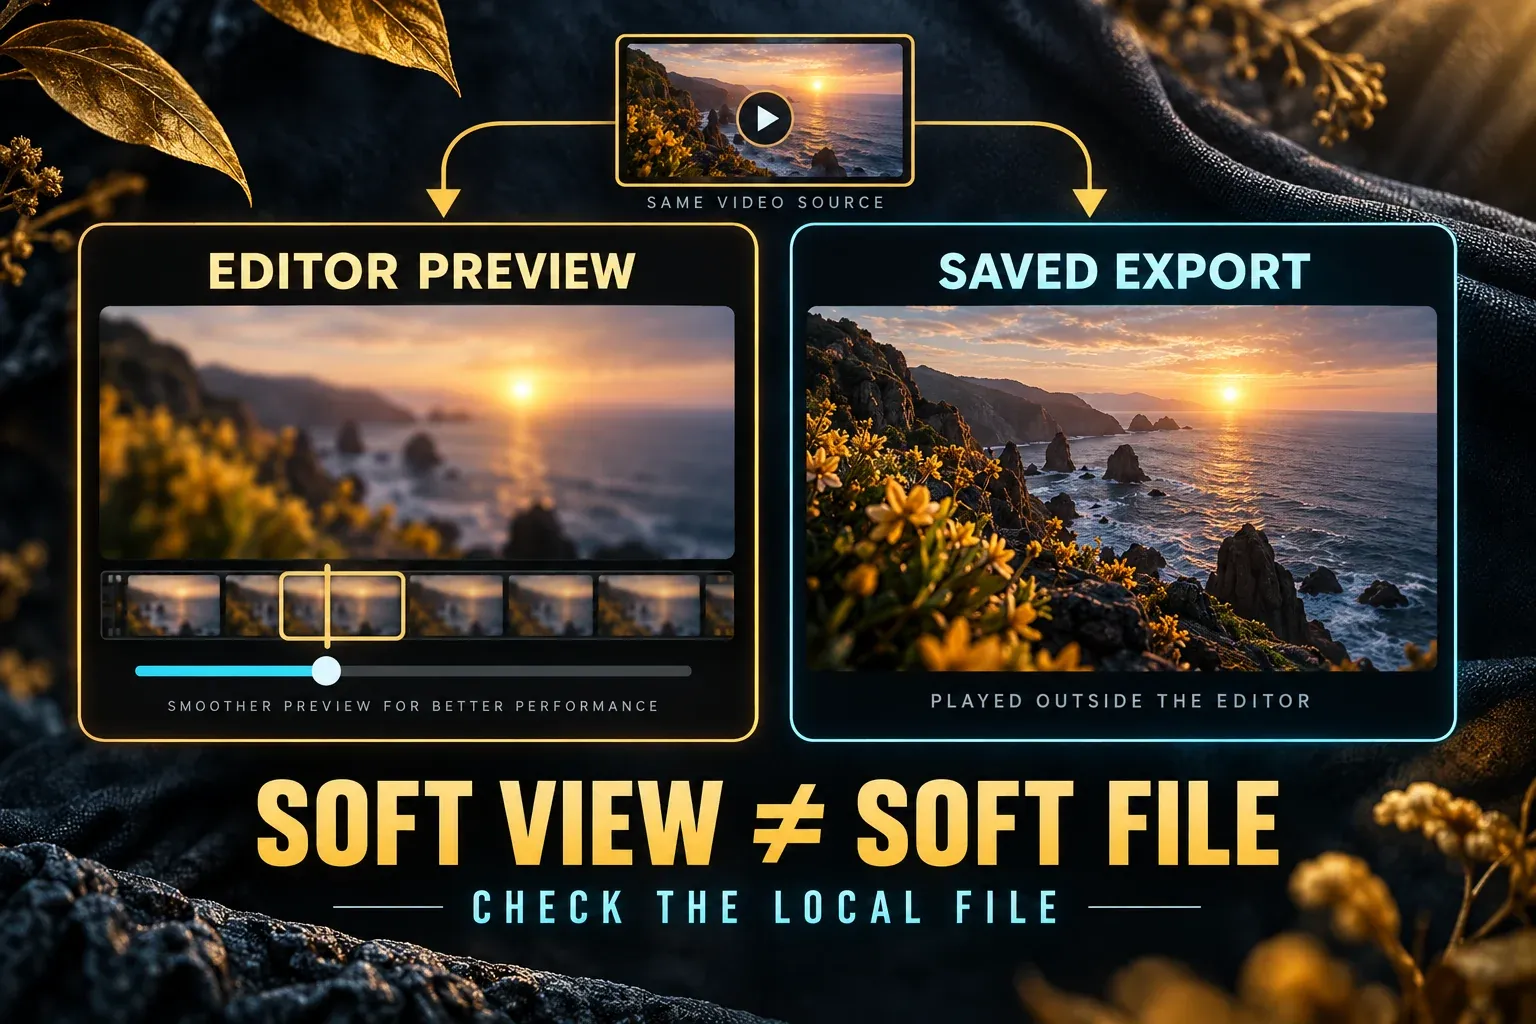
A blurry preview does not necessarily mean a blurry export. CapCut’s quality help explains that lighter preview playback can look softer than the finished video. You can also have a preview problem and an export problem at the same time.
This guide covers a video that finishes exporting but loses detail. For an export that stalls or produces no playable file, use the export-stuck guide. Other troubleshooting routes are in CapCut Fixes.
Checked September 13, 2026 against CapCut, Apple and YouTube documentation. Menu layouts and available options vary by device, app version and account.
Find the Copy That Turned Blurry
Use a section with hair, leaves, fabric, small lettering, water or fast movement. These reveal lost texture and compression blocks better than a flat wall.
- Source: play the untouched camera or screen-recording file in a normal player.
- Editor preview: pause CapCut on the same frame.
- Local export: export a short test from a project copy, then play the completed file outside CapCut. Ten seconds is a useful starting point, not a test of the whole edit.
- Platform upload: check the processed TikTok, Reel or YouTube version only after the local file is sharp.
Compare the same frame at the same display size, then watch the movement at normal speed. Do not compare a small editor window with a full-screen export. If the finished file looks wrong in only one player, try that same file in another player or on another device before changing the project.
If the source is already soft, check whether the export adds further damage rather than assuming the source explains everything. If only the editor is soft, use the preview branch in our CapCut blurry-after-import guide. If the local export is soft, continue here. If only the uploaded copy is soft, skip to the upload section.
Repair a Blurry Local CapCut Export
Keep an independent, editable copy of the project and its source media before testing. Confirm the copy opens; a finished MP4 is not an editable backup. Trim or remove clips only in the test copy, and keep the blurry export for comparison.
1. Check the exported pixel dimensions
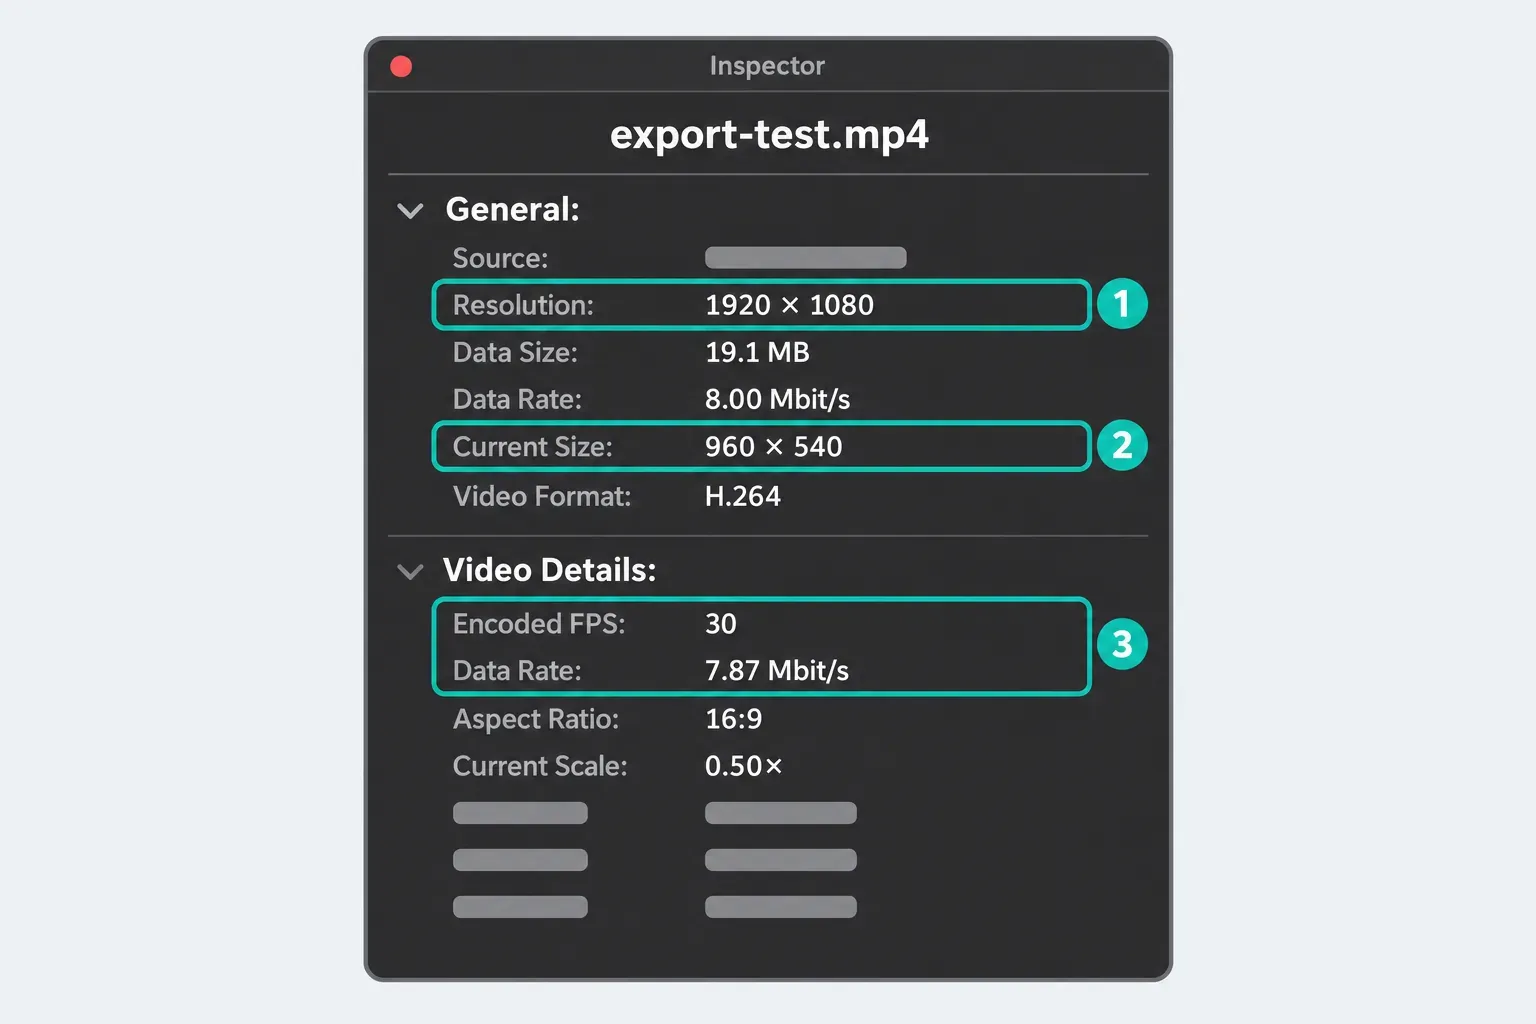
Open the completed file's information or properties and check its width and height. For a 9:16 video, a typical 1080p output is 1080 × 1920; the landscape 16:9 equivalent is 1920 × 1080. Those are examples for those shapes, not dimensions every project must use. On Mac, QuickTime Player's Movie Inspector opens with Window → Show Movie Inspector or Command-I and reports the file's video details.
Resolution describes pixel dimensions; MP4 is a file container. Choosing 4K in an ordinary export does not recover detail that a low-resolution source or heavy crop never contained. Enhancement and AI upscaling are separate processing steps, not the same as choosing a larger output size.
In Movie Inspector, read Resolution for the saved pixel dimensions. Current Size is the displayed size in the player, so a smaller number there does not mean CapCut exported fewer pixels. Under Video Details, record Encoded FPS and Data Rate for your comparison; the General data rate can include other streams.
2. Reset crop, scale and reframing on the test clip
A landscape clip may lose useful detail when you enlarge it to fill a vertical frame. In the test copy, first reduce the crop or scale so the whole source fits, even if that leaves borders. Compare the same section. Then test stabilization or automatic reframing separately, if you used them. Resetting everything at once would hide which change helped.
If reducing the crop helps repeatedly, use a wider composition, a background around the clip, or a higher-resolution original. Check tracking and zoom keyframes too: the crop can change partway through a shot.
3. Retest resolution and bitrate separately
Open Export and choose dimensions suited to the composition and source. Check the saved file, then hold resolution, frame rate, codec and effects steady while comparing the current bitrate with a higher setting. On the documented Desktop screen, those choices include Higher and Custom; do not assume your phone or Web editor has the same menu.
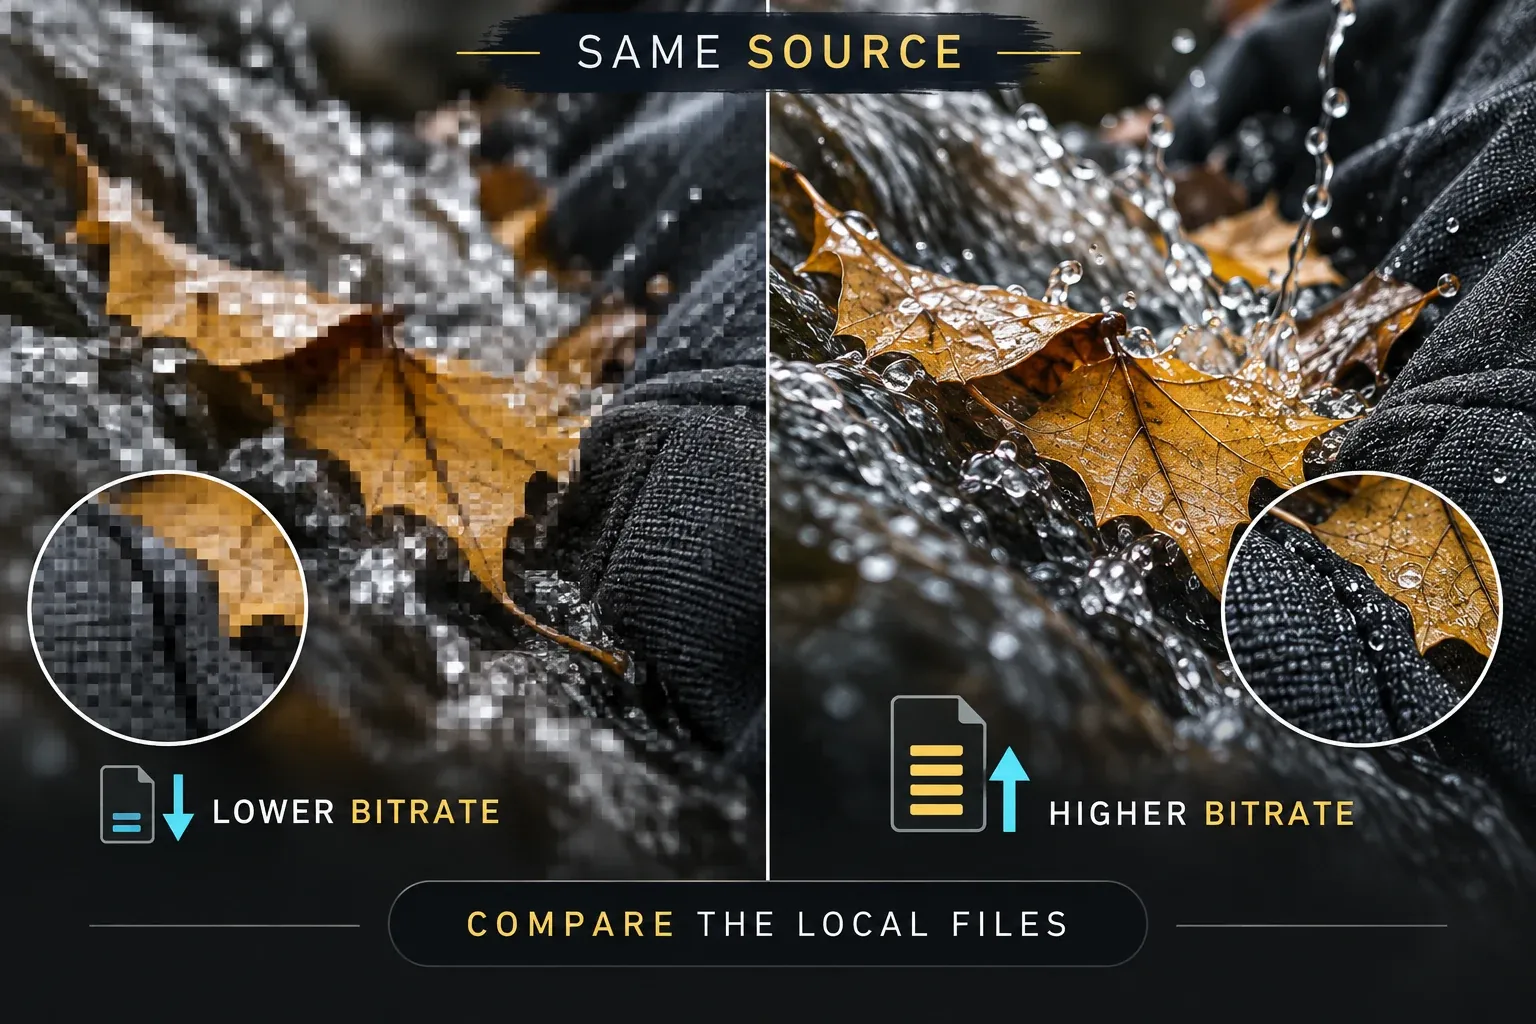
CapCut's current bitrate guidance explains how bitrate affects the exported image. A higher rate can preserve more detail, but it will not repair missed focus or an enlarged low-resolution crop. Fast motion, foliage, water, grain and fine text are useful stress tests. Raise bitrate in steps and compare the same passage; stop when the gain becomes negligible. Check the units before entering a custom number: 1 Mbps = 1,000 Kbps, so 20 Mbps means 20,000 Kbps. That is a unit example, not a recommended preset for every video.
The full choice of codec, color space, platform delivery and frame rate belongs in our full breakdown of CapCut export settings. Stay here if the completed local file is soft; use that guide when you need to choose delivery settings from scratch.
4. Separate motion problems from lost detail
Keep the intended timing of the edit. With mixed-frame-rate clips, not every source can match one output frame rate; choose for the timeline and destination rather than automatically selecting 60 fps. YouTube's current upload encoding guidance recommends using the frame rate in which the content was recorded. Exporting 30 fps footage at 60 fps does not create missing spatial detail. If paused frames look sharp but playback skips or freezes, use the guide to lagging after export. If the moving subject is already smeared in the source, a higher export frame rate is not a repair for that recorded motion blur.
5. Bypass effects one at a time
If only one section turns soft, do not re-export the entire project after changing five settings. In the test copy, isolate that range and bypass one item at a time, where present:
- AI enhancement, denoise or automatic adjustments;
- motion blur, optical flow or frame interpolation;
- sharpening, glow, grain or heavy filters;
- stabilization, tracking, compound clips or nested edits;
- a speed ramp, freeze frame or replacement clip at the failure point.
Repeat any improvement with the same settings before rebuilding a layer. A report of mobile-export blur describes a problem that persisted after resolution and HDR changes. The writer had not found a confirmed fix. Treat the reply’s suggestions as tests, not as an established explanation for your file.
6. Test a clean project and hardware encoding last
Put the untouched source in a new empty project and export the same passage. Match the crop, dimensions, frame rate, codec and bitrate as closely as possible. A sharper result narrows the investigation to differences between the projects; it does not identify the cause by itself. For an SDR comparison, try H.264 in MP4 if your export panel offers it, then test playback on the intended device.
CapCut's current blurry-video help lists hardware encoding as an occasional Desktop troubleshooting step. If that setting is available, note its original state, change only that setting and compare the same passage. Restore it if it does not help. Hardware encoding is a different control from proxy playback; changing one is not a reason to switch off the other.
Find the Export Controls on Your Device
iPhone or Android: in CapCut's documented mobile layout, tap the resolution label near Export to open the output settings. Choose the available resolution you need and compare the quality or bitrate control if your version exposes one. Wait for the save to finish, then open the actual saved video in Photos, your gallery or a player. A missing 4K or Custom option is not proof that your footage is damaged.
Windows or Mac: open Export, record the current choices and change one setting for each test. The figures below show what each quality check compares; control names and available options can differ between builds.
CapCut Web: choose the output settings offered in Export, finish the render and download the file. Judge that download, not an embedded preview. Keep private or client footage in an approved workflow; do not move it into Web or cloud storage solely for this test without permission.
If Only the CapCut Preview Looks Blurry
Leave the project alone when the local export is sharp. CapCut's current preview-quality help illustrates Full, High, Medium and Low preview modes, with the lighter modes labelled as not affecting export. A proxy is also designed to reduce editing load and can make the preview look softer.
Raise preview quality only when you need to inspect focus, masks or fine text. On a heavy timeline, the higher setting can make playback less smooth. Switch back after the check rather than forcing the computer to play every edit at full resolution.
Do not use “proxy is on” as proof that a completed MP4 was damaged. The local-file comparison is the evidence.
If the Local File Is Sharp but the Upload Is Blurry
If you are comparing the same file at the same size, this points to the upload or playback stage. Upload the original completed export, not a screen recording, downloaded social copy or a compressed attachment. A file copied without re-encoding is different from one compressed by a sharing app.
For YouTube, wait until the requested quality is available. YouTube's low-quality-after-upload guide says new uploads are initially processed in low quality and that 1080p or 4K versions can take longer. Check the watch-page quality menu. Soon after upload, missing HD options often mean processing is unfinished. If they remain missing, confirm the uploaded file's actual dimensions and try a supported browser or device; missing quality alone is not a reason to wait indefinitely.
For TikTok or Instagram, first confirm that you selected the correct original export. Compare the processed post on another connection or device, and check any quality or data-saving options available in your app. These checks separate playback differences from a poor uploaded copy. There is no bitrate setting in this guide that promises to bypass the platform's processing.
If the platform copy alone remains soft, use the platform-specific section of our CapCut export settings article. Do not keep sharpening the CapCut timeline to compensate for a transcode you have not isolated.
Check These Settings Before the Next Export
CapCut's official English quality guide currently shows Resolution and Bit rate choices including Lower, Recommended, Higher and Custom on the documented Desktop interface. Use the choices available in your installed version; these documented Desktop labels may differ on Mobile or Web.
If your export dialog offers cloud syncing, check its state before saving. For a local-only comparison, keep that optional sync off.
Use the controls as a test:
- Resolution: match the real source and project need; do not upscale by habit.
- Bit rate: raise it when the local file shows blocks, smearing or lost texture.
- Codec and format: H.264 in MP4 is a useful SDR test option when available, not a universal HDR workflow or a guarantee for every player.
- Frame rate: preserve source/timeline cadence unless you have a specific delivery reason.
- Color space: keep source interpretation and intended SDR or HDR delivery consistent; changing color space is not a sharpness repair.
If CapCut cannot complete the control render or creates no playable file, switch to the CapCut export-stuck diagnostic. A stalled render and a soft completed file are different jobs.
When Only Text or Colors Look Wrong
Fuzzy captions or graphics: compare a short export with larger, plain text and without glow or blur. For an imported logo or text graphic, check the original image dimensions and whether you enlarged it. Improving one text layer is a different job from sharpening every video clip. Judge readability at the size viewers will watch it.
Washed-out colors: if edges remain defined but brightness or color changes, investigate color handling before bitrate. YouTube's HDR guidance distinguishes HDR playback from its SDR conversion and requires appropriate HDR metadata. Do not simply relabel HDR footage as SDR or turn HDR on to make an ordinary video look sharper.
Do you need Pro or AI enhancement to fix blur?
Do the local-file comparison before buying an upgrade. Paying cannot tell you whether the problem came from a cropped source, a low bitrate or a processed upload. If you try an enhancement tool, compare its result with the original. Look for altered faces, smeared texture or halos as well as sharper edges.
CapCut’s upgrade-prompt help identifies premium assets and settings as possible reasons for a payment prompt. Check the actual badge or warning in your account. Do not assume an AI option is free, or that every 4K export requires the same plan on every platform.
What Not to Do
- Do not export everything at 4K. More output pixels do not restore missing source detail.
- Do not convert everything to 60 fps. More frames are not more sharpness.
- Do not max Sharpen first. It increases edge contrast and can add noise or halos around edges; a crisper outline is not recovered texture.
- Do not blame Proxy without checking the export. A soft editing preview and a soft saved file need different checks.
- Do not repeatedly export and re-import. Start from original media where possible so each generation does not become the next source.
- Do not reinstall or clear app data for a quality problem. Protect unsynced drafts and original media before any destructive troubleshooting.
Final Quality Check
Play the repaired export from beginning to end outside CapCut. Check the same fine-detail frames used in the short test, plus motion, gradients, text, audio sync and the exact section that failed. Confirm the pixel dimensions and keep this sharp local file as the delivery master.
Only then upload it. Check the processed platform version separately. “Looks sharp in the editor” and “looks sharp in the local file” are different checks; neither proves what a social platform will serve.
If the same fault survives the clean-project test, send CapCut Support the app version, device and OS, source/output dimensions, frame rate, codec, bitrate and the exact time where it happens. Include an anonymized reproduction only if you can share it safely. Remove account details, file paths and private project content from any evidence.
CapCut Blurry Export FAQ
Why is my CapCut video blurry after export even at 1080p?
The 1080p label confirms output dimensions, not source detail or compression quality. Compare the source and local export, then check crop/scale, bitrate, effects and whether the file really has the expected dimensions.
Will exporting CapCut in 4K fix a blurry video?
Not by itself. A larger output can retain more detail when the composition contains it, but simply choosing 4K does not restore missing source detail. Check crop and compression first; enhancement is a separate process, not a guaranteed recovery of the original scene.
What bitrate should I use to stop a blurry CapCut export?
There is no single number for every project. Record the current setting, then compare the same difficult section with a higher bitrate if that control is available. Keep resolution, codec and frame rate steady. Desktop labels such as Recommended, Higher and Custom may differ on other platforms.
Does Proxy make the final CapCut export blurry?
CapCut documents Proxy as a way to lighten editing playback and warns that it can make the preview look softer. Do not assume it damaged the final file. Play a short local export outside CapCut and use that result.
Why does my CapCut video look clear in Photos but blurry on TikTok or Instagram?
If it is the same exported file at the same display size, this points to upload or playback differences. Confirm which file you uploaded, compare the processed post on another device or connection, and avoid a compressed intermediate copy.
Why is my CapCut upload blurry on YouTube at first?
YouTube processes new uploads in low quality first; higher-resolution versions can take longer. Check the quality menu again after processing. If expected options remain missing, verify the uploaded dimensions and try another supported browser or device.
Will CapCut Pro or AI enhancement fix the blur?
Not automatically. First compare the original, the saved export and the uploaded copy. An enhancement tool may change the image rather than restore the scene exactly. Check its output and any payment prompt before using it across the whole project.
Why is only one part of my exported video blurry?
Test that range in a project copy. Compare its source clip, crop, speed change and any effects one at a time, then repeat the improvement. A busy section can also expose compression limits, so do not rule out bitrate solely because other shots look fine.