

To make a CapCut video silent, select the clip and set its audio Volume to 0. That keeps the video and leaves the sound easy to restore. If you want the source track gone from the timeline, separate the audio first, select the new audio layer and delete it.
Those are different edits. A third option matters when you want to remove music but keep speech: use CapCut's audio-separation tools where your platform and build provide them. The right path depends on what should remain when you export.
Choose the result before touching the timeline
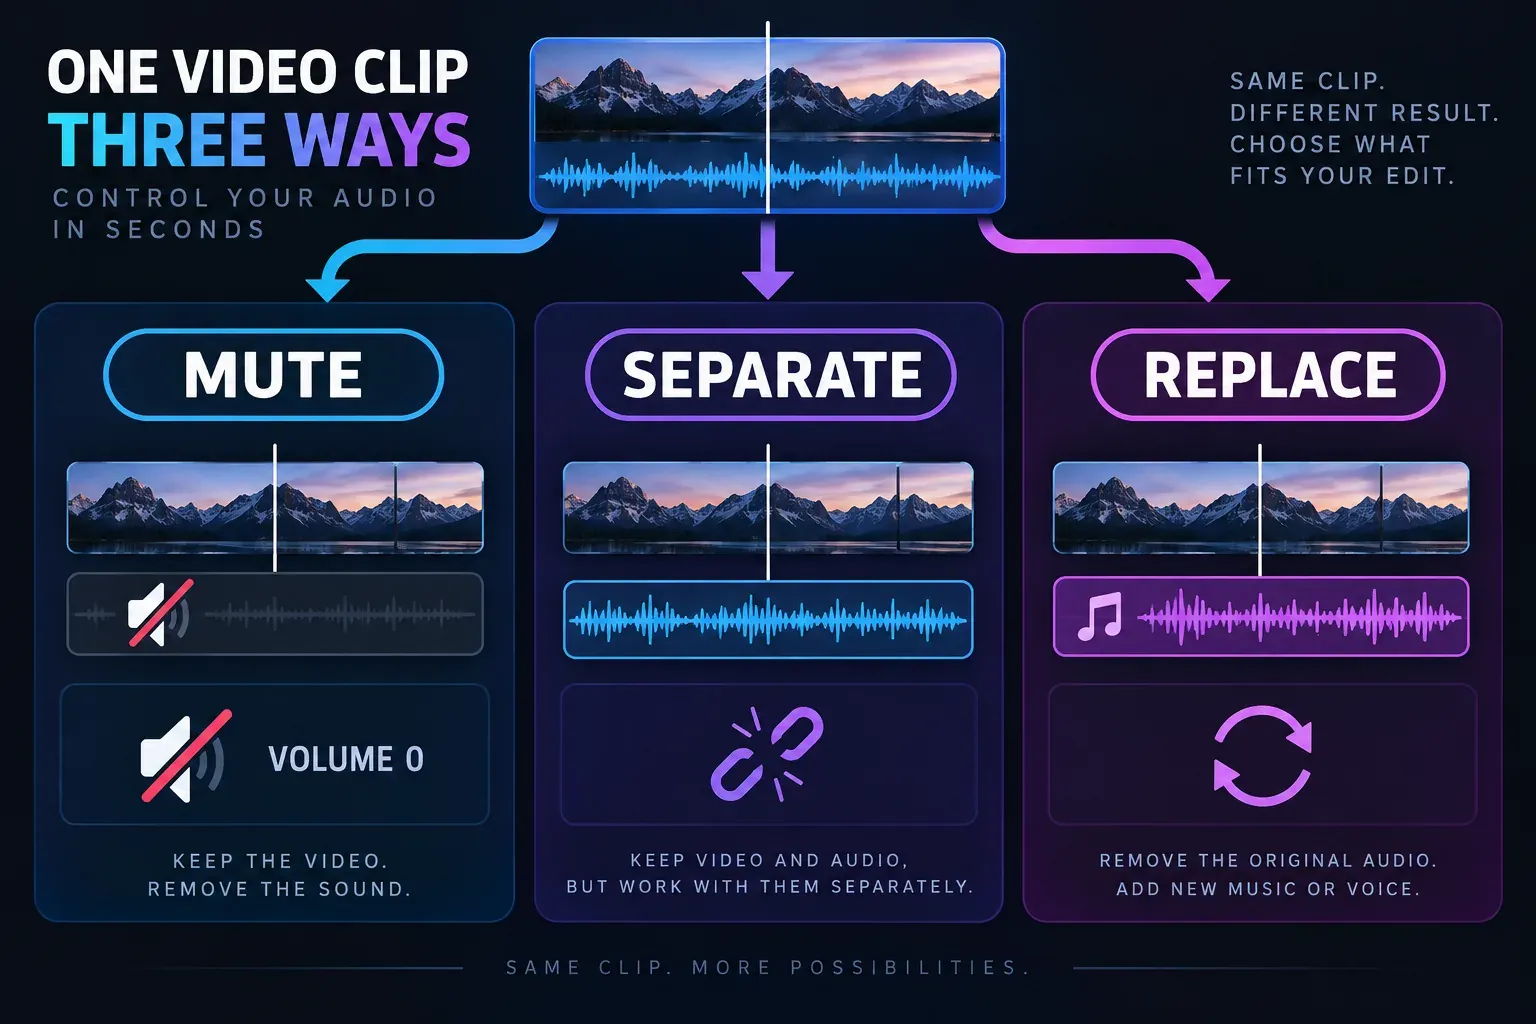
Mute the clip when you want to silence the original sound, add a voiceover later, or keep a reversible edit. The video and its audio remain connected, with the clip volume at zero.
Separate and delete the track when you want the original audio layer removed from the project. This gives you an independent audio track to edit or delete.
Separate selected elements when the goal is to keep a voice or vocal line while reducing music. CapCut describes this Desktop workflow as Audio → Basic → Separate audio, followed by a choice such as Vocals, Instruments, Drums, Guitar, Bass, Strings or Others. That is stem separation, not a universal mute button, and the available choices can vary.
If the original project is important, keep a copy before deleting a detached track. Muting is the safer first move when you are still deciding what the finished edit needs.
Mute the original audio
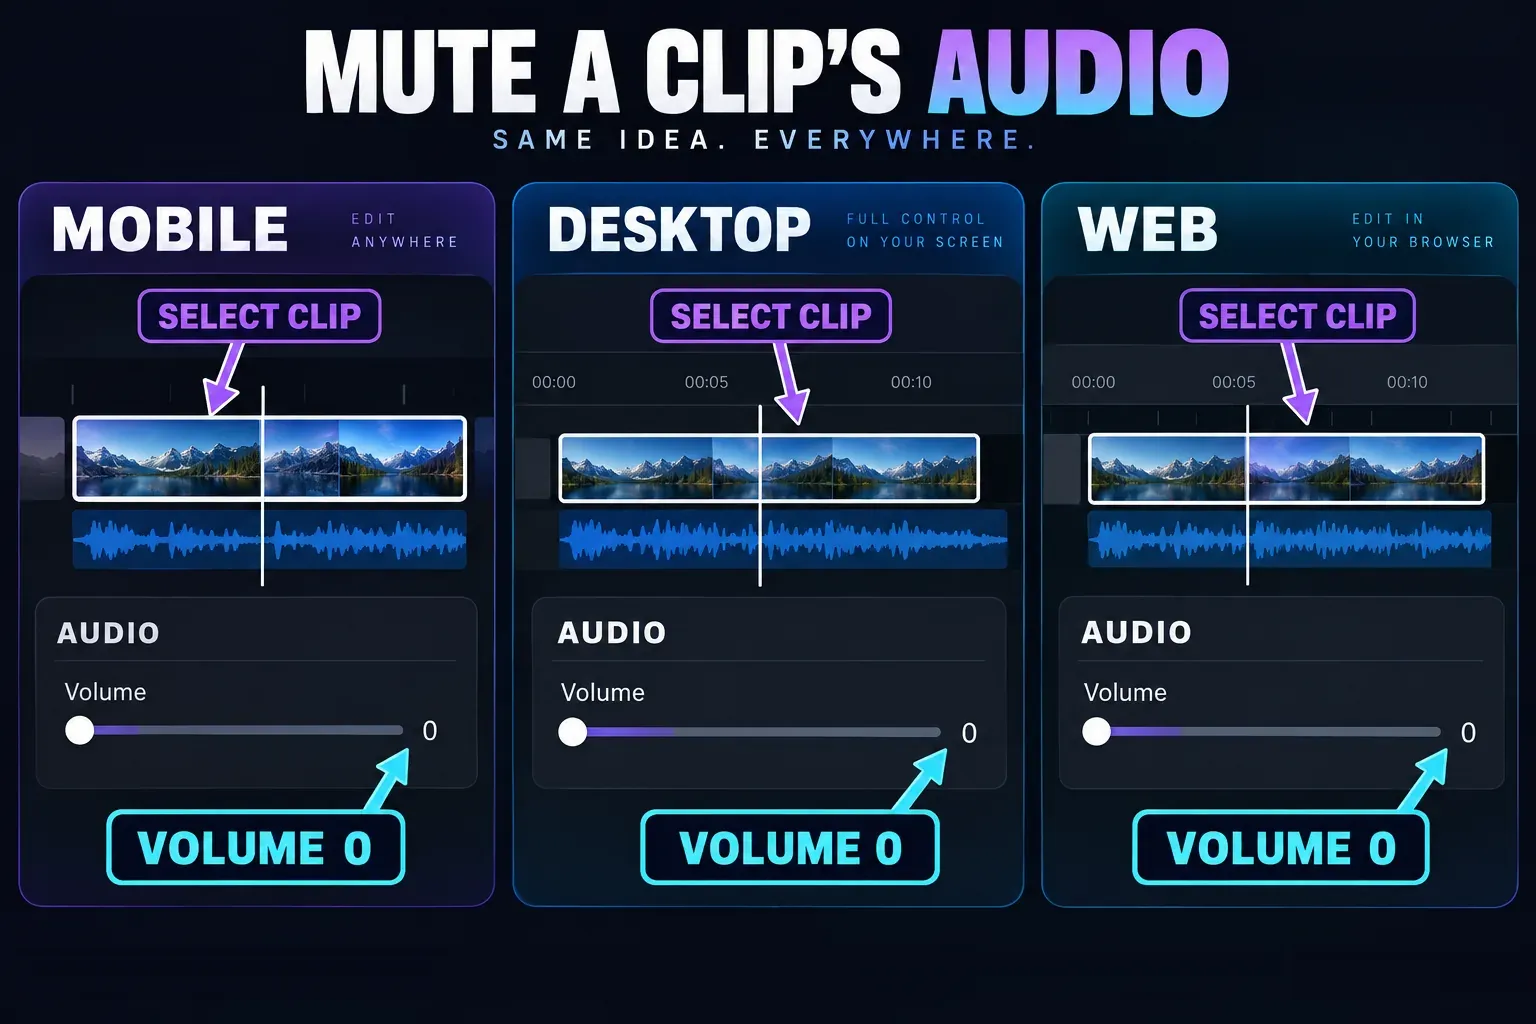
This is the quickest answer to “How do I remove sound from a video in CapCut?” It changes the selected clip's level to zero without asking you to rebuild the timeline.
On Mobile
- Open the project and tap the video clip on the timeline.
- In the bottom toolbar, open the audio controls or the Volume control.
- Set the volume to 0, then confirm the edit.
- Play the timeline once with any replacement tracks enabled. A second music or voice layer can still be audible after the original clip is muted.
CapCut's mobile labels and the position of Volume can move as the toolbar changes. The important part is that the video clip is selected, rather than a text, sticker or audio layer.
On Desktop and Web
- Click the video clip in the timeline.
- Open its audio controls in the editing panel.
- Move Volume to 0.
- Continue editing or export the video.
CapCut's official mute-video instructions describe the selected clip, audio controls and zero-volume setting. Its online mute workflow uses the same basic idea after the clip is uploaded. The panel can look different between CapCut Desktop and CapCut Web, so follow the control attached to the selected clip rather than searching for one fixed screen layout.
Separate and delete the audio track
Use this route when muting is not enough and you want the original audio to become an independent timeline item.
On Desktop
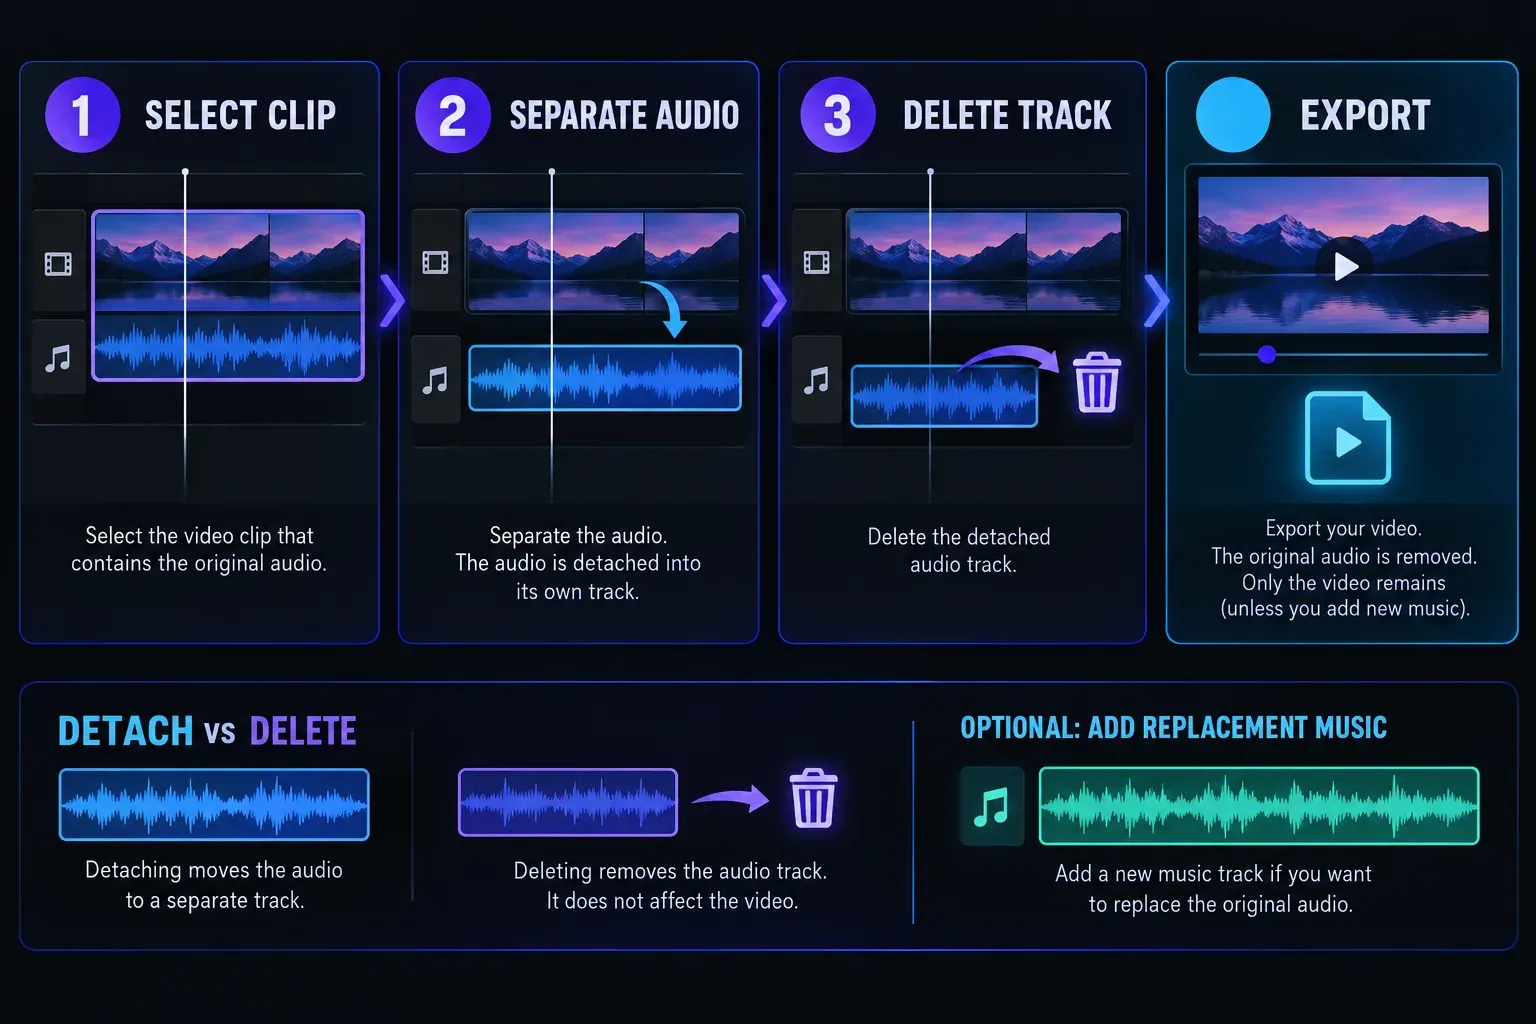
- Select the video clip that contains the original sound.
- Right-click the clip.
- Choose Separate audio.
- Click the detached audio track beneath the video.
- Press Delete or use the editor's delete command.
CapCut documents the right-click path in its split-sound guide. After separation, check that you selected the new audio layer before deleting anything. Removing a video clip instead will change the picture as well.
On Mobile
- Tap the video clip in the timeline.
- Scroll the clip toolbar until you find Detach or a similarly named audio-separation command.
- Tap the new audio track under the video.
- Delete that track, or leave it in place if you want to edit it separately.
The official mobile wording in CapCut's split-sound resource is Detach. Some builds may place the command under a different part of the clip toolbar. If you cannot find it, mute the clip with Volume = 0; that still produces a silent picture without relying on a particular toolbar label.
On Web
CapCut's official resource describes Separate audio for the Web editor. Select the clip, use that command, select the separated audio layer and delete it if the project should contain no original track. If the command is missing, use the selected clip's audio controls and set Volume to 0 instead.
Remove music while keeping a voice
Muting the source clip removes every sound carried by that clip. It cannot keep speech while removing only the music underneath it.
For that narrower job, use Separate audio where CapCut exposes the stem choices. On Desktop, CapCut places the feature under Audio → Basic → Separate audio, where you can choose an available element such as vocals or instruments. Treat the result as an editing aid: the menu and separation choices are not guaranteed to match across Mobile, Web and Desktop.
Once you have the tracks you want, balance them in the CapCut audio-mixing guide. That page covers retained voice, music and effects; this article covers removing the original clip sound.
Check the exported file
A quiet timeline can still contain another audible layer. Before sharing the file:
- turn off or inspect every audio layer that should not remain;
- listen through the beginning, middle and end of the exported video;
- confirm that a replacement voice or music track starts where you expect;
- open the saved file in a second player if the destination is sensitive to audio.
If you expected sound and it disappeared by accident, use the CapCut no-sound troubleshooting guide instead. It covers missing audio in the editor, export and social platforms. For the final render settings, see the CapCut export settings guide.
Frequently asked questions
Can I remove sound without removing the video?
Yes. Set the selected clip's Volume to 0 for a reversible silent edit, or separate the audio and delete only the new audio track.
Is muting the same as deleting audio?
No. Muting leaves the audio associated with the clip at zero volume. Separating and deleting removes the independent track from the current project. Keep the original project if you may need that sound again.
How do I remove background music but keep talking?
Use CapCut's audio-separation feature if your platform and build offer vocal or instrument choices. Do not use ordinary mute for this job: it silences the voice and music together.
Why can I still hear sound after setting Volume to 0?
Look for another audio layer, a duplicated clip, or a newly added music and voice track. Select each audible layer in turn. If the problem is unexpected silence rather than intentional removal, switch to the no-sound troubleshooting workflow.