

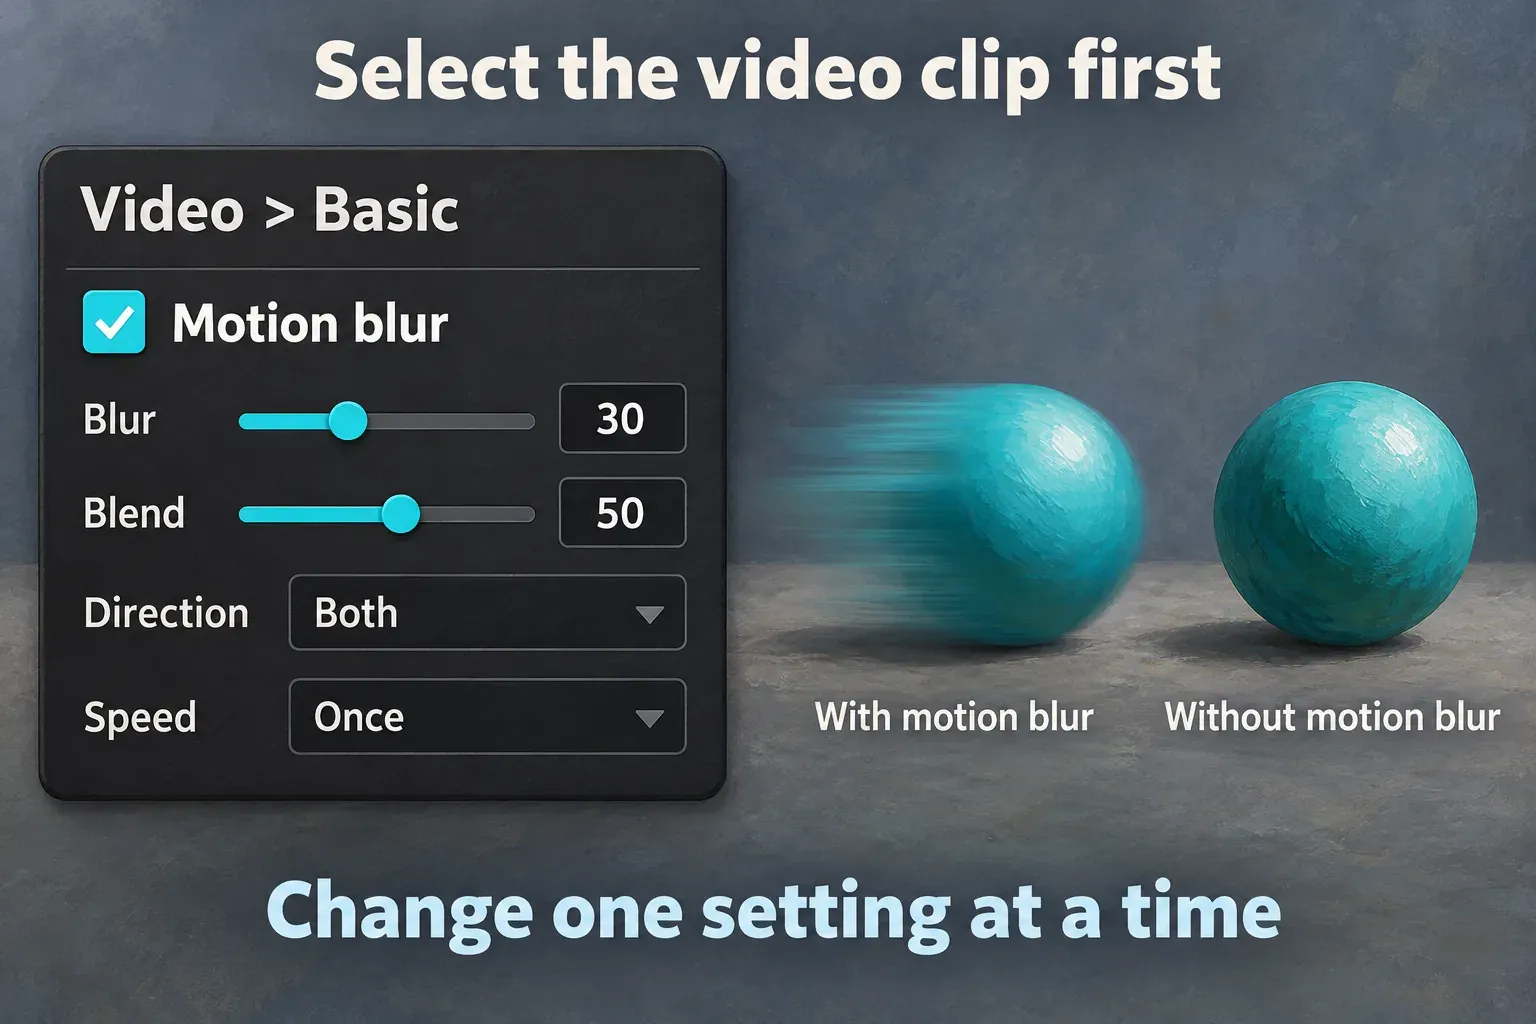
To add motion blur in CapCut PC, select the video clip on the timeline, open Video > Basic, find Motion blur and enable it if your build exposes that control. Adjust Blur and Blend, then compare the available Direction and Speed options on a moving part of the shot. A similarly named preset in Effects is another route, with its own appearance and controls.
I would start with the selected-clip tool for a natural-looking trail and use a library preset when the edit needs a deliberate streak or transition accent. Judge the moving edge, not the effect thumbnail: the useful amount is the amount that supports the action without hiding it.
Add motion blur on CapCut PC
CapCut's documented Desktop workflow provides both a clip-level Motion blur control and an Effects-library route. For the clip control:
- Import the video and place it on the timeline.
- Select the video clip itself. Selecting an effect strip, text item or empty canvas gives you a different panel.
- In the right-hand inspector, open Video > Basic and scroll to Motion blur.
- Enable the control and allow any processing to finish.
- Start with a restrained Blur setting. Adjust Blend separately and play a section with clear movement.
- Compare the exposed Direction and Speed choices, then inspect the first and last affected frames.
The precise location, options and access badge can change with the app build and account. If that section is absent, use the library branch below or check availability; a phone tutorial doesn't establish where the PC control should be.
Don't add ordinary Blur just because its thumbnail looks softer. Motion blur is meant to suggest movement. If your goal is a sharp person against a softer room, follow the background-blur workflow. If the goal is hiding a plate or screen, use a controlled local blur or cover; a fleeting motion trail doesn't provide reliable redaction.
Choose settings from the shot, not a universal recipe
CapCut's motion-blur controls include blur and blend degrees, direction choices such as forward, backward or both, and options labelled once, twice or higher repetitions. That establishes which controls to look for, rather than a setting that suits every source.
| Control | Useful adjustment | What to inspect |
|---|---|---|
| Blur | Begin low and raise it only until the moving edge feels less abrupt. | Has the subject become a smear? Can you still follow the action? |
| Blend | Change it separately after choosing the blur amount. | Do trails merge acceptably with the picture, or do doubled edges dominate? |
| Direction | Compare the options exposed by the selected tool. | Which treatment fits the movement without leaving a distracting echo? |
| Speed or Times | Compare the lowest available option before stronger choices. | Does the extra treatment improve the shot enough to keep? |
Direction choices such as Forward and Backward aren't left/right angle controls. Use the labels offered by that tool and compare the picture rather than trying to type a direction from a camera move. Likewise, don't read Once or Twice as an export frame rate. Leave the clip's playback speed unchanged unless you also want a retime.
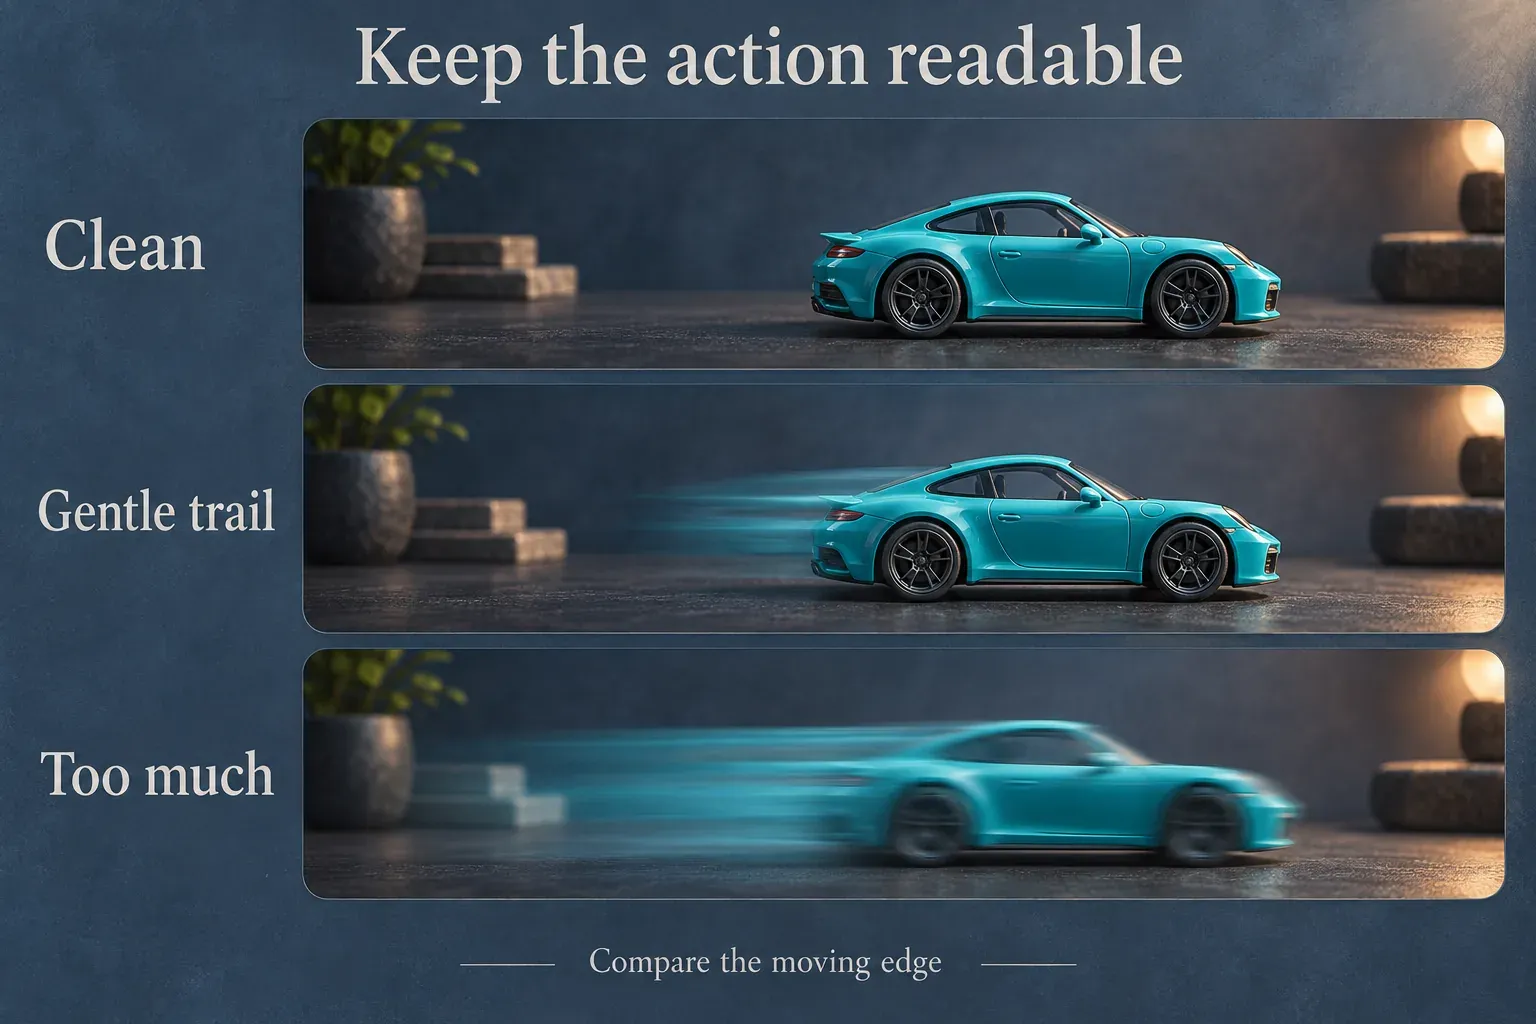
For a fast pan, I would judge the strongest movement first, then check the quieter frames. A treatment that suits the pan can make the resting picture look needlessly soft. For a gaming edit, keep important UI, aiming cues and hit information readable. For a product shot, protect the detail that explains what the product is.
Essential titles and captions deserve the same care. If an effect applied across the composite smears the words, change its scope or placement, keep the text outside the affected section, or shorten the accent. Adding another sharpen effect on top is a poor first response to excessive blur.
Use an effect strip for a short accent
For a library preset, open Effects, search for Motion Blur and inspect the currently available results. CapCut's effect-strip instructions describe adding the effect above the video and adjusting its timeline length. Older material places a preset under Lens; search is more useful than relying on that category staying fixed.
Add the chosen asset, let it download, then move and trim the effect strip to the intended moment. Select the strip to adjust its own parameters. Its controls may differ from Blur, Blend, Direction and Speed in the selected-clip panel, so don't transfer slider values between the two routes.
For a clip-level property, isolate the section with splits when you need blur only during a brief fast movement. Keep it disabled on the neighboring segments. Our cut, trim and split guide covers the timeline operation. For a separate preset strip, trim that strip instead; splitting the underlying video alone doesn't set its duration.
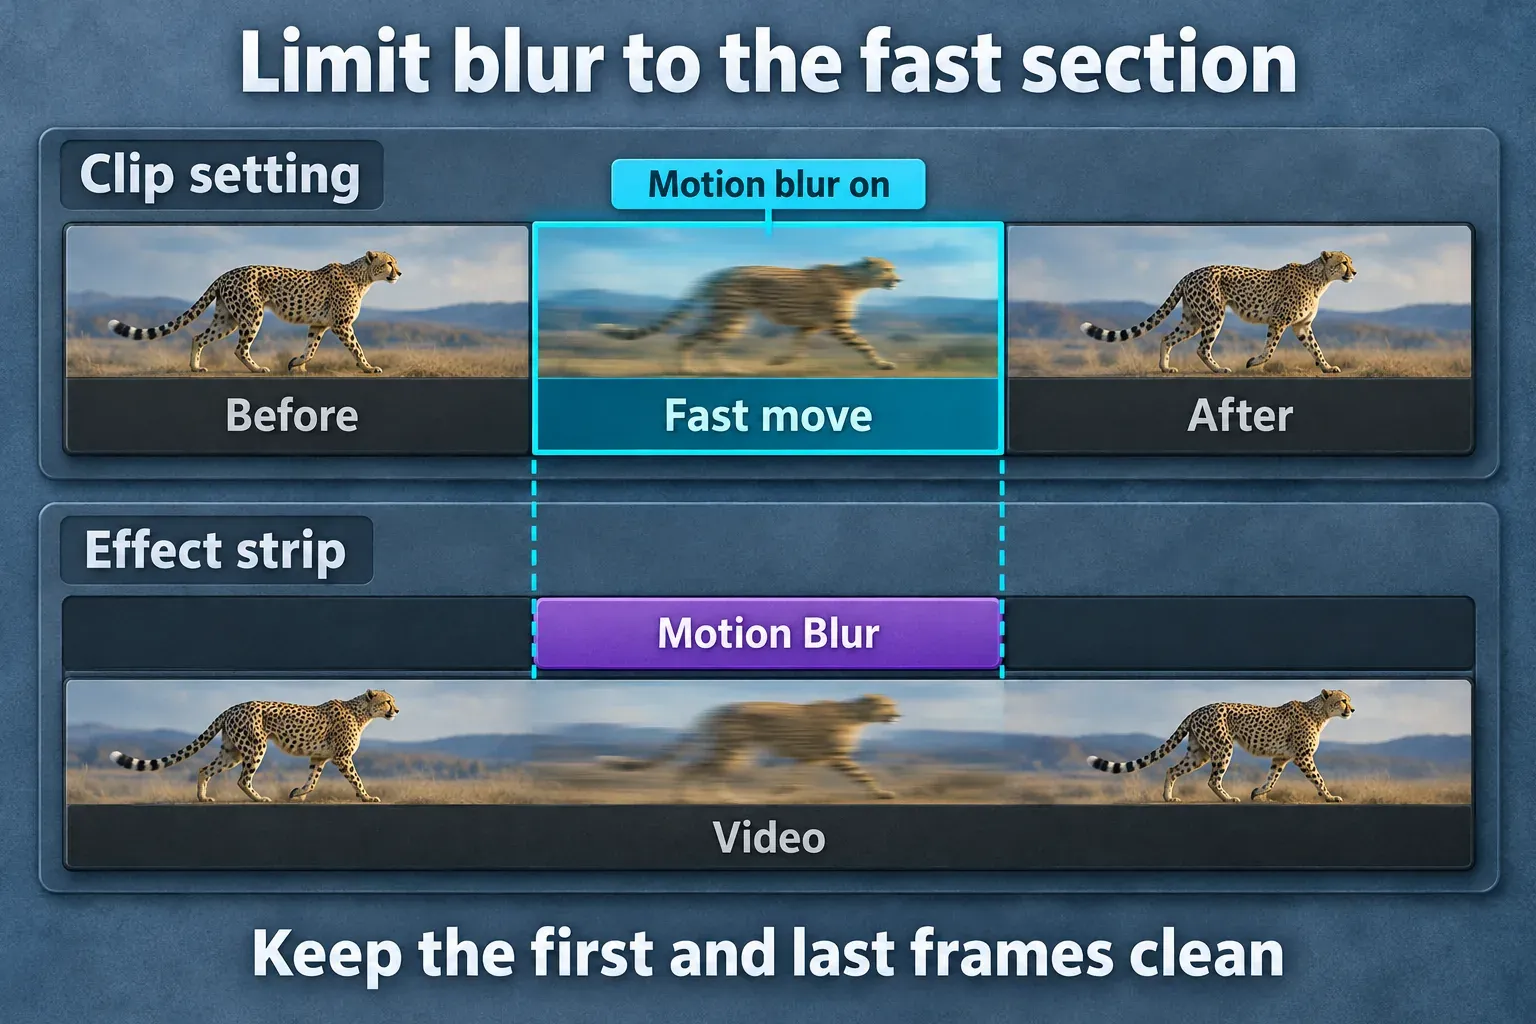
Start playback before the treatment begins and continue after it ends. Watch for an abrupt change in softness at both boundaries. Shorten, weaken or reposition the accent if it draws more attention than the cut itself.
There is a reason similarly named tools can cause confusion. In a dated CapCut PC discussion, users disagreed about whether a Lens preset gave them the motion treatment they expected. That thread isn't a current menu guide, but it points to a useful question: do you want a stylized smear, or softer movement within the shot?
Motion blur and smooth slow motion solve different problems
Motion blur adds or suggests a trail during movement. A slow-motion treatment addresses the timing of frames after you reduce playback speed. Softening repeated frames may conceal some harsh edges, but it doesn't recover missing action from the recording.
Adobe's explanation of frame blending for retimed footage distinguishes temporal frame processing from motion blur. Those are After Effects controls, not a description of CapCut's internal algorithm. The distinction still helps you diagnose the task: settle the speed ramp first, then decide whether the moving picture also needs a blur treatment.
If a slowed shot jumps between positions, adding more Blur isn't a dependable cure. Review the source frame rate and the slow-motion options your CapCut build provides. If the movement is already smooth but looks excessively crisp for the intended style, a modest motion trail may be the better adjustment.
Mobile, Web and missing controls
On Mobile, select the video clip and inspect its editing toolbar. CapCut's Mobile motion-blur instructions show Edit > Motion blur, with Blur, Blend, Direction and Times options. Use that route where it is present. If your build instead offers a library preset, look under Effects > Video effects, apply the available asset and set its timeline range. A preset and the clip tool can produce different treatments.
On Web, search the Effects library for the required look. Don't expect the Desktop Video > Basic panel or every native option. CapCut documents platform and account differences in effect availability, so absence from one editor doesn't prove that the project is broken.
Work through the problem you can see:
- The control is missing: confirm that a video clip is selected, inspect the current app build and search the library. Save the project before updating. If you need support, record the platform, version, account and missing control.
- There is a Pro badge or export prompt: inspect the exact tool or asset and the rest of the project. An older free tutorial doesn't establish your current entitlement. Compare legitimate alternatives using the Free versus Pro guide.
- The effect appears to do nothing: use a section with visible motion, raise its strength slightly, confirm the enabled state and put the playhead inside the affected clip or strip. Wait for processing before judging it.
- It only softens the whole image: check whether you selected an ordinary Blur preset or a stylized smear rather than the clip-level motion tool.
- An old asset has disappeared: preserve the original project before replacing it. CapCut says effects can be retired even for subscribers; that general policy doesn't establish why your particular item is absent.
If the control is present but fails, isolate it from other effects on a copied section and follow the general CapCut effects checks. That gives you a clearer support report than changing several unrelated settings at once.
Check the export and keep an editable version
Compare the treated section at normal speed, then pause around the strongest motion, overlapping edges and effect boundaries. Keep the version with the least blur that achieves the intended look. For a short social edit, also review it at phone size; detail that survives a large preview may disappear on a small display.
Export a representative section with the resolution and frame rate intended for delivery, then play the local file outside CapCut. Our export-settings guide covers those choices. If only editor playback is choppy, separate preview performance from the rendered result before weakening a treatment that looks good in the file.
Keep the original media and editable project. To remove a clip-level treatment, disable Motion blur on each affected segment. To remove a library treatment, select and disable or delete its effect strip. A flattened export doesn't retain those editable controls; return to the project for a clean version. The CapCut Tutorial hub connects this step with the rest of the edit.