

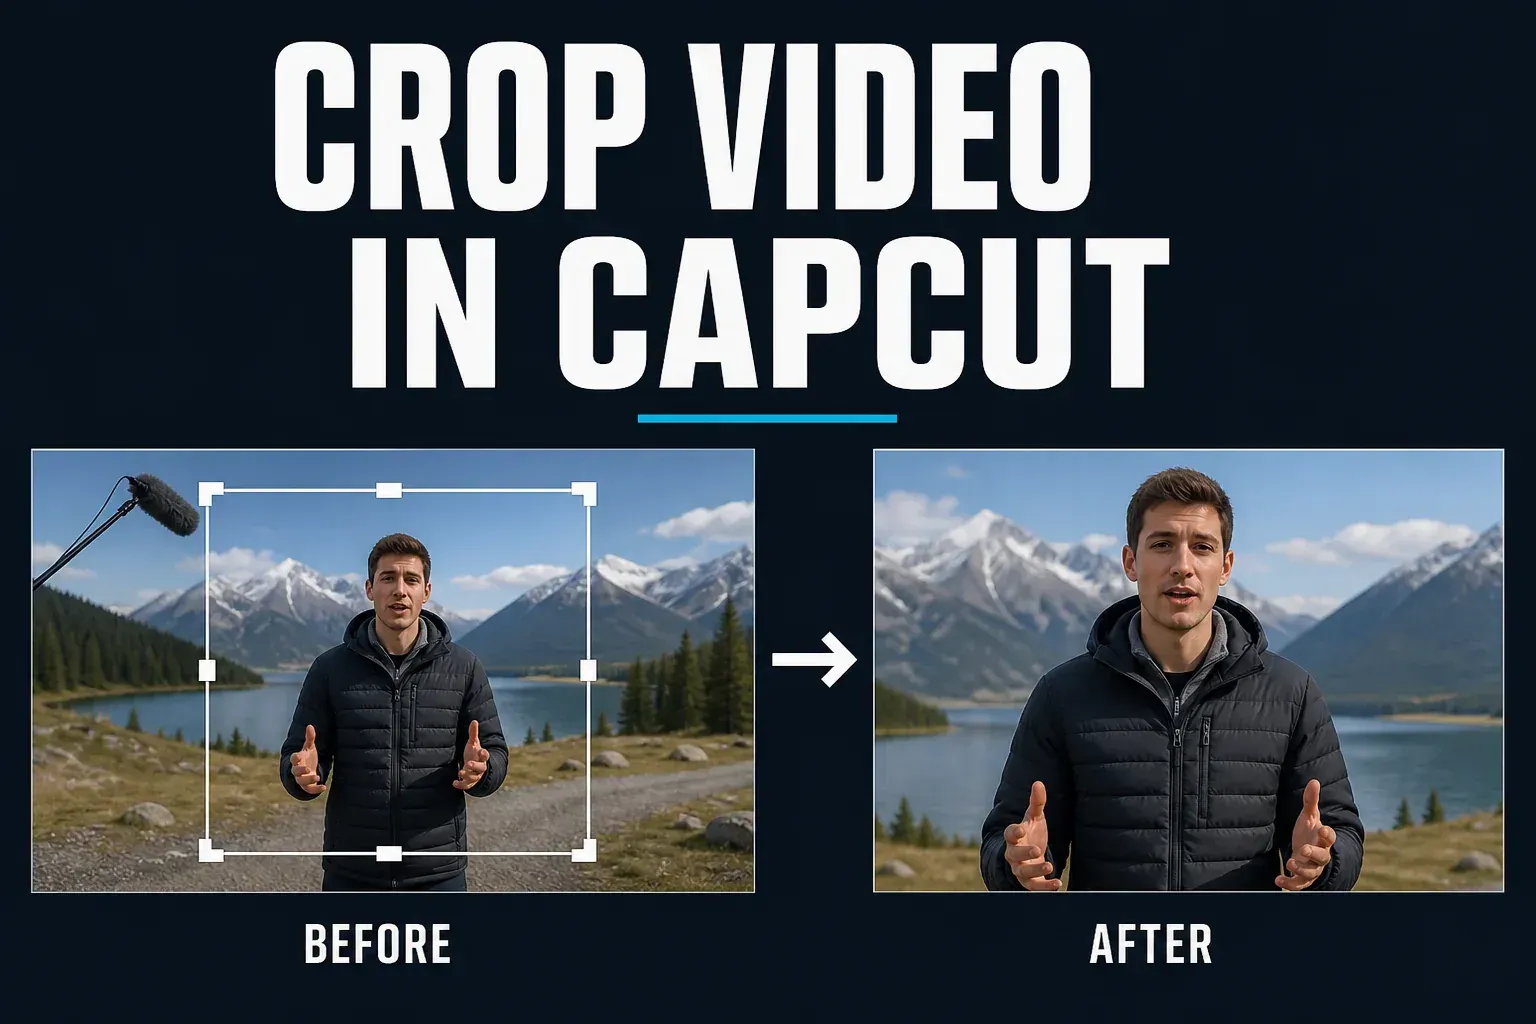
To crop a video in CapCut, select the video clip on the timeline, open Crop, drag the frame handles around the part you want to keep, then confirm the change. On Mobile, Crop may sit inside Edit or Transform. On Desktop, it is in the toolbar above the timeline. On Web, select the clip first, then look for the Crop icon near the preview or clip controls.
Checked September 4, 2026. CapCut currently offers manual Crop on Mobile, Desktop and Web. The label is stable, but the group and icon position can move between app builds, screen sizes and browser layouts.
Use the Right Control Before You Start
CapCut uses several controls that can make a picture look tighter. They do different jobs. Choosing the wrong one is how a simple crop turns into black bars, a soft export or a subject that drifts out of frame.
| You need to… | Use | What changes |
|---|---|---|
| Remove something near a frame edge | Crop | The outside picture area is cut away from the selected clip. |
| Remove time from the beginning, middle or end | Trim or Split | The clip duration changes; the visible frame doesn't. |
| Make the project vertical, square or widescreen | Canvas / Ratio | The project frame changes. The clip may still need repositioning. |
| Make the whole clip larger or move it | Scale / Position | The source is enlarged or shifted inside the project frame. |
| Keep a moving subject inside a new frame | Auto Reframe | CapCut analyzes the motion and adjusts framing over time. |
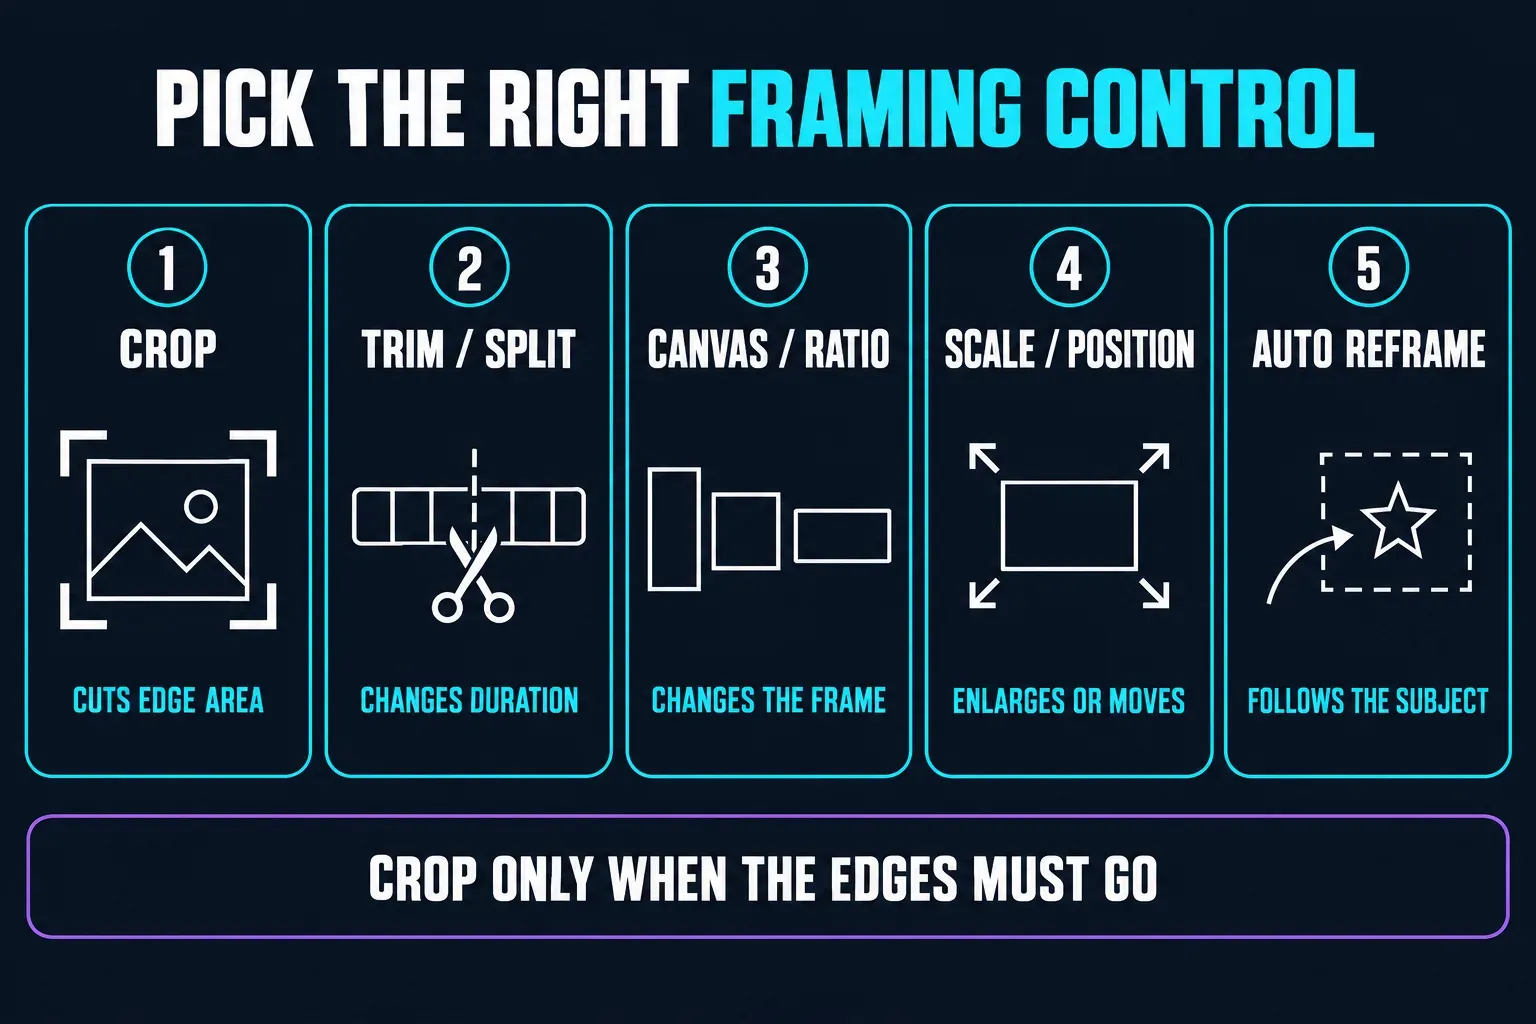
CapCut's own video cropper reference makes the same core distinction: cropping changes the visible area of each frame, while trimming changes duration. This guide stays with manual Crop. The full project-size workflow belongs in the separate Aspect Ratio lesson.
Choose Your CapCut Platform
| Platform | Quick path | Confirmation |
|---|---|---|
| Mobile | Select clip → Edit / Transform → Crop | Tap the checkmark. |
| Desktop | Select clip → Crop above timeline | Click Confirm. |
| Web | Select clip → Crop near preview controls | Apply or confirm, then preview. |
How to Crop a Video in CapCut Mobile
The selection comes first. If the bottom toolbar shows project-wide tools, tap the video strip on the timeline, not the preview, text layer, audio track or empty space.
- Open the project and tap the video clip you want to crop.
- Tap Edit or Transform if that group appears in your build. Swipe the bottom toolbar if needed.
- Tap Crop. Choose Free for independent edge control, or a fixed crop shape if you already know the frame you need.
- Drag the corner or edge handles inward. Reposition the picture so the important subject remains inside the crop box.
- Tap the checkmark, then play the clip from beginning to end. A crop that works on the first frame can cut off a subject after they move.
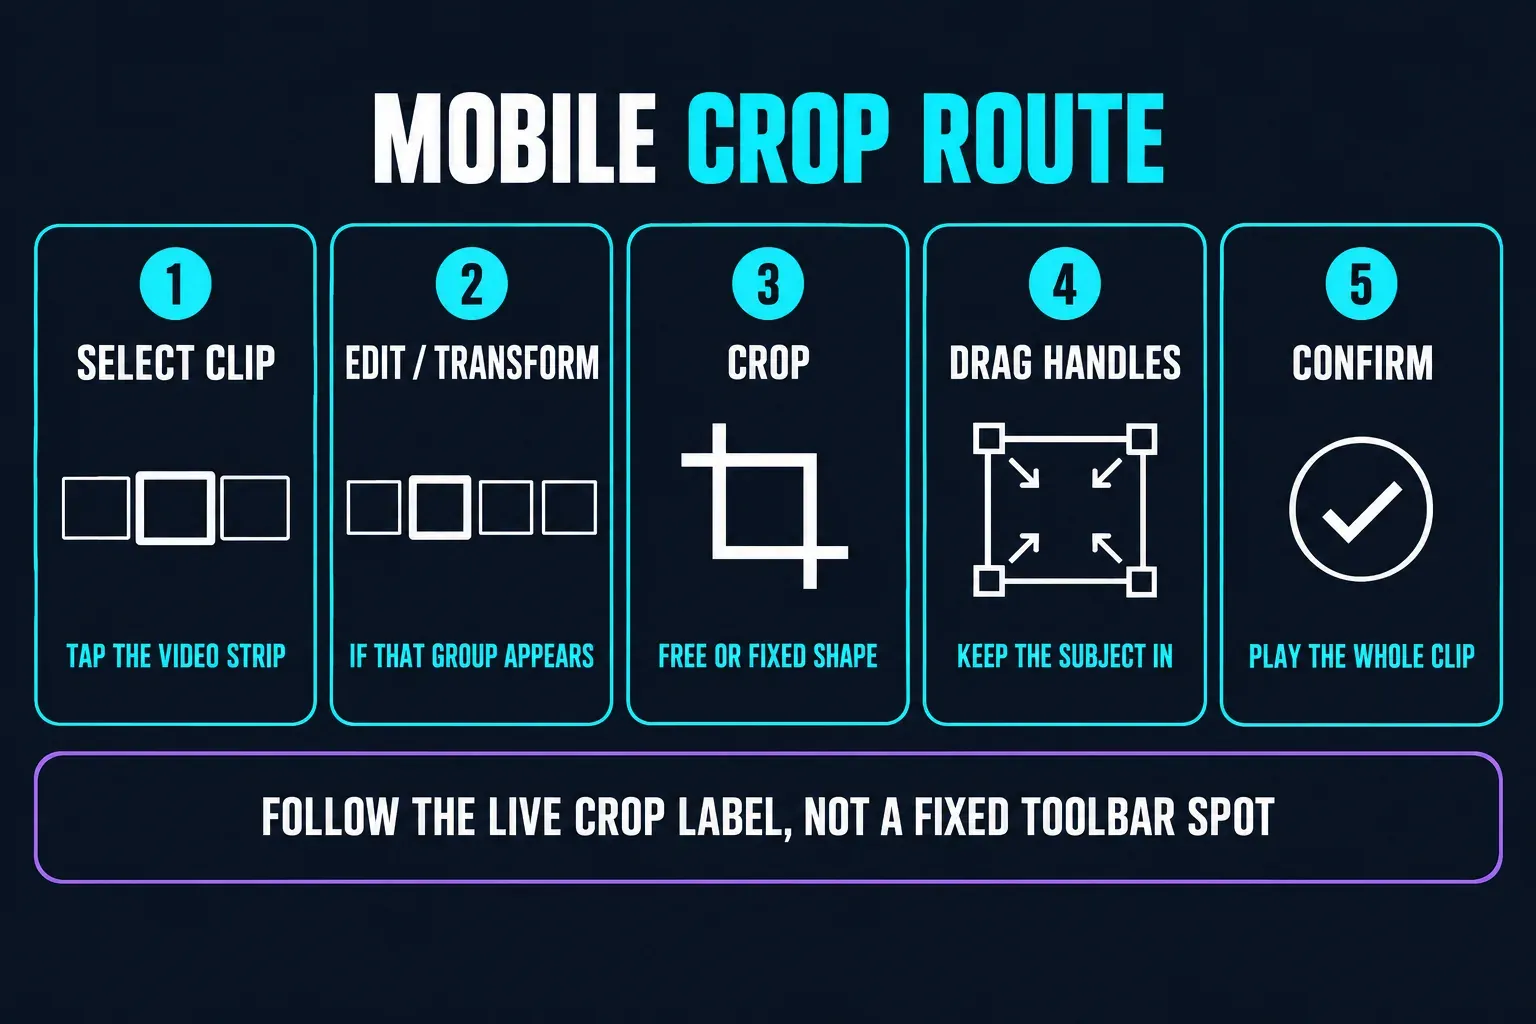
CapCut's official Mobile crop reference currently describes selecting the clip, opening Edit and choosing Crop beside Mirror and Rotate. Other CapCut pages use different wording, so trust the live Crop label rather than looking for one permanent toolbar position.
How to Crop a Video in CapCut Desktop
- Import the source and place it on the timeline.
- Click the intended video clip. A selected timeline item has a visible outline.
- Click the Crop icon in the toolbar above the timeline. In the current English Desktop build it uses a square-corner crop symbol.
- Leave the dropdown on Free for a manual crop, or choose a fixed shape. Drag the handles and reposition the picture inside the box.
- Click Confirm. Play the full selected clip before opening Export.
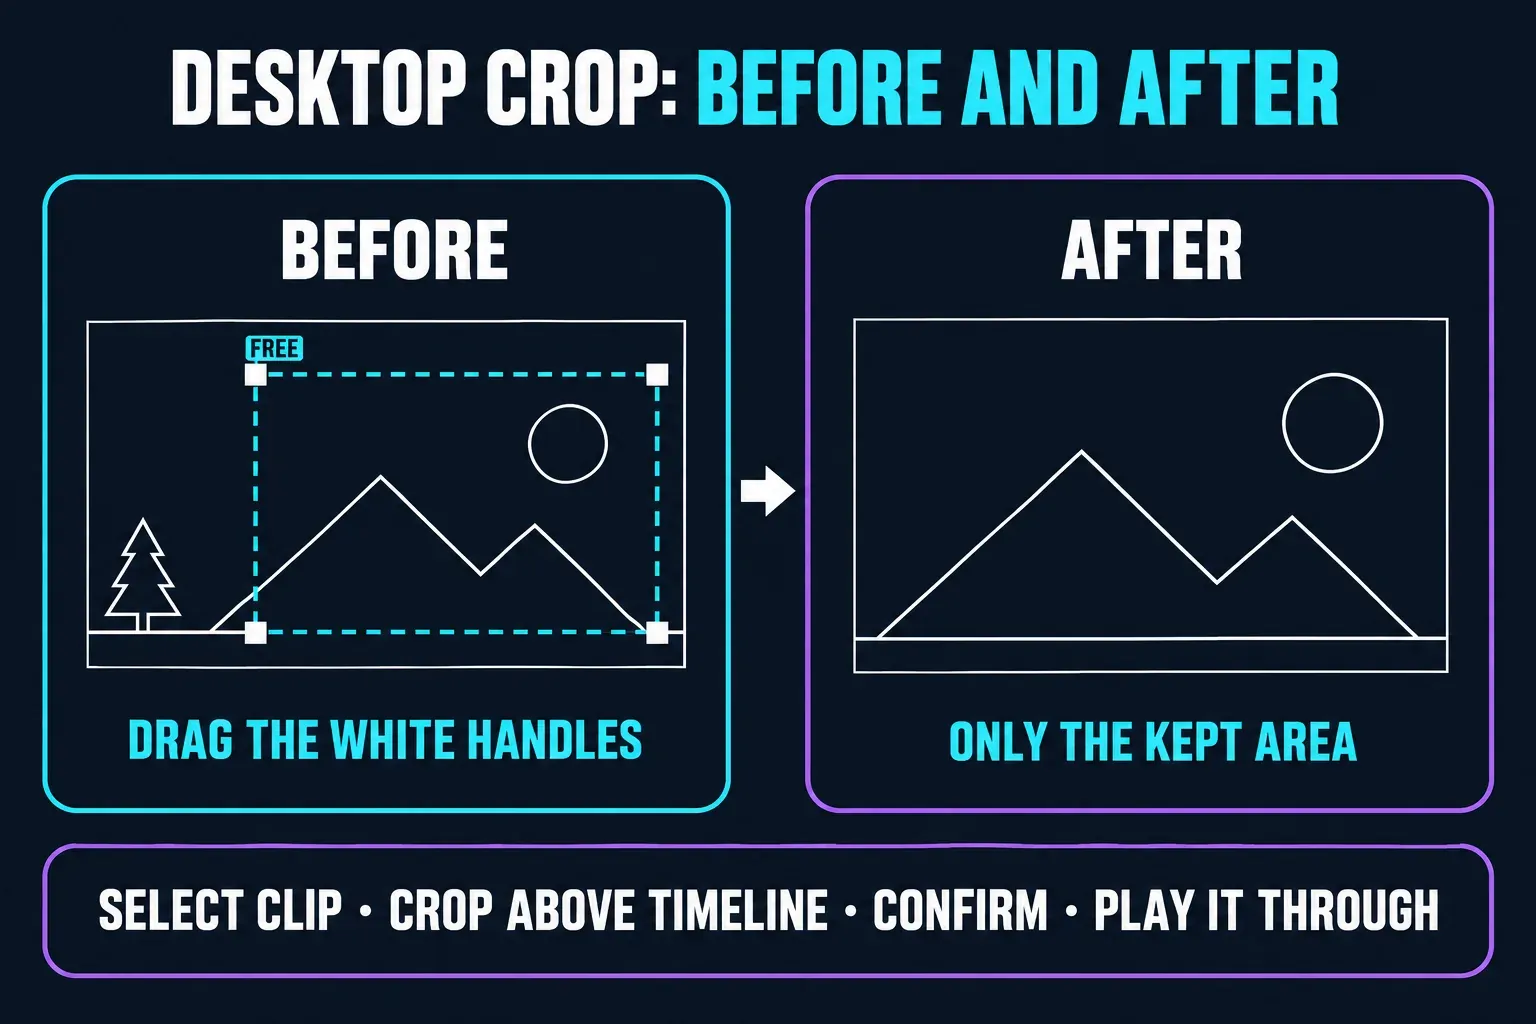
The current CapCut Desktop crop tutorial also places Crop above the timeline and documents both Free and fixed-ratio options. If your window is narrow, an icon can move into a compact menu; widening the app is safer than assuming the tool was removed.
How to Crop a Video in CapCut Web
- Open the project and wait until the source clip is available on the browser timeline.
- Click the video clip. Crop controls may not appear while the canvas, an overlay or empty timeline space is active.
- Click Crop near the preview or selected-clip controls.
- Adjust the frame, apply the change and play through the whole clip.
- Export a short sample before committing to a long browser render.
CapCut's current Web crop instructions use the same selected-clip sequence. Browser layouts can collapse controls sooner than Desktop, so zoom the page back to 100% and widen the window if Crop is present but hidden. The CapCut Web Editor guide covers upload, browser and project problems that affect more than this one tool.
Crop Only One Part of a Video
Crop applies to the selected timeline clip. If the tight framing should begin and end at specific moments, isolate that time range first:
- Put the playhead on the first frame that needs the crop and choose Split.
- Move to the first frame after the crop should end and split again.
- Select the new middle clip and apply Crop to that clip only.
- Play across both edit points. Check for a visible jump in framing.
If the jump is distracting, a gradual Scale/Position move may fit better than a sudden crop. The CapCut cut, trim and split guide explains precise split points and what happens to linked overlays, captions and audio.
Why Cropping Leaves Black Bars
Black bars usually mean the clip and the project canvas have different shapes. Cropping harder is only one possible answer, and it throws away more of the picture.
- Keep the full frame when every edge matters. Accept the bars or choose a background.
- Fill the canvas when edge content can be sacrificed. Scale and reposition the clip until the project frame is covered.
- Add a background when you need the complete source and no empty space. A blurred duplicate or simple color can fill the canvas behind it.
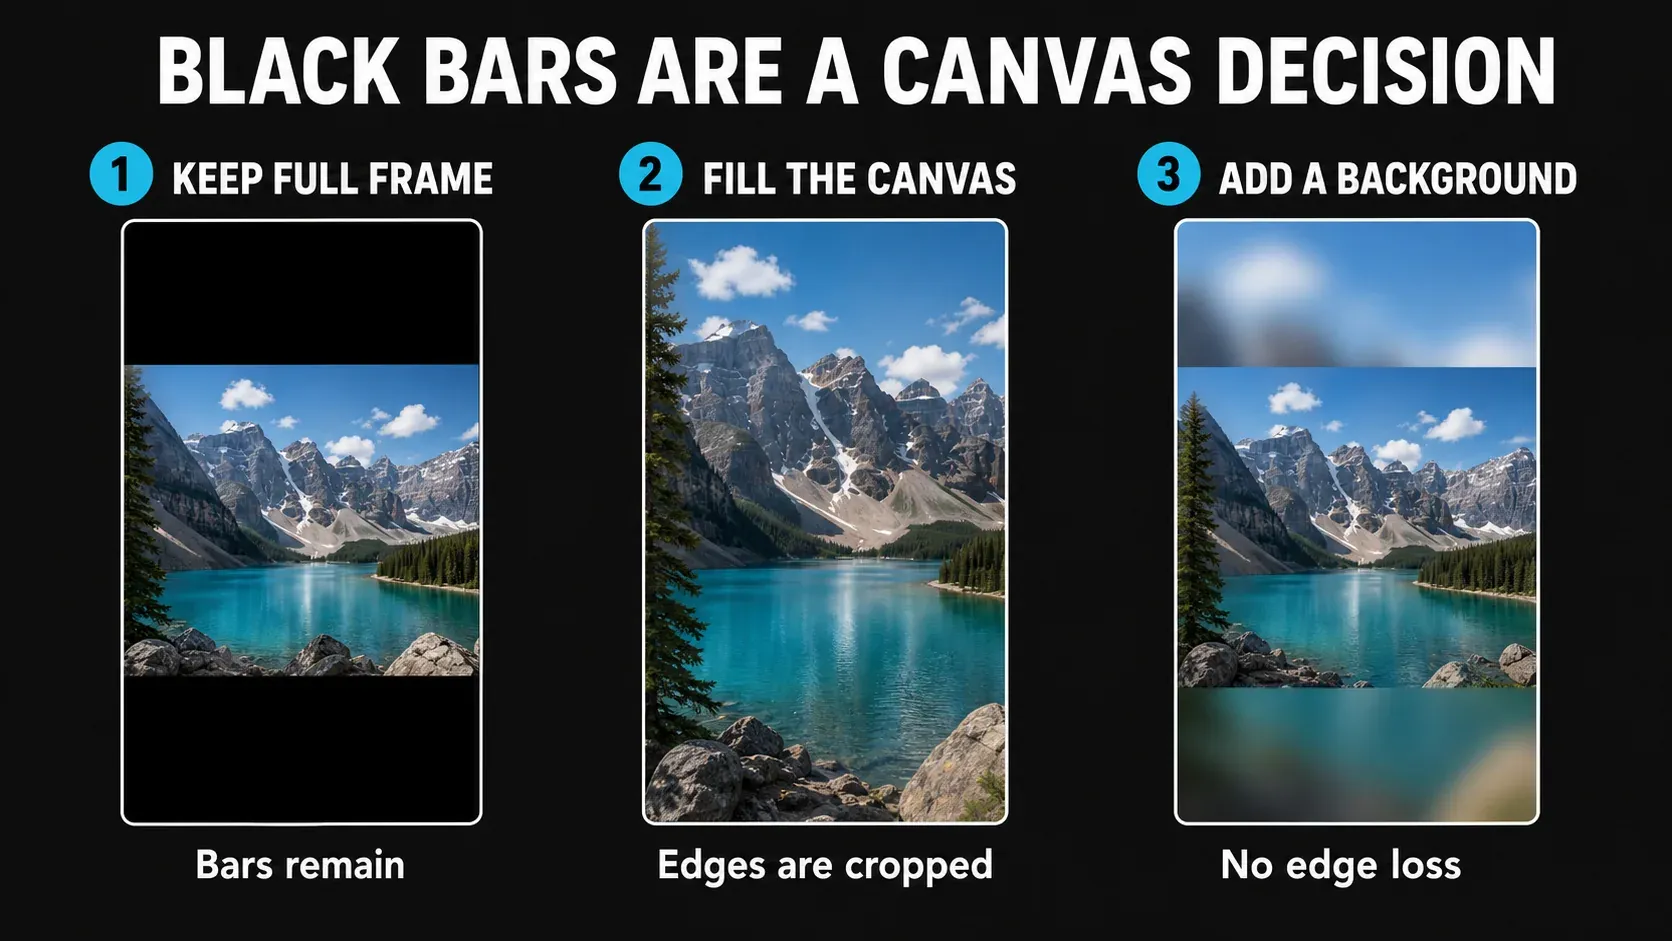
Don't use manual Crop to chase a person who moves around the shot. CapCut currently treats Auto Reframe as a separate Pro feature that analyzes subject movement. Our CapCut Auto Reframe guide explains when that paid route saves enough manual work to make sense.
Crop Without Making the Export Look Soft
A tight crop doesn't invent new detail. It keeps a smaller part of the source and asks that part to fill more of the output. The result may look fine in a small preview but soft on a full phone or monitor.
- Start with the highest-resolution source you have.
- Crop only as tightly as the composition needs.
- Don't judge quality from the editor preview alone. CapCut's blurry-video guidance warns that preview quality can differ and that excessive zoom or crop can pixelate footage.
- Export a five- to ten-second test at the resolution and frame rate available for the real delivery.
- Watch that file outside CapCut, ideally on a second device. Check faces, text, fine edges, black bars and any watermark before rendering the full project.
High-resolution export options are not identical on every device or platform. CapCut's export documentation says availability depends on the platform, hardware and source. Use our CapCut export settings breakdown for the output decision instead of assuming that a larger number restores detail removed by an extreme crop.
Crop Is Missing, Limited or Not Applying
- Select a video clip. Crop may not appear for audio, text, empty timeline space or the project canvas.
- Expose the full toolbar. Swipe on Mobile, widen Desktop, or return browser zoom to 100% on Web.
- Reset once. Reopen Crop and use Reset before dragging the handles again.
- Check the media type. A still image, nested clip, template segment or compound clip may expose different controls.
- Update without deleting your project. Check the official store or CapCut's Desktop updater. Preserve local drafts and source media before reinstalling anything.
- Test a clean duplicate. If Crop fails only on one complicated clip, duplicate the project and remove effects or nesting before blaming the whole app.
If CapCut is freezing, crashing or failing outside the Crop window too, use the broader CapCut not working checklist.
CapCut Crop FAQ
Where is Crop in CapCut Mobile?
Tap the video clip on the timeline first. Open Edit or Transform if that group appears, swipe the bottom toolbar and tap Crop. The exact group and icon position can move between app builds.
Where is Crop in CapCut Desktop?
Select a video clip and look in the toolbar above the timeline for the square-corner Crop icon. If the app window is narrow, widen it or check the compact tool menu.
Is Crop the same as changing the aspect ratio?
No. Crop removes outer picture area from a selected clip. Canvas or Ratio changes the shape of the project frame. You may use both, but they solve different parts of the job.
Can I crop only one part of a video?
Yes. Split at the first frame of the section and at the first frame immediately after it, select the new middle clip and apply Crop to that clip. Preview both joins because the framing changes suddenly.
Why are there black bars after I crop?
The cropped clip may not fill the project canvas. Decide whether to keep the full picture with bars, scale and reposition it to fill the canvas, or place a background behind it.
Does cropping reduce video quality?
It can make the result look softer when a small part of the source is enlarged to fill the output. Use a strong source, avoid unnecessary over-cropping and judge a short exported file outside the editor.
This lesson is part of our CapCut tutorial for beginners. After the frame looks right, test the exported file before adding more effects; a crop is only useful if it survives the final screen as well as the editor preview.