

To change the aspect ratio in CapCut, change the project or canvas ratio, not the clip's Crop setting. Choose a frame such as 9:16, 16:9 or 1:1, then decide whether the clip should fit inside it, fill it by cropping the edges, or sit over a background. Check captions and overlays before you export; changing the frame doesn't automatically repair the composition.
The ratio button is only the first decision. A landscape clip placed inside a vertical project can show empty bands. Zooming until those bands disappear can cut off the subject. Auto Reframe may follow a moving subject, but that is a different tool again. This guide separates those choices so you can change the frame without rebuilding the wrong part of the edit.
Labels move between CapCut builds. Each section below names the setting that changes the whole frame; if yours sits somewhere else, look for that project-frame control rather than Crop on a selected clip.
Use Ratio, Crop or Auto Reframe?
| What you want to change | Use | What it affects |
|---|---|---|
| The shape of the whole project | Aspect ratio / Canvas / Resize | The frame every clip, caption and overlay sits inside |
| Visible edges of one selected clip | Crop | That clip's source area; the project frame stays the same |
| A moving subject during a vertical conversion | Auto Reframe | Composition over time, using subject tracking where the tool is available |
| Pixel dimensions, frame rate or bitrate | Export settings | The rendered file, not the canvas shape |
That ownership matters. If the source itself is sideways or mirrored, correct it with Rotate or Mirror before choosing the canvas. If you crop a clip and still see black space, the canvas and the cropped clip are two different shapes. If you choose 9:16 and the subject leaves the frame halfway through, the canvas is correct but the composition still needs work.
Choose the Ratio Before You Reframe the Clip
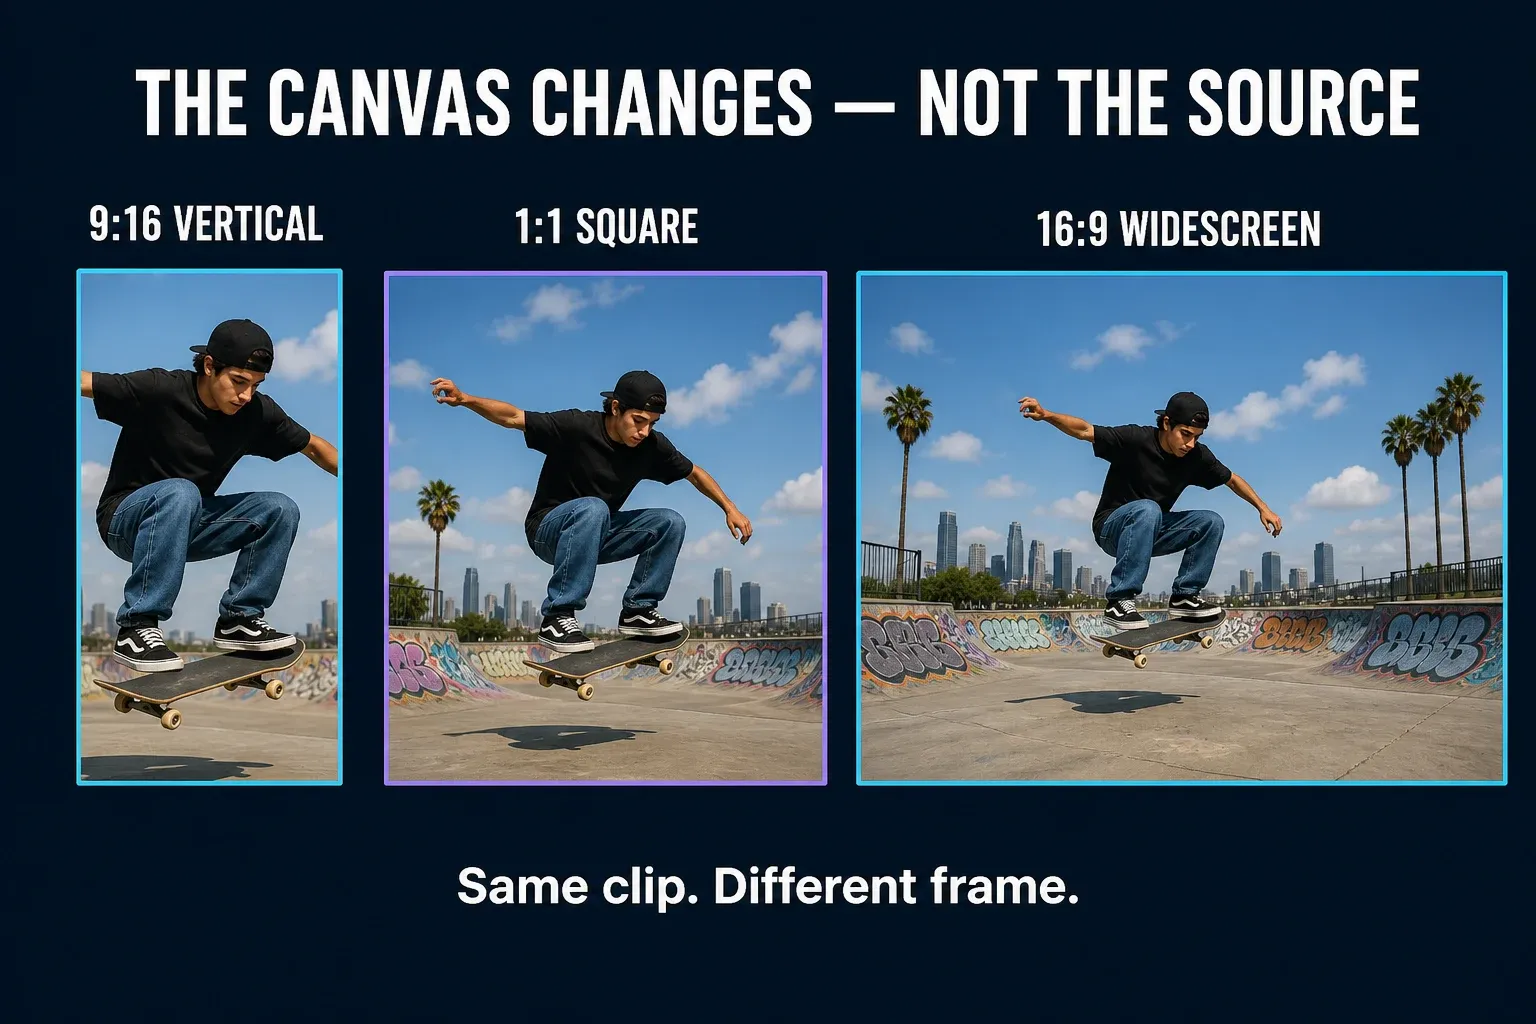
Start with the destination, then check the actual preview. 9:16 is the usual full-screen vertical starting point for TikTok, Reels and Shorts. 16:9 is the familiar widescreen frame. 1:1 creates a square canvas. Other portrait and cinematic presets may appear depending on the CapCut platform and build.
These numbers describe shape, not quality. A 9:16 project could later be exported at several pixel sizes; selecting 9:16 doesn't itself promise a 1080×1920 file. CapCut's aspect-ratio guide treats the ratio choice separately from resolution, bitrate, codec and frame rate in the export step.
If you have not placed captions, overlays, masks or keyframes yet, set the ratio now. CapCut's own layout troubleshooting warns that changing the frame mid-project can disturb the arrangement of elements. You can change it later, but you need a complete layout pass afterward.
How to Change Aspect Ratio in CapCut Mobile
- Open the project and return to the main editing toolbar. If clip-only controls are open, tap an empty part of the canvas or use the back control to close them.
- Find Aspect ratio or Canvas in the bottom toolbar. The wording can move between current iPhone and Android builds, so look for the project-frame control rather than Crop inside the selected clip.
- Choose the target shape, such as 9:16, 16:9 or 1:1. Watch the canvas change before touching the clip scale.
- Tap the clip and reposition it. Pinch to enlarge only if you're willing to lose edge content; otherwise keep the full clip and add a color, blur or image background.
- Scrub from the first frame to the last. Recheck captions, stickers, overlays and any subject that moves near an edge.
CapCut's video-resizer documentation uses both Canvas and ratio language across its platform explanations. That is why a guide that promises one permanent button name is brittle. The reliable distinction is project frame versus clip Crop.
How to Change Aspect Ratio in CapCut Desktop
- Open the project and identify the current project ratio near the preview or in project details.
- Click an empty part of the timeline so nothing is selected, then open Details, choose Modify and set the Aspect ratio field in the project settings that open. Primal Video's CapCut desktop tutorial lists aspect ratio, resolution and frame rate as the project settings to confirm there. Some layouts also expose the current ratio closer to the Player.
- Choose the canvas shape. Pick a preset such as 9:16, 16:9 or 1:1; the exact list can vary by version.
- Select the clip and use position and scale to compose it inside the new frame. Don't stretch the picture to force a fit.
- Play through the edit and inspect every section that contains text, overlays, masks or animated position changes.
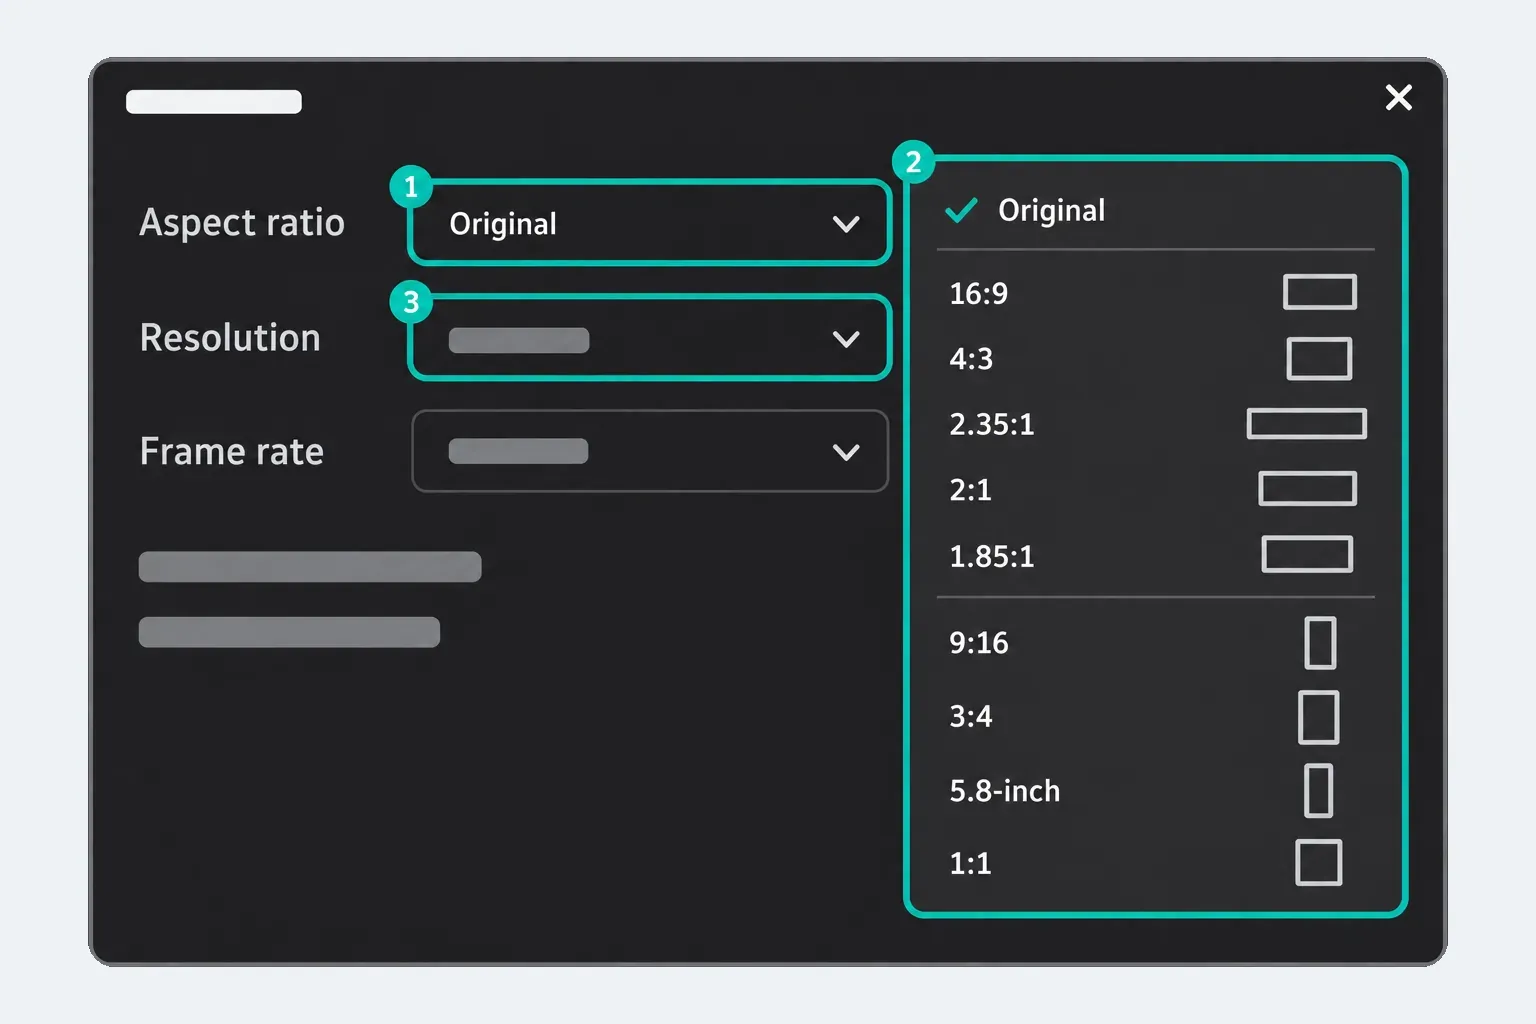
The important detail is not the length of the preset list; it is that Aspect ratio, Resolution and Frame rate are separate project settings.
How to Change Aspect Ratio in CapCut Web
- Open the project in CapCut Web and select the project canvas rather than a Crop handle on the clip.
- Look for Screen Aspect Ratio, Resize, Canvas, or the current ratio label such as Original or 16:9. CapCut has used more than one label in its live Web routes.
- Choose the destination ratio and let the preview redraw the canvas.
- Reposition or scale the clip. If the whole source must remain visible, use a background treatment instead of filling the frame by cutting away the edges.
- Export a short test and watch the downloaded file outside the editor before you render the full project.
The current official Web resize walkthrough calls the control Screen Aspect Ratio, while other CapCut pages use Resize or a ratio dropdown. Treat the visible control in your editor as the authority; account and interface changes can arrive before documentation catches up.
Fix Black Bars After Changing the Ratio
Black or empty bands are not proof that the ratio change failed. They mean the source clip and the new canvas have different shapes. Pick one of three honest treatments:
- Fit: keep every edge of the source. This preserves content but can leave empty space.
- Fill: enlarge and reposition the clip until the canvas is full. This removes the bands by cropping some edge content.
- Background: keep the complete clip and fill the spare area with color, blur or an image. This is useful when no edge can be sacrificed.
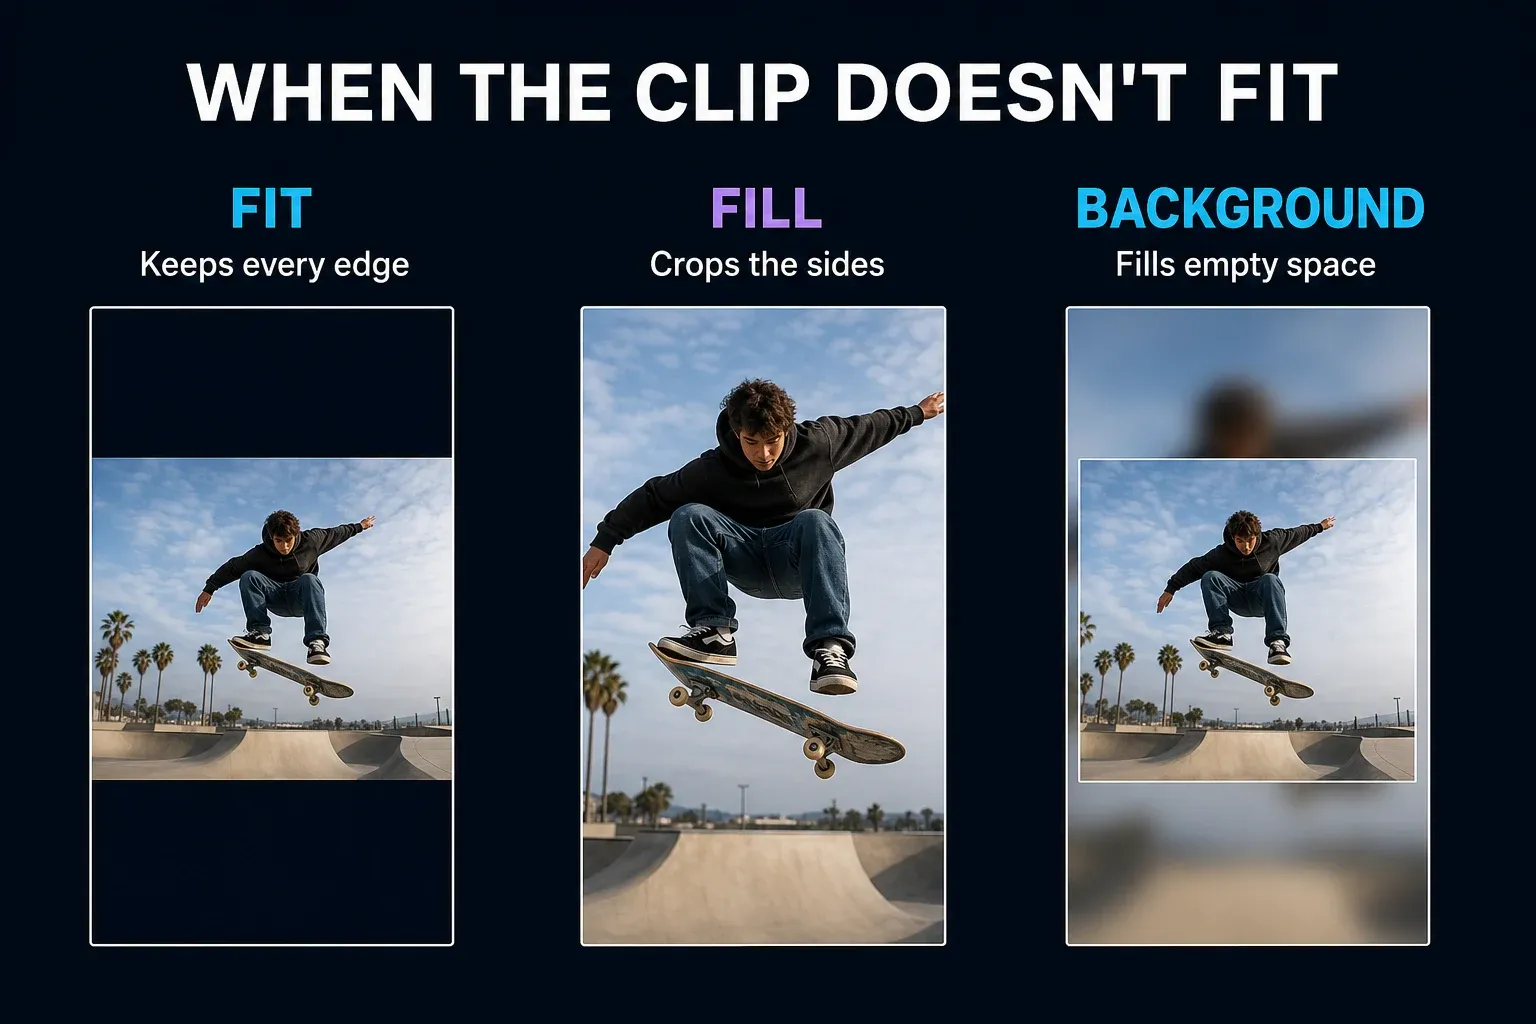
CapCut's official resizer describes the same background choices. If the subject moves and a fixed position fails later in the clip, use position keyframes or move to the dedicated Auto Reframe workflow instead of zooming further.
Changing the Ratio After You Already Edited
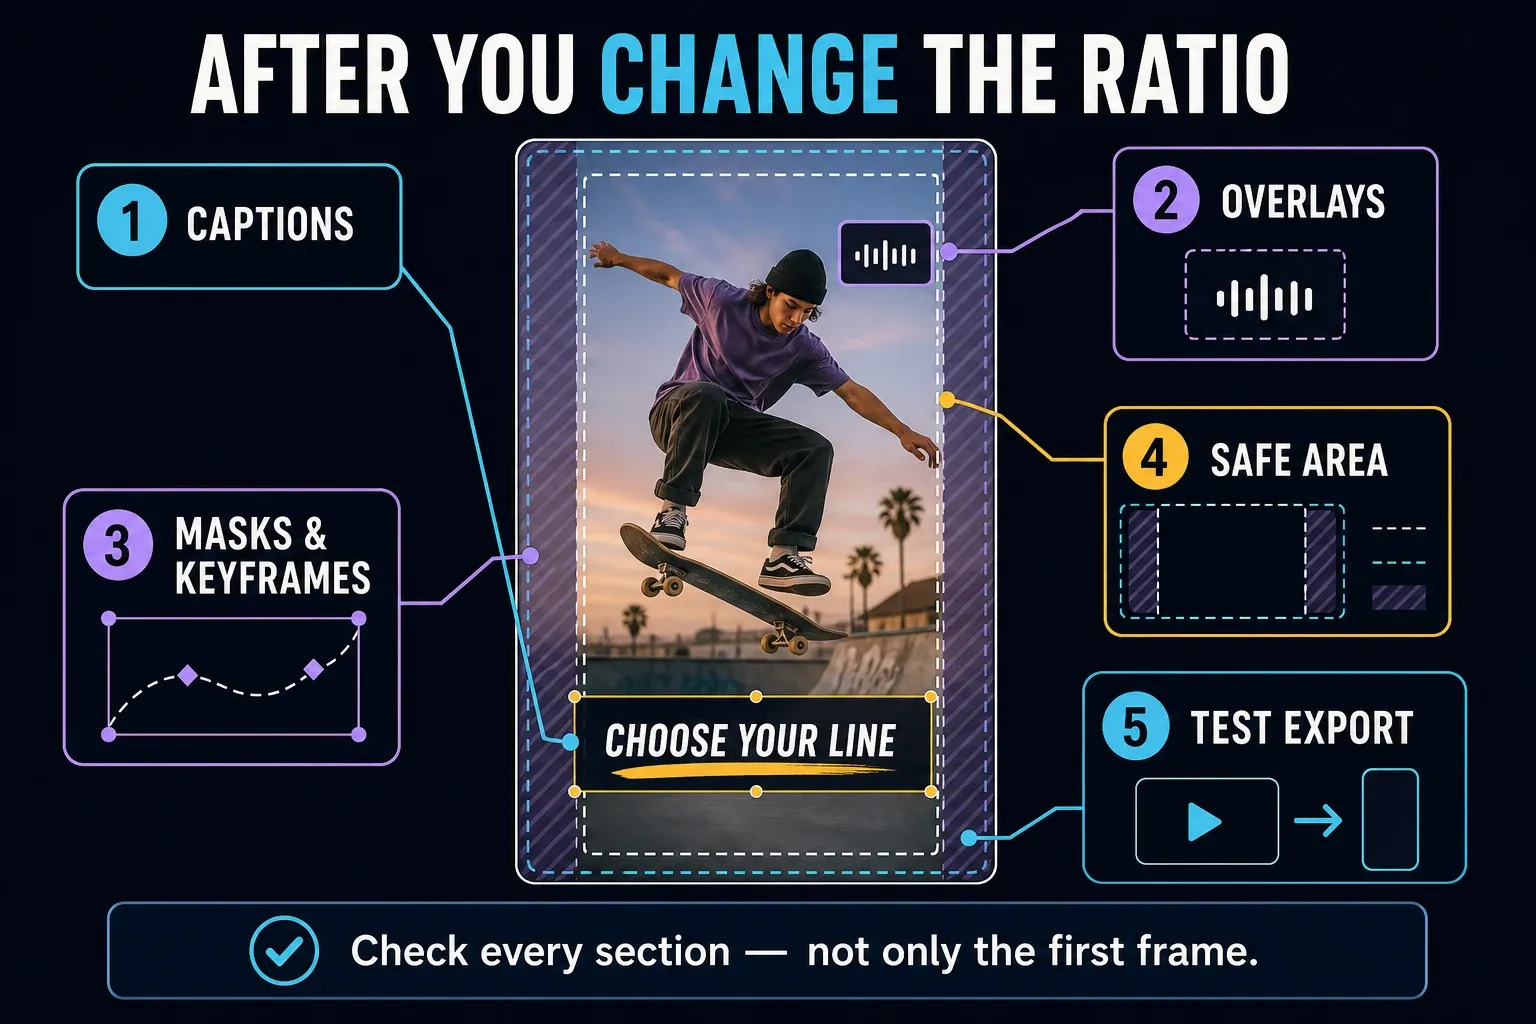
You don't need to rebuild the project automatically, but you do need to audit it from start to finish. A ratio change can move an overlay off the intended corner, place captions under platform controls, expose the edge of a mask, or make an old position keyframe land outside the new frame.
- Duplicate the project or preserve the working version before a major conversion.
- Change the ratio once; don't bounce between presets while repairing the layout.
- Review every caption and text layer at its longest line.
- Check overlays, logos, stickers, masks and picture-in-picture frames.
- Play through the position and scale keyframes instead of checking the first frame alone.
- Export a short representative section and watch it on another screen.
Aspect Ratio Is Not Export Resolution
Aspect ratio answers “what shape is the frame?” Resolution answers “how many pixels does the exported frame contain?” A vertical frame can be low or high resolution; a widescreen frame can be exported at several pixel sizes. Keep those decisions in that order: set the canvas, repair the composition, then choose export settings that match the source and destination.
Don't upscale a soft source and expect the ratio change to restore detail. Filling a narrow vertical canvas from a landscape clip may require a stronger crop, which makes limited source resolution more visible. If the preview is composed correctly but the finished file still looks soft, check our CapCut export settings breakdown rather than changing the ratio again.
If Aspect Ratio Is Missing or Not Applying
- You only see clip controls: close the selected-clip toolbar and return to the project or canvas controls.
- You opened Crop: back out. Crop changes one clip; it doesn't define the whole project frame.
- The list differs from this guide: use the presets your current build exposes. Don't reinstall a working app just to chase an older menu.
- The ratio changes but the clip doesn't fill it: choose Fit, Fill/crop or Background. That is a composition decision, not a failed setting.
- One part still leaves the frame: check position keyframes or Auto Reframe for that moving section.
- The downloaded file has the wrong dimensions: return to Export and check resolution separately.
CapCut Aspect Ratio FAQ
How do I change the aspect ratio in CapCut Mobile?
Open the project-level editing toolbar, find Aspect ratio or Canvas, and choose the target frame. Then reposition the clip and decide whether to fit it, fill the frame by cropping, or add a background.
How do I change the aspect ratio in CapCut on PC or Mac?
Use the ratio control near the Player, or click an empty part of the timeline, open Details, choose Modify and change Aspect ratio in the project settings. The exact location and preset list can vary by Desktop build.
What aspect ratio should I use for TikTok, Reels or Shorts?
9:16 is the usual full-screen vertical starting point. After selecting it, check the subject, captions and interface-safe areas for the actual destination instead of assuming the preset completes the layout.
Why does CapCut add black bars after I change the ratio?
The clip and canvas have different shapes. Keep every edge with Fit, fill the canvas by cropping and repositioning, or preserve the full clip over a color, blurred or image background.
Is changing aspect ratio the same as cropping a video?
No. Aspect ratio changes the project frame. Crop removes visible edge content from one selected clip. You may use both, but they solve different parts of the composition.
Does changing aspect ratio reduce video quality?
The ratio setting itself changes shape, not source detail. Quality can appear worse when Fill requires a strong crop and enlargement, or when the exported resolution is too low for the new framing.
Set the frame first, then make the clip fit it on purpose. Choose Ratio for the project, Crop for one clip, and Auto Reframe when motion needs tracking. Once the composition holds from the first frame to the last, finish with a real export check and continue through the CapCut tutorials hub.