

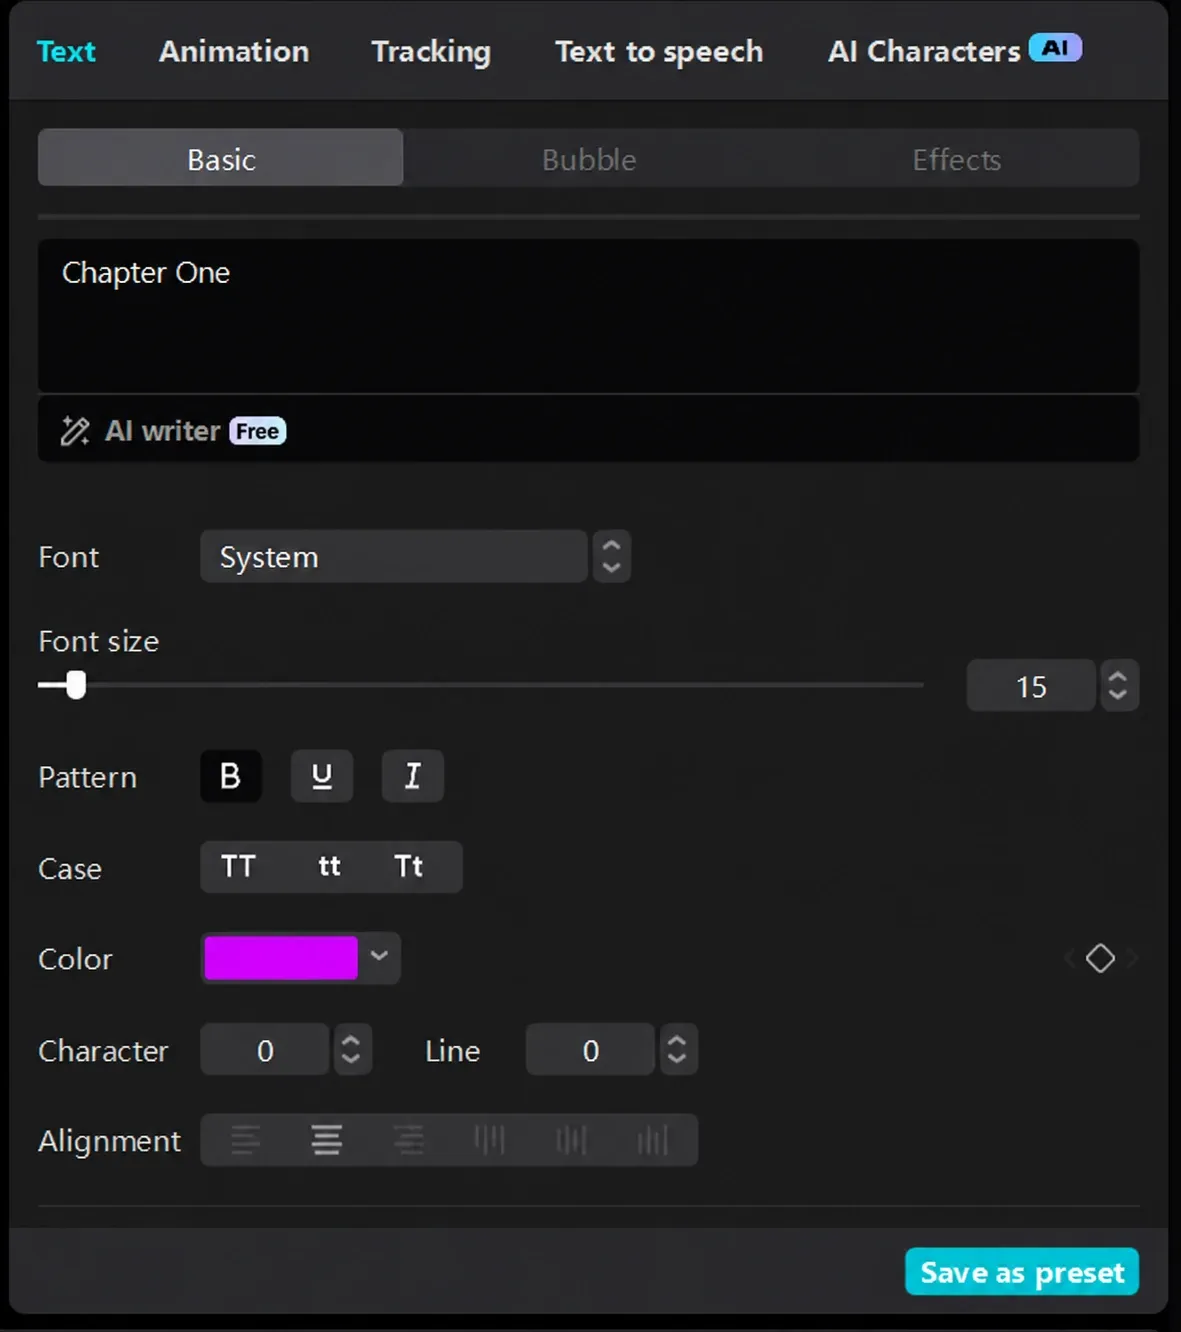
To save a text preset in CapCut Desktop, select a finished text clip, open Text > Basic in the right panel and click Save as preset. To use it again, open the Text library and look under Yours > Presets, or Add text > Presets in the older layout. Add the saved item to your timeline, replace its wording and check its position and timing against the new video.
I'd keep a small set of named styles for recurring titles, because finding the right preset should take less work than rebuilding it. Save a useful finished treatment, then keep the editable project that contains it. A preset library and a project backup solve different problems.
Which kind of text preset do you need?
CapCut uses similar names for several different text tools. Pick the one that matches the job before searching through the library.
| What you want | Start here | What still needs attention |
|---|---|---|
| Reuse your own title styling in another project | Save a custom text preset from a selected text clip | New wording, line breaks, timing and framing |
| Pick a ready-made title design | Text templates | Editable fields, animation and any plan restriction shown on the item |
| Change how text enters or leaves | Animation | Entrance and exit duration within the text clip |
| Style spoken subtitles | The selected caption group and its styling controls | Transcription, caption grouping, word timing and supported Apply to all behavior |
| Share fonts, colors and logos with collaborators | Your available Brand Kit or brand assets | The selected account, Space and team permissions |
A font is only one part of a text treatment. Size, alignment, outline, background and placement also affect whether a title works. Our guide to adding text in CapCut covers creating the first layer; this page focuses on saving and finding the style afterward.
Text > Basic shows the styling controls for the selected clip. Your saved presets are library items you add from Text. Finish the style in Basic, then use Save as preset when you want to reuse it.
Save a custom text preset on PC or Mac
Work on a normal text clip first. If you're selecting the footage, the right panel shows video controls instead of the text controls you need.
- Open Text, add a default text clip and place it on the timeline above your footage.
- Select that text clip. Enter a short sample line that lets you judge the letters, spacing and outline.
- Open Text > Basic on the right. Set the font, size, color and alignment. Finish any stroke, shadow or background you want in the style.
- Position the text in the player. Check it over both a light and a dark part of the footage so a thin outline doesn't disappear halfway through the shot.
- Find Save as preset at the bottom of the text editing panel and save the treatment. If a naming field appears, choose a name that describes its job.
The selected-text panel and its save control are shown in CreateThat's desktop text walkthrough. Save as preset belongs to the text treatment you're editing; the main Export button creates a finished video instead.
Use names such as Hook white outline, Speaker lower left or Chapter dark background. Those are suggested names, not built-in CapCut categories. A description like Text Presets(4) won't help much when several saved items look similar.
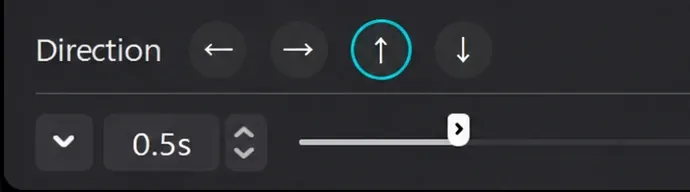
Keep motion deliberate. If you want the title to slide or fade, finish the movement before checking the saved item, then confirm what carries over when you insert it again. Our text animation guide separates animation length from the total length of the text clip. A reusable design still needs enough screen time for the new words.
Find saved text presets and use them in another project
Return to the Text library on the left. In layouts with a personal library, look under Yours > Presets. Older desktop layouts place Presets under Add text, alongside Default. Menu organization can change by version and platform, so look for the saved-text library rather than a visually similar effects category.
CHIP's preset instructions show the older Add text route and reuse in a different video. The newer Yours route also appears in the saved-preset naming discussion. These are alternative library layouts, not two folders that must both exist.
Add the saved item to an empty section of the timeline so you can inspect it before placing it over the edit. Replace the sample wording, move it to the correct moment and trim the text clip to the required duration.
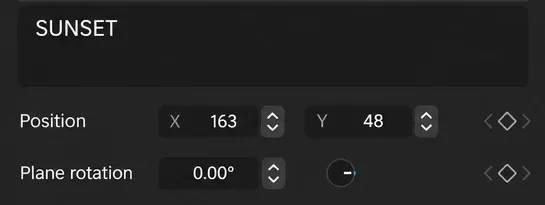
Then check the design with the new words. A one-word hook and a two-line sentence can share a font and still need different spacing. Watch for a name that runs off the frame, an outline that closes up small letters, or an animation that starts before the viewer can see the subject.
Don't assume that changing the original text later updates every title you've already inserted. Treat the new timeline clip as an item to inspect and edit. For a revised recurring design, save a clearly distinguishable version and check which one you use next time.
What a saved style does not guarantee
The useful question is whether the preset produces the right title in the destination project. Check these dependencies before trusting it across a series:
| Check | Why it matters |
|---|---|
| Font availability | A style's font choice isn't a separate copy of the font file or its license |
| Text and line breaks | New wording can wrap or overflow even when the settings match |
| Canvas shape | A lower-third designed for widescreen can land badly in a vertical video |
| Text clip duration | The new words may need more reading time |
| Motion | Entrance, exit and loop behavior must fit the new clip |
| Included assets | An effect or template used by the design can have its own availability or plan condition |
If the font is missing on the destination computer, use the custom font import guide and the font's own licensing terms. Saving a style doesn't grant permission to distribute a typeface to another editor.
For a team, keep the design name, font name and an approved reference frame together. The Brand Kit guide explains the shared-asset side. A saved title on one account isn't evidence that every collaborator can already access it.
Text presets are missing, or Save as preset isn't there
Start with the selected object and library. These checks preserve the edit and are more useful than immediately reinstalling CapCut.
The save button is missing. Select one ordinary text clip on the timeline and reopen its Text > Basic panel. Check the lower part of the panel. A video clip, an effect and an auto-caption selection can expose different controls. If a plan or account prompt appears, follow what it says for that item rather than assuming a paid subscription unlocks every preset workflow.
The saved item isn't in the list. Check the personal Text library, clear a search or category filter and confirm the CapCut account and selected workspace. If you saved it on another platform, first check whether it is still visible there. Finding it on the original device is different from proving it was synchronized to the new one.
CapCut says a preset with the same name already exists. Use a distinct name, then inspect the names in Text > Yours > Presets if that library is available. Users in the naming discussion linked above reported resolving the collision by renaming existing default-named items. That makes renaming a sensible check; it doesn't establish that deleting the library is necessary.
It disappeared after an update. Preserve the project that still contains the working title. The mobile missing-presets thread contains conflicting reports about where the controls moved and which accounts could see them. It supports checking the interface and account, not a claim that all presets have been permanently removed or that buying Teams will restore them.
I'd preserve the finished title before trying any reset, because the editable layer is the useful part you still have. Avoid deleting app data, removing presets or replacing the only master project just to make a library refresh.
Reuse the text safely when the library is unavailable
For the current project, copy the finished text clip and paste it, then change its words. CapCut's text-duplication help recommends this approach for consistent manual text and explains that newly created text doesn't have one universal batch setting for position, style and size.
For a recurring series, preserve a small master project containing the editable title treatment and its source media. Duplicate the project before adapting it. Keep a separate restorable copy using the project backup and transfer workflow, because another draft inside the same app isn't an independent backup.
An exported MP4 is useful as a visual reference, but importing it again gives you a video with the lettering baked into its frames. It doesn't recreate the font settings, editable words and original text track.
Using presets on mobile and with auto captions
On iPhone or Android, start by selecting the text itself and checking the available styling, template and preset controls. Don't follow the desktop sidebar path literally on a phone. If your mobile editor offers a personal save control, save the style and verify that you can insert it again before relying on it for the next project. If that control is absent, preserve a master draft containing the editable text.
For spoken captions, use the controls exposed by the selected caption group. A preset designed for a manual title doesn't create transcription, split speech into caption segments or fix their timing. Follow the auto captions guide for that workflow, and check the whole caption group before applying a visual change across it.
Before finishing the video, play through every reused title. Check the words, line breaks, animation and position on the final canvas, then inspect the exported file. The preset saves repeated setup; the final reading check still belongs to the new edit. Once the titles read correctly, return to the CapCut tutorial library for the next editing step.