

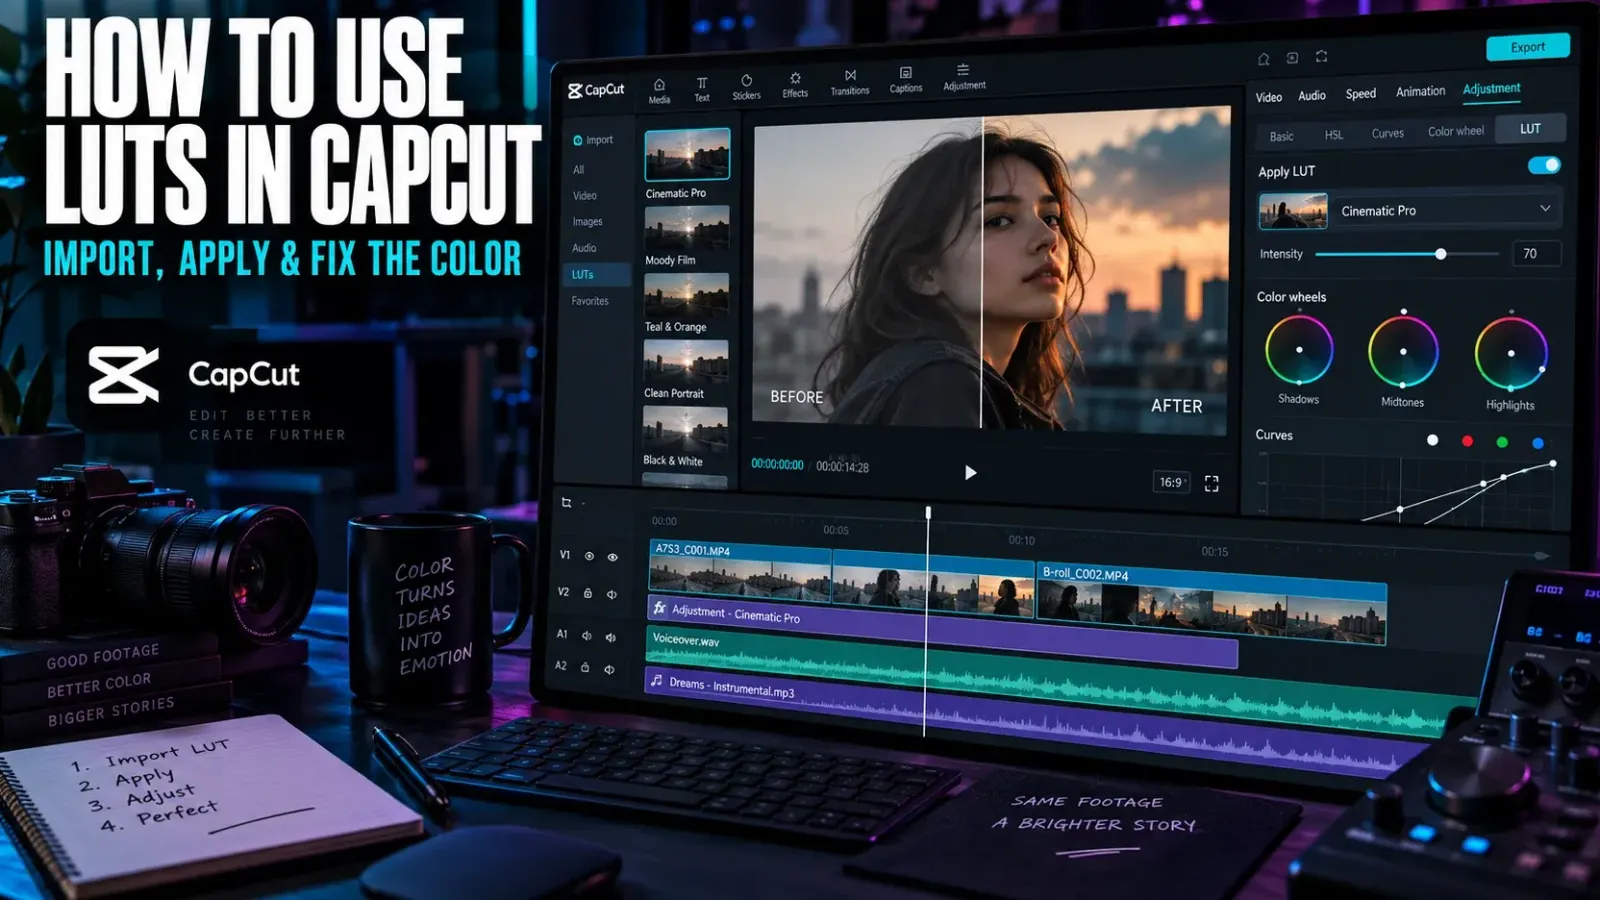
Checked September 21, 2026. CapCut panels and feature availability can vary by platform, account and app build. The import route below is confirmed for CapCut Desktop.
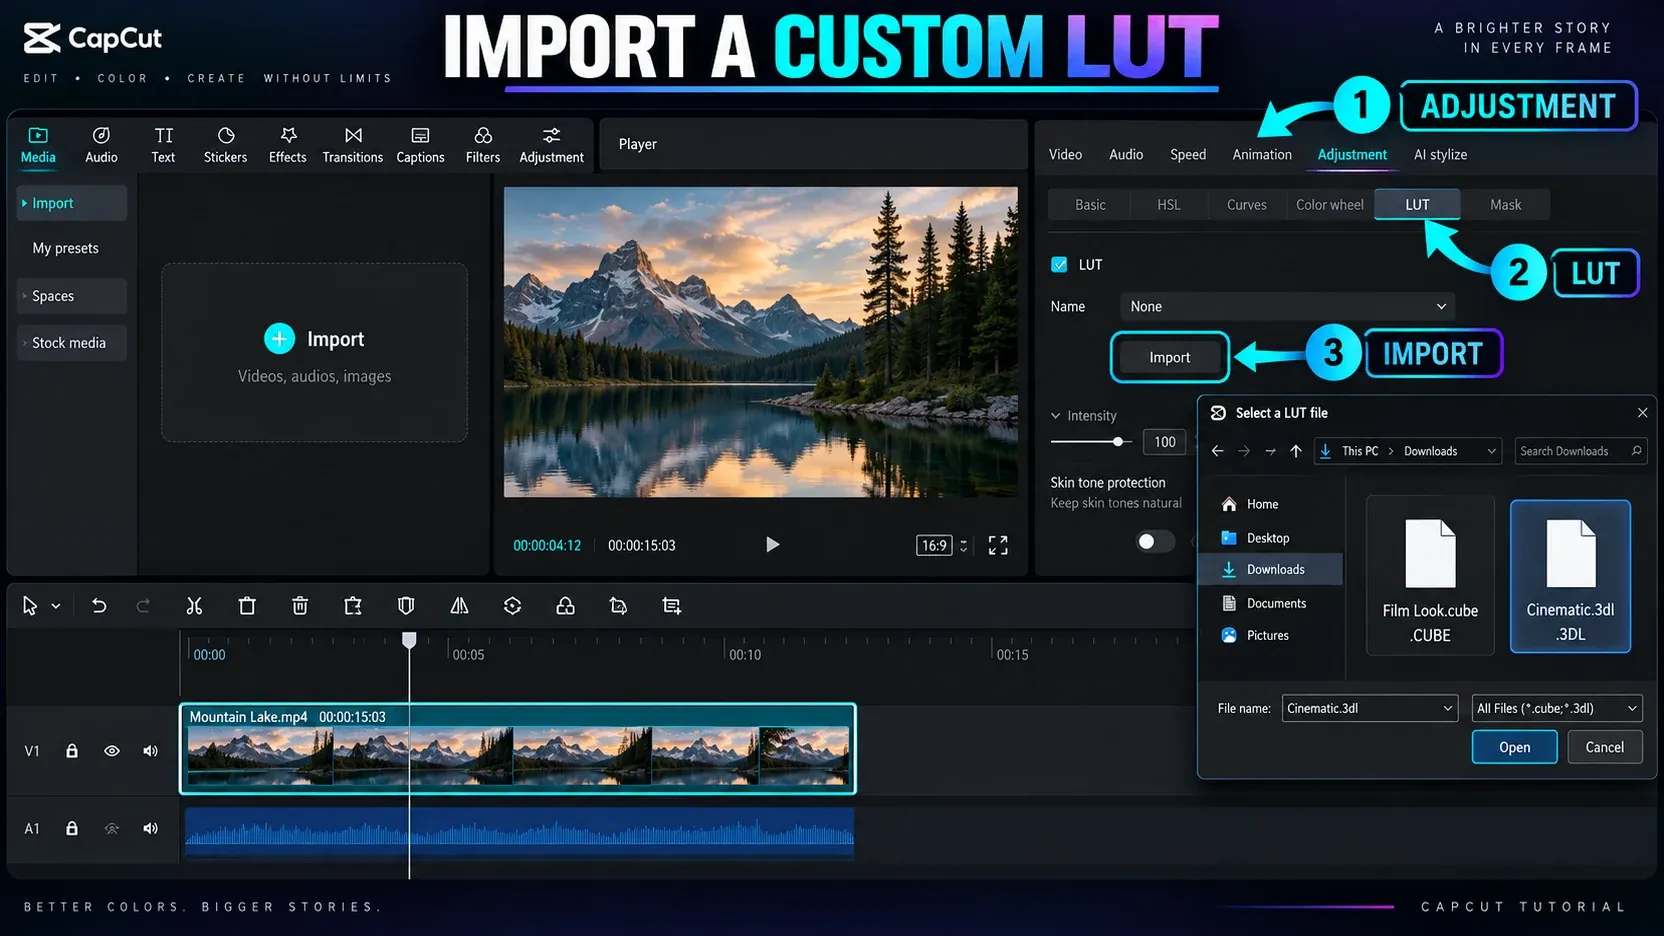
To import a LUT in CapCut Desktop, select the clip, open Adjustment, choose LUT, then click Import. CapCut's current guide says the Desktop editor accepts CUBE and 3DL files. Apply the LUT, lower or raise its intensity, then use the other color controls to correct the result before export.
The clicks are the easy part. The important decision is whether the file is a technical LUT that converts a camera profile or a creative LUT that adds a look. Applying the wrong type—or applying a strong look before correcting the clip—can crush shadows, clip bright areas and push skin toward orange, green or magenta.
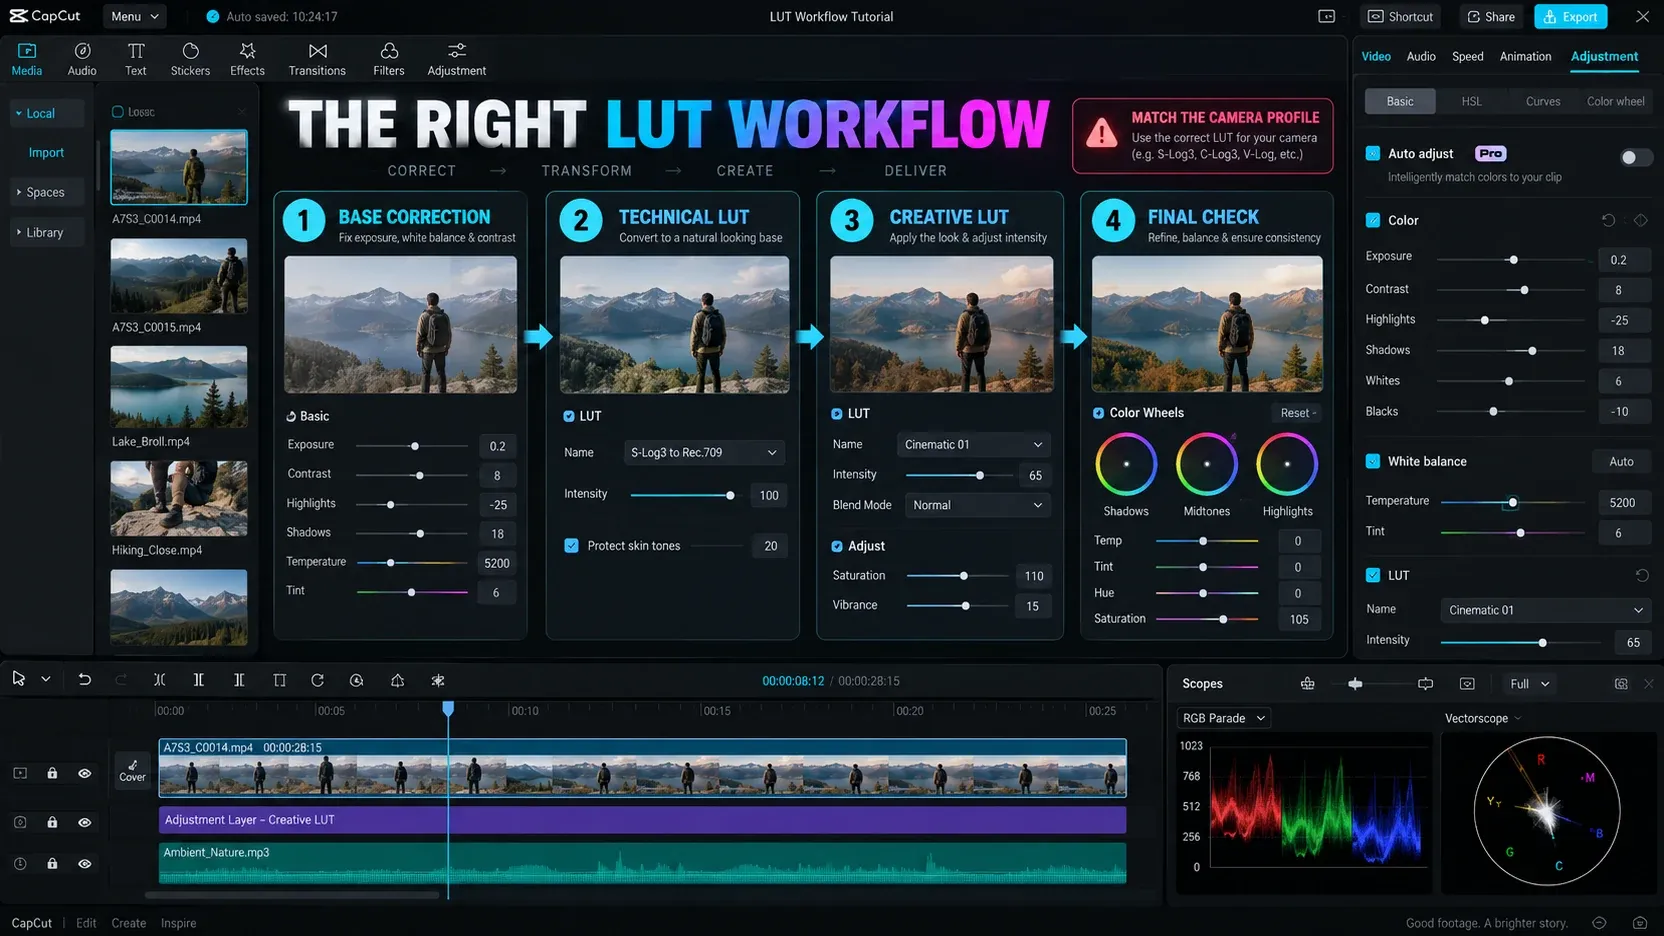
Reliable order: correct exposure and white balance first, apply the matching technical transform when the footage needs one, add a creative LUT only if it helps the story, adjust intensity, then make the final clip-level corrections.
Technical LUT or creative LUT: choose before you import
A LUT, or lookup table, remaps input colors to output colors. That definition covers two jobs that should not be confused.
| LUT type | What it is for | What can go wrong |
|---|---|---|
| Technical or conversion LUT | Converts footage from a specific LOG, RAW or camera color profile toward a standard viewing space | The picture can become too contrasty, too saturated or simply wrong if the LUT does not match the source profile |
| Creative or look LUT | Adds a style such as warm film color, cool shadows or muted contrast | A strong look can damage skin tones and hide detail when the source clip was not corrected first |
CapCut's current LUT guide makes the same functional distinction: technical LUTs standardize footage, while creative LUTs create a mood. A file name such as SLog3-to-Rec709.cube suggests a technical transform. A name such as Warm_Night_07.cube is more likely a creative look, but the name alone is not proof. Check the download page or documentation for the expected input color space.
If the clip already looks normal before the LUT, do not add a LOG conversion LUT just because it has a cinematic name. Standard-looking phone footage usually needs correction and perhaps a subtle creative look, not an extra camera transform.
Which LUT files CapCut can import
The official Desktop instructions identify two custom LUT formats:
.cube.3dl
Keep the original extension. Unzip a downloaded pack before importing it, and avoid renaming an image, preset or archive to .cube in an attempt to make it compatible. A real LUT file contains color-mapping data; changing the suffix does not convert another file type.
Store the LUT in a stable project folder before importing it. Moving or deleting the source file later can make a reusable workflow harder to maintain, especially when a project moves between computers. A simple structure works well:
Project Name/
  Footage/
  Audio/
  LUTs/
  Exports/
Use descriptive names such as CameraProfile-to-Rec709.cube and Creative-Warm-LowContrast.cube. A folder full of LUT1, Final2 and NewLook files becomes difficult to diagnose when the grade looks wrong.
Import a custom LUT in CapCut Desktop
The current verified route is short:
- Import the video and place it on the timeline.
- Select the clip you want to grade.
- Open Adjustment.
- Choose LUT.
- Click Import.
- Select a
.cubeor.3dlfile from your device. - Apply the LUT to the selected clip.
- Adjust its intensity instead of accepting the default strength automatically.
- Refine exposure, contrast, highlights, shadows, white balance, HSL or the color wheel as needed.
- Compare the result with the LUT disabled before moving to export.
CapCut lists HSL, the color wheel and other color adjustments as tools that can refine the LUT result. The exact arrangement can change between builds, so follow the control names rather than expecting every button to remain in one fixed position.
If you are new to the workspace, the CapCut tutorial hub explains the timeline and editing panels. A LUT changes color mapping; it is not the same job as a transition, overlay or stylized item from the CapCut effects guide.
Use this color-grading order
A LUT works best inside a sequence of decisions. Dropping it on an unbalanced clip and stopping there gives the LUT control over problems it was not designed to solve.
1. Correct the source clip
Before adding a creative look, check the clip without the LUT:
- Is the subject too dark or too bright?
- Does neutral material look blue, yellow, green or magenta?
- Are bright windows, lamps or clouds already losing detail?
- Are the shadows intentionally dark, or simply blocked up?
- Do adjacent clips have noticeably different exposure or white balance?
Make broad corrections first. This gives every later look a more stable input.
2. Apply the matching technical transform
Use a technical LUT only when its expected input matches the recorded profile. A transform built for one camera's LOG curve is not a generic “make flat video normal” button for every file.
When the match is correct, the technical transform should move flat footage toward a normal viewing image. When the result becomes immediately harsh, oversaturated or strangely tinted, stop and verify the camera profile before compensating with more adjustments.
3. Add the creative look
A creative LUT should support the scene rather than announce itself. Apply it after the base correction and technical transform. Compare it against the ungraded image and ask what actually improved: separation, mood, consistency or attention on the subject.
If the only obvious change is heavier contrast and orange skin, the look is too strong or poorly matched.
4. Adjust intensity
There is no universal best LUT percentage. The same file can behave differently across indoor light, daylight, skin tones and camera profiles.
Start at a restrained strength and increase it only while the picture improves. If lowering intensity fixes the highlights but leaves the color cast, the underlying LUT may be wrong. Intensity is a blend control, not a repair tool for a mismatched transform.
5. Finish with clip-level corrections
After the LUT, inspect each clip again. Match exposure and white balance across the sequence, then correct any hue or saturation problem introduced by the look. A shared creative LUT can unify a project, but it does not erase differences in lighting or camera setup.
Check skin, highlights and shadows before export
A grade can feel impressive in one frame and fail as soon as the subject moves into different light. Scrub through the full clip and pause at the brightest, darkest and most skin-sensitive moments.
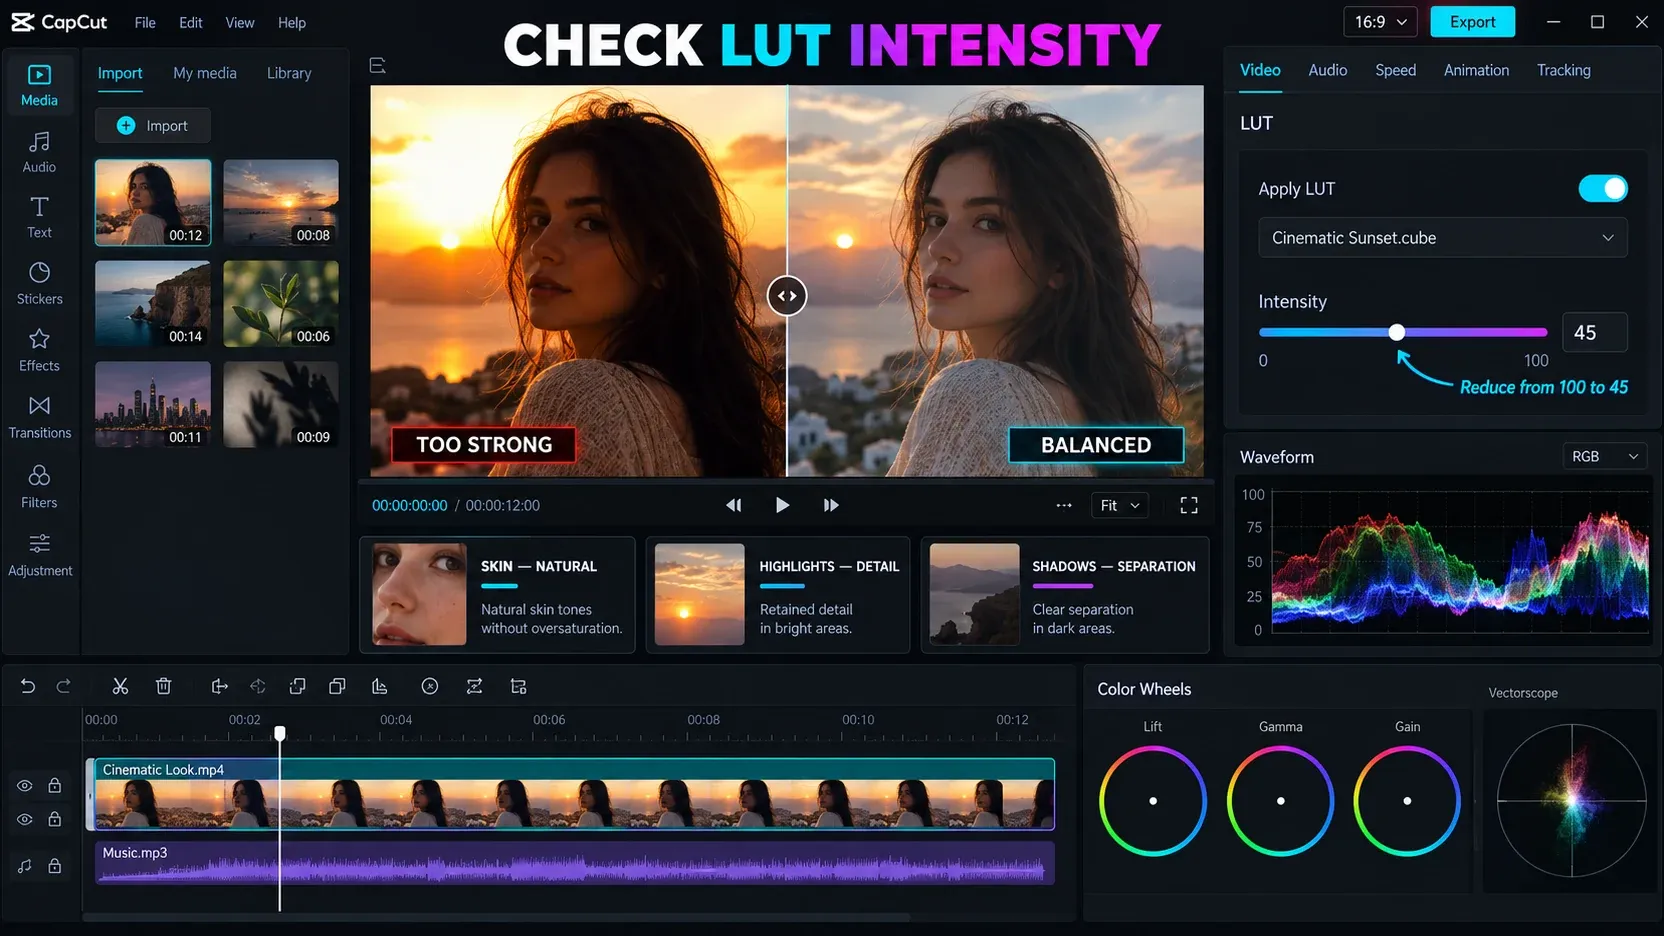
Skin
Look for sudden orange, red, green or magenta shifts. Compare the face with the neck and hands, and inspect more than one point in the clip. Mixed lighting may require a local compromise rather than stronger saturation.
Highlights
Check windows, white clothing, clouds, lamps and reflections. If texture disappears after the LUT, reduce its intensity or soften the relevant correction. A LUT cannot restore source detail that was already clipped during capture.
Shadows
Inspect hair, dark clothing and the background. Deep shadows can fit the scene, but large black areas with no separation often mean the look is too contrasty for that clip.
Clip transitions
Play across cuts. A grade that looks fine in isolation can reveal an exposure or white-balance jump when two shots sit next to each other. Match the clips before judging the overall style.
Why a LUT looks wrong in CapCut
The image becomes too dark or contrasty
First lower LUT intensity. Then disable the LUT and inspect the source. If the source was already dark, correct it before the creative look. If the source looked normal and a technical LUT makes it harsh, the input profile probably does not match the transform.
LOG footage becomes oversaturated
Verify the exact camera profile, gamma and gamut expected by the technical LUT. Similar names do not guarantee compatibility. Avoid stacking two conversion LUTs; a clip converted once should not receive a second technical transform unless the workflow explicitly requires it.
Skin turns orange, green or magenta
Lower the creative LUT intensity and compare the face, neck and hands. Correct the source white balance, then use the available HSL or color controls carefully. If the cast remains across different lighting, choose a better-matched look instead of forcing the current LUT to work.
Different clips still do not match
A shared LUT applies a shared mapping, not a shared exposure. Correct each clip's exposure and white balance, then compare them at the cut. Use the same creative look only after the inputs are reasonably aligned.
CapCut will not import the file
Confirm that the pack was extracted and that the selected file is a real .cube or .3dl LUT. Download the file again from its legitimate source if it is empty, corrupted or still inside an archive. Do not assume every preset sold for another editor is supplied in one of CapCut's documented formats.
The imported LUT is missing later
Keep custom LUT files in a stable folder and avoid deleting or moving them while the project is active. If the project moved to another computer, copy the LUT folder as part of the handoff and reimport the file when the new installation cannot locate it.
CapCut Mobile and Web: do not copy Desktop steps blindly
The official workflow verified for this guide describes CapCut Desktop and uses its Adjustment and LUT panels. The checked official evidence did not establish the same custom-file import path for every Mobile or Web account.
If your version exposes a LUT or custom import control, verify the accepted format and test the result on a duplicate project. If it does not, move the color-grade job to Desktop or use the color controls that your platform actually provides. Do not install an old or unofficial build just to reproduce a menu from a tutorial.
This platform limit matters when following videos: a creator may be showing a different device, build, region or account state. Match the tutorial to your editor before assuming a control has been removed.
Review the grade before exporting
Run one final pass with the LUT enabled and disabled. Check:
- the correct technical transform for the source profile;
- creative LUT intensity;
- skin across several frames;
- texture in the brightest areas;
- separation in dark clothing, hair and backgrounds;
- exposure and white-balance continuity across cuts;
- titles, graphics and brand colors that the grade should not distort;
- playback on a second display when color accuracy matters.
Then choose the delivery resolution, frame rate, bitrate and format in the CapCut export settings guide. If the editor preview looks sharp but the completed file does not, use the blurry-after-export troubleshooting guide rather than trying to fix softness with a LUT.
CapCut LUT FAQ
Can CapCut import CUBE LUTs?
Yes. CapCut's current Desktop guide documents custom CUBE and 3DL import through Adjustment → LUT → Import.
What is the best LUT intensity in CapCut?
There is no fixed best value. Set the strength by the source profile, lighting, skin and highlight detail. Lower intensity when the look overwhelms the clip, but change the LUT when the transform itself is wrong.
Should I color-correct before or after a LUT?
Correct basic exposure and white balance before a creative LUT. Apply a matching technical transform when LOG or flat footage needs conversion, then make final clip-level corrections after the LUT.
Why does a LUT make my CapCut video too dark?
The LUT may be too strong, the source may already be underexposed or a technical LUT may not match the recorded profile. Disable the LUT, inspect the source, then diagnose those causes in that order.
Can one LUT make all clips match?
It can create a shared direction, but it does not equalize different exposure, white balance or lighting. Correct the clips individually and judge the match at each cut.
Is a LUT the same as a CapCut filter?
Both can change the look, but a custom LUT is a color-mapping file with a documented input and output behavior. Treat filters as editor presets and LUTs as part of a controlled color workflow. Neither replaces source correction.