


A Reel can look sharp in CapCut and still reach Instagram with captions under the interface, an awkward cover crop or softer detail. Instagram adds a caption block, audio attribution and a right-side control stack. It also crops the cover differently across the Reels tab and profile preview, then re-encodes the upload. The edit is not finished until the exported file survives those surfaces.
Start with a 9:16 canvas and export a 1080 × 1920 H.264 MP4. A 30 fps upload copy is a practical starting point; keep the native-rate master when the footage was shot at 24 or 25 fps. Choose 60 fps only when the source was recorded at 60 fps and the extra motion detail matters. Keep caption blocks short, design the cover separately and upload the original exported file. The safe-zone values below are cautious working buffers from this guide, not an official organic-Reels specification.
This guide was checked against Instagram and CapCut documentation plus fresh search results on August 16, 2026. Published video requirements depend on the Instagram publishing route; the 30 fps setting here is a practical upload preset. Instagram doesn't publish one mandatory CapCut bitrate or a permanent organic-Reels safe-zone rectangle. Recommendations in this guide are labeled as starting presets rather than platform rules.
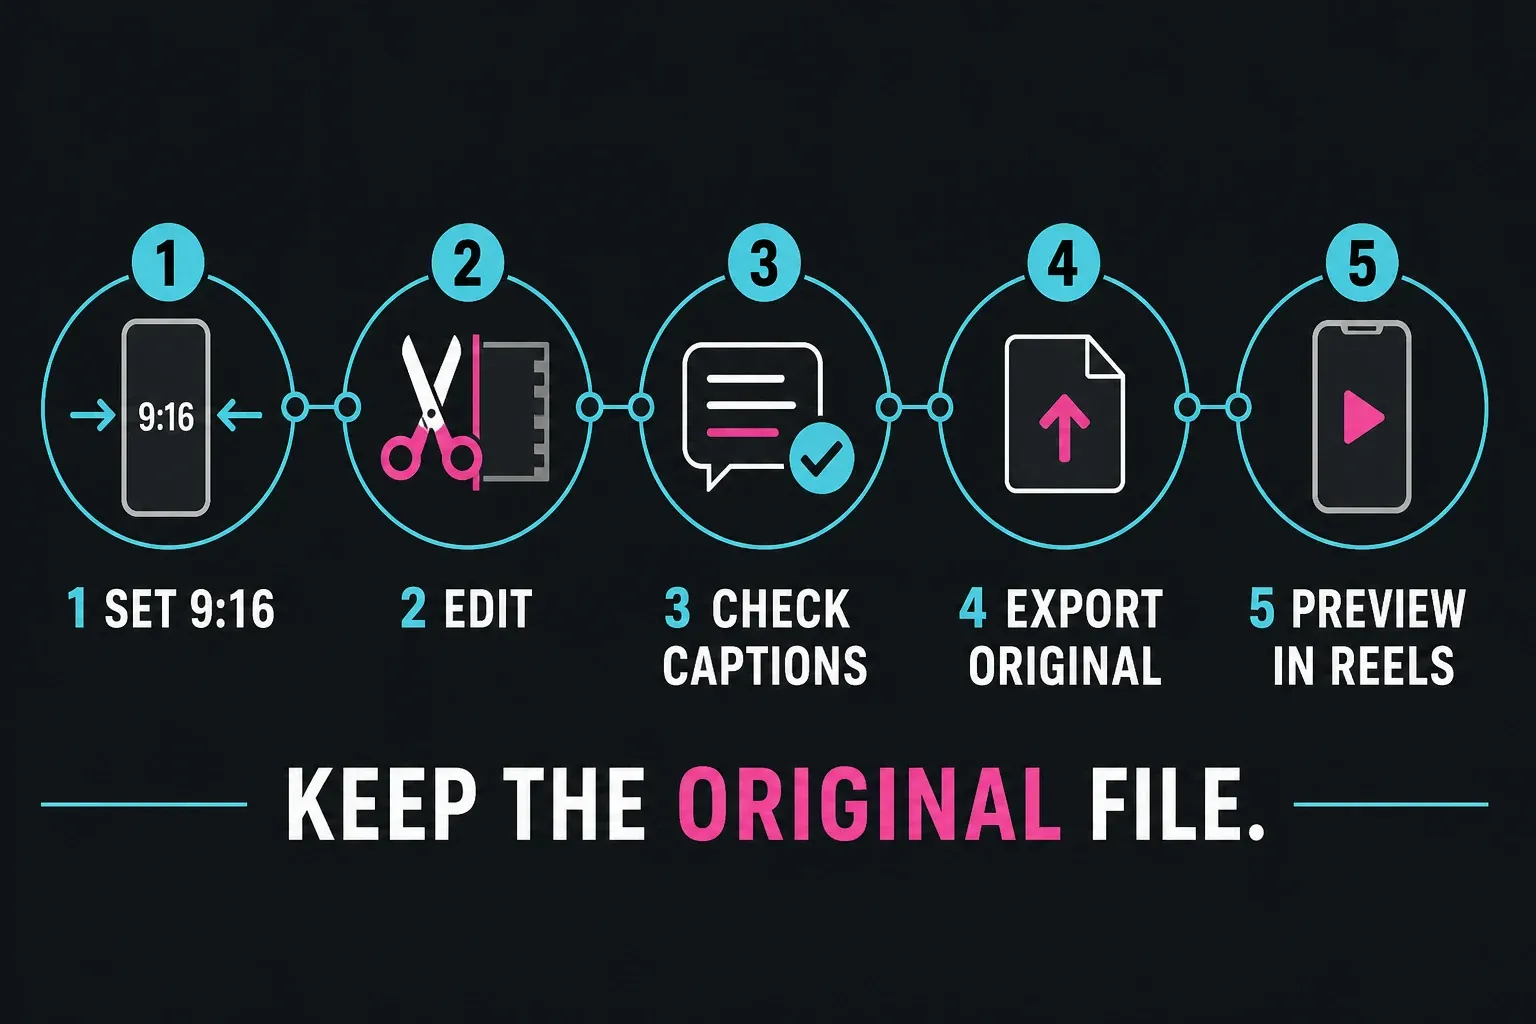
CapCut for Instagram Reels: Quick Settings
| Setting | Use | Status |
|---|---|---|
| Canvas | 9:16 | Best full-screen fit |
| Resolution | 1080 × 1920 | Recommended working size; Instagram's official minimum is 720 px |
| Frame rate | 30 fps upload preset; keep a native-rate 24/25 fps master; 60 fps for native 60 fps footage | Practical workflow choice, not a universal Instagram minimum |
| Format and codec | MP4, H.264 | Practical compatibility preset |
| Bitrate | Start around 8–12 Mbps at 1080p | Editorial starting range, not an Instagram specification |
| Audio | AAC, 48 kHz | Reliable CapCut export preset |
| Working safe buffer | Top 220 px; bottom 400 px; left 60 px; right 120 px | Conservative editorial recommendation |
| Cover | 1080 × 1920 master; inspect the 1:1.55 cover frame and current grid crop | Set before posting |
| Length | Up to 20 minutes; over 3 minutes is not recommended to new audiences | Current Instagram Help guidance |
The distinction in the last column matters. Instagram's published video specifications vary by publishing route. They don't establish one universal CapCut bitrate, one frame-rate minimum for every uploader or one organic-player safe-zone rectangle that protects every caption length and account interface.
Set Up the CapCut Project Before You Edit
Start a new project and choose a 9:16 canvas. Set 1080 × 1920 later in CapCut's export panel; resolution is an output setting, not a special project type. Instagram's official Reel size page accepts aspect ratios from 1.91:1 through 9:16, but 9:16 fills the vertical Reels viewer. A horizontal file may upload, yet it leaves unused space or needs a crop.
Choose the ratio before building text, masks or keyframes. Changing a finished 16:9 edit to 9:16 is not a simple resize: subjects move out of frame, caption line breaks change, and overlays need to be repositioned. Use the CapCut Auto Reframe guide for the first moving crop, then repair the difficult shots before placing captions. If the first source clip makes CapCut choose the wrong canvas, correct the ratio before doing anything else.
Meta's Reels publishing API video specifications list 23–60 fps. That API range does not establish what every in-app uploader accepts. Keep a native-rate master for 24 or 25 fps footage; 30 fps is a practical upload preset, and you can make a separate 30 fps copy if your uploader requires it. Choose 60 fps when the source was genuinely recorded at 60 fps and smoother motion matters. Exporting 30 fps footage at 60 fps usually adds repeated frames and file size rather than useful detail.
Instagram's record-a-Reel guidance says Reels can be up to 20 minutes, but videos longer than 3 minutes won't be recommended to new audiences. That makes 3 minutes a distribution threshold, not the upload ceiling the older article claimed. Edit to the idea's natural length, then treat the 3-minute mark as a reach decision.
If You Start With a CapCut Reel Template
A template can save time on beat timing and transitions, but it is not automatically ready for Instagram. Confirm the canvas is 9:16 before replacing every placeholder. Then watch the complete timeline for a branded ending, text that falls into the lower interface area, music you can't use on Instagram, Pro-only assets and effects that soften after a second export.
Templates also inherit somebody else's crop and pacing. Replace the media first, then repair each shot around your subject instead of forcing every clip into the original framing. Our walkthrough of CapCut templates covers finding and editing a template; return to the export and upload checks on this page before posting the result.
Instagram Reels Safe Zones in CapCut
Meta gives advertisers safe-zone guidance for Reels placements and recommends vertical creative, but that material is written for Reels ads. It is not a permanent pixel map for every organic Reel. The organic viewer can change with device shape, caption length, account type, shopping overlays and product experiments.
The most contested area is the lower third. Instagram can place the profile row, caption, audio attribution and a longer expandable text block there. The right edge carries like, comment, share and other controls. A centered “universal” box reused across Reels, TikTok and Shorts can still put the lowest caption line under Instagram's UI.
| Edge | Conservative working buffer | What can cover it |
|---|---|---|
| Top | 220 px | Account and camera controls on some surfaces |
| Bottom | 400 px | Caption, audio attribution and profile controls |
| Left | 60 px | Device crop and profile elements |
| Right | 120 px | Engagement controls and audio thumbnail |
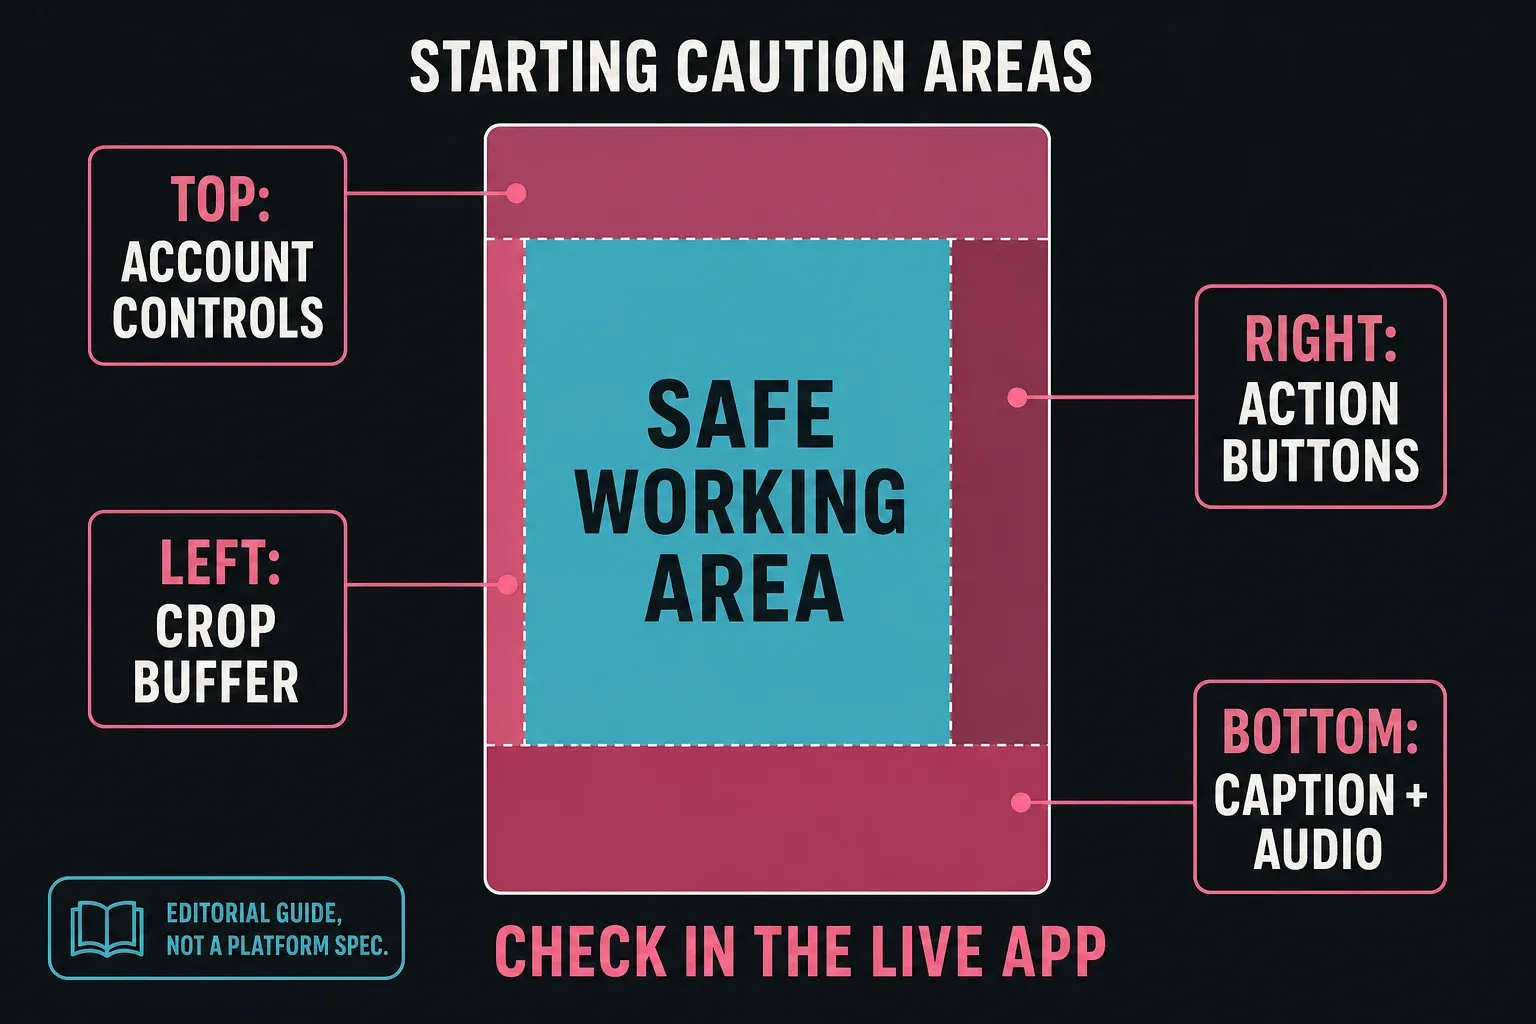
The starter overlay leaves a working band about 900 pixels wide, from y=220 to y=1520 on a 1080 × 1920 canvas. Those values are deliberately cautious. A short caption may leave more room; a long caption, translated interface or shopping overlay may use more. Treat the overlay as a repeatable editing aid, then confirm it in the current posting preview.
Build a Reels Safe-Zone Overlay
- Create a transparent 1080 × 1920 image with semi-transparent bars over the four working buffers.
- In CapCut, add it as an overlay above every other track and stretch it across the project.
- Keep headlines, subtitles, logos and calls to action out of the shaded areas.
- Before export, hide or delete the guide layer and watch the full video once.
Some CapCut builds expose social-platform guides, while others don't show the same controls. Use a built-in guide only when it matches the Instagram surface you're targeting. Otherwise, an imported overlay is predictable and reusable. Before a client or campaign post, open the exported file in Instagram, inspect the posting preview on the actual phone and account, and adjust the template if the interface covers anything important.
Create Captions That Stay Readable on Reels
Generate captions from the cleanest voice track you have. CapCut's auto-caption troubleshooting points to noisy audio, low volume, the wrong language, network problems and an outdated app as common failure causes. If your Auto Captions screen offers a recognition-source selector, choose the voice or original track you need. Otherwise, temporarily mute competing music, generate the transcript, correct it, then restore the mix and duck the music under speech.
- Position: keep the lowest line above the working bottom buffer and left of the right-side control stack.
- Length: use roughly three to seven words per block and no more than two lines when possible.
- Contrast: use a readable weight, outline or background plate instead of relying on a precise font-size number.
- Timing: recheck every block after trimming, changing speed, removing pauses or moving clips.
CapCut's language coverage and whether a caption tool is free or paid can differ by platform, account and release. If recognition doesn't cover the language or accuracy you need, CapCut documents SRT import on Desktop and Web; mobile can edit subtitles synced from those platforms but can't start a direct SRT import. The separate CapCut auto-captions guide covers styling and correction in more depth.
Design the Reel Cover, Then Check Every Crop
Don't rely on a random video frame for the cover. Build a separate 1080 × 1920 master in CapCut or another design tool, with a short headline and the important subject near the center. That gives you enough vertical material for the Reels tab while leaving room to reposition the crop.
Instagram's official size page recommends a cover photo of 420 × 654, a 1:1.55 ratio. At a 1080-pixel working width, the equivalent frame is about 1080 × 1682. The cover frame, full Reels viewer and profile preview are different surfaces, and Instagram doesn't give one permanent profile-grid crop on that help page. Keep the critical headline and subject central, then inspect the live profile preview instead of trusting a crop copied from an older tutorial.
| Surface | Planning frame | What belongs there |
|---|---|---|
| Full Reel master | 1080 × 1920 | Background and full vertical composition |
| Instagram cover recommendation | 1:1.55; 420 × 654 official reference | Headline, face, product and logo |
| Profile-grid preview | Check the account's live crop before posting | Most important central elements |
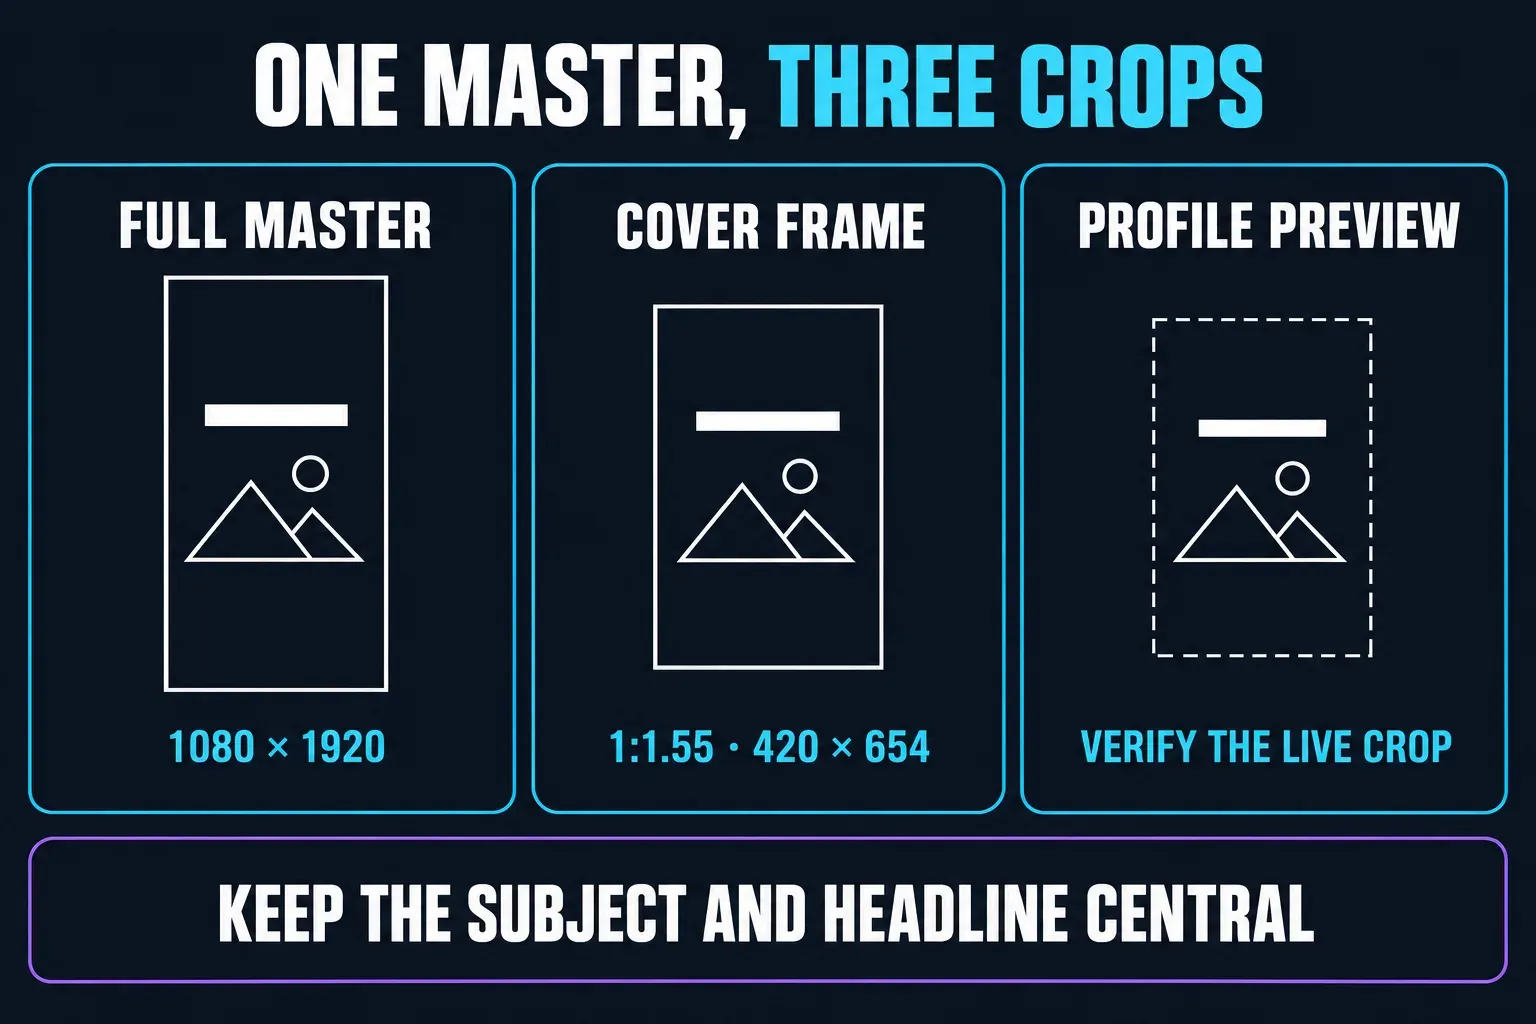
Set the cover and adjust its profile preview before publishing. Instagram's help page says the cover can't be edited after upload, so treat the initial choice as final.
CapCut Export Settings for Instagram Reels
Instagram re-encodes uploads. The goal is a clean source file, not the largest file CapCut can create. Published video requirements depend on the posting route; 30 fps is a practical upload starting point, not a universal minimum. The settings below are practical starting values, not a promise that Instagram will preserve every pixel.
| Setting | Starting value | Reason |
|---|---|---|
| Resolution | 1080 × 1920 | Fills the 9:16 viewer without an unnecessarily large master |
| Frame rate | 30 fps upload preset; 60 only for native 60 fps source | Preserve the original-rate master; check the chosen uploader |
| Format | MP4 | Reliable mobile and web compatibility |
| Codec | H.264 | Predictable upload compatibility across devices |
| Bitrate | 8–12 Mbps starting range at 1080p | Enough source detail without treating bitrate as a platform guarantee |
| Audio | AAC, 48 kHz | Compatible CapCut export preset |
Don't export 4K solely because a tutorial says Instagram rewards it. CapCut's current 2K/4K export guidance says availability depends on the platform, source, device, browser, region and app version. Keep a higher-resolution master when your wider workflow needs one, but test a short 1080 × 1920 Reel on the target account before multiplying upload sizes. Instagram still creates delivery versions, and a larger file is not proof that viewers will receive more detail.
Export once from the original project and upload that file. Don't send it through a messaging app, download it from another social network or screen-record it first. Each extra encode removes detail before Instagram performs its own encode. In Instagram, open Settings → Media quality and enable Upload at highest quality, a control documented on the same official Reel size page. If CapCut itself won't finish the export, use the CapCut export-stuck checklist before changing random quality settings.
Send the CapCut Edit to Instagram Without Breaking It
On mobile, export the MP4 to the camera roll first. CapCut may also offer an Instagram hand-off, but saving the local original gives you a file you can watch, reuse and compare. On Desktop or Web, export locally and transfer the file without recompressing it, or use Instagram's supported computer-upload flow.
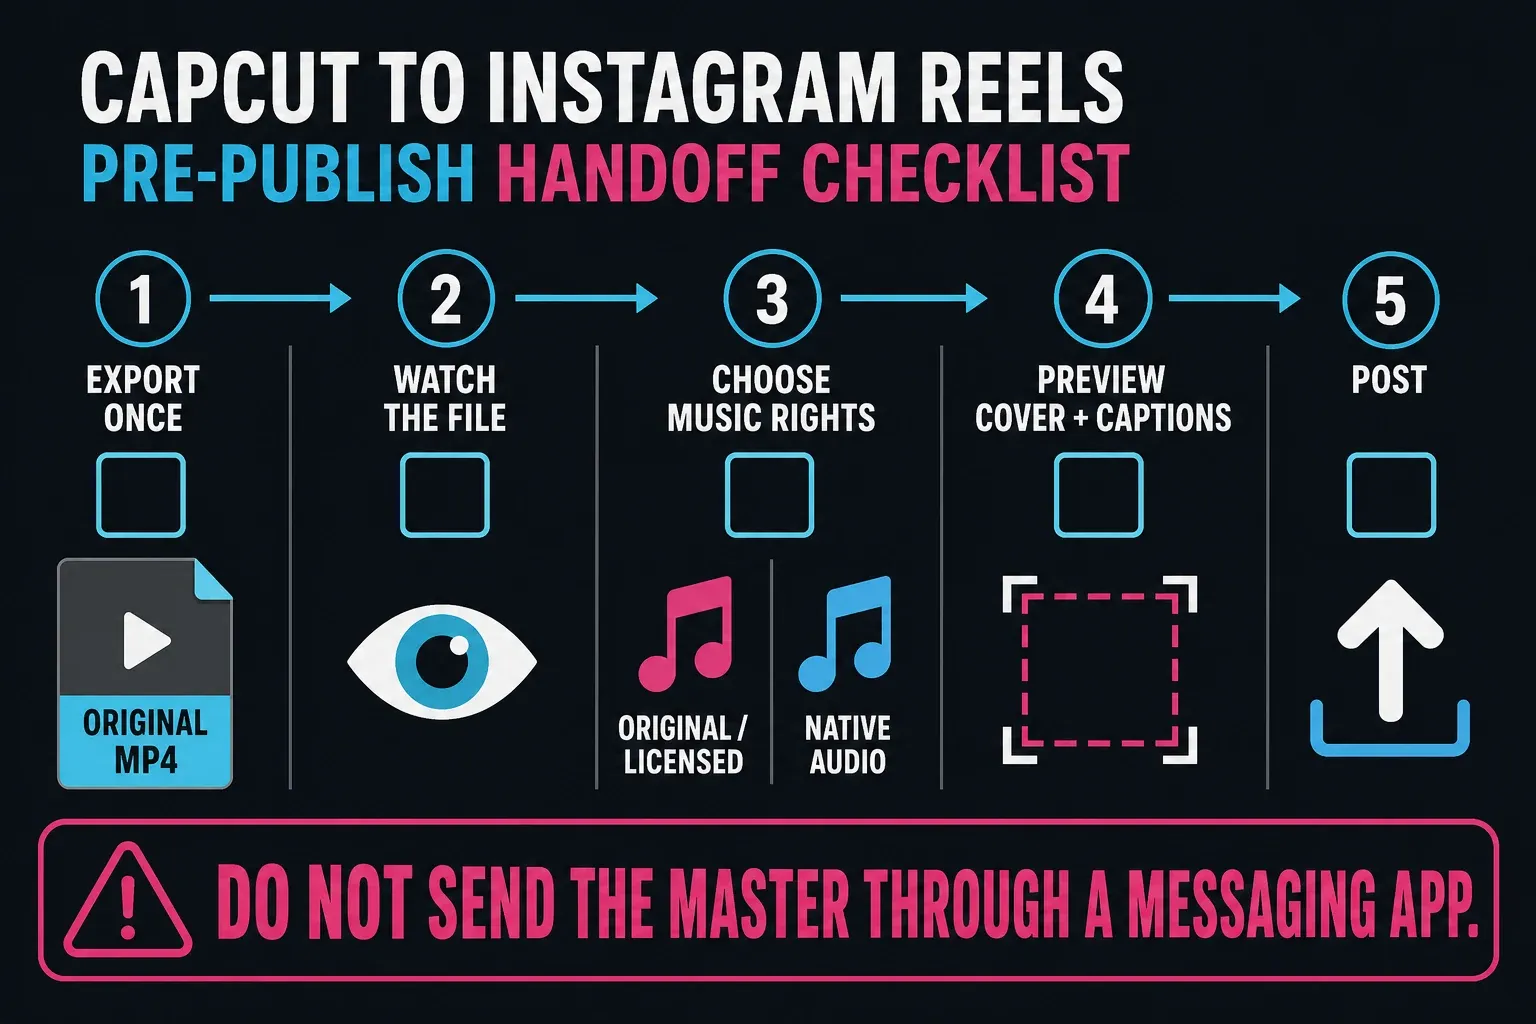
Choose the audio path before the final cut. Audio burned into the video arrives as uploaded original audio. Instagram says it may relabel uploaded licensed audio with the artist and track, but “may” is not a dependable way to select a native sound page. If the sound page and attribution matter, edit to a reference track, remove or mute it before export, then add the native track inside Instagram.
For brand or client work, “available in the app” is not a commercial license. CapCut's Materials License Agreement says its ordinary Sounds are for personal, non-commercial use, while its Commercial Sounds are licensed only for named permitted platforms that don't include Instagram unless separate rights are agreed. Meta also says its licensed Instagram music library is intended for personal, non-commercial use; eligible commercial work should use properly licensed original audio or Meta Sound Collection. Decide this before you lock cuts to a song.
A manually edited CapCut project can normally export without a watermark. CapCut's watermark guidance says template projects may include a branded ending clip or other template layer; remove those elements and preview the entire export. Our CapCut watermark guide separates timeline endings, template branding and paid assets.
Run This Check Before You Post the Reel
Do the check on the exported file rather than inside the project preview alone. It takes less time than deleting and rebuilding a post whose cover or captions failed.
- The safe-zone overlay is hidden or deleted.
- No subtitle, logo or call to action sits inside the working bottom or right buffer.
- Caption spelling and timing still match after the last cut or speed change.
- The cover is selected and its profile-grid crop has been inspected.
- Music rights are appropriate, or the native Instagram track will be added after upload.
- The original-rate master is preserved; a separate 30 fps copy is ready if the uploader requires it. Use 60 fps only for native 60 fps footage.
- No Pro-locked asset or template ending remains unnoticed.
- Instagram's highest-quality upload switch is on and the original export is selected.
Fix every item before publishing. Instagram lets you edit some metadata later, but the video file itself can't be swapped without creating a new post.
If Reels is the whole workflow rather than one export target, our Instagram Edits review covers Meta's capture-to-publish route. For a simpler phone editor that is less tied to one network, see the InShot review.
CapCut for Instagram Reels FAQ
Is CapCut good for Instagram Reels?
Yes. CapCut covers the core Reels workflow: a 9:16 canvas, quick cuts, captions, text, music timing, overlays and H.264 export. CapCut doesn't preview every Instagram interface or profile crop, so check the safe zone and cover inside Instagram before publishing.
Does CapCut add a watermark to Instagram Reels?
A manually built timeline can normally export without a visible CapCut watermark. Template projects may contain a branded ending clip or embedded layer, and paid or generated assets can have their own restrictions. Preview the full export and remove the ending element before upload.
Why does my CapCut video look blurry on Instagram?
Common causes are a low-resolution source, extra compression before upload, Instagram's highest-quality switch being off, or an unnecessary HDR/codec conversion. Export 1080 × 1920 H.264 once, upload that original file, enable highest-quality uploads and compare a short test before changing several settings at once.
What is the safe zone for Instagram Reels in CapCut?
Instagram doesn't publish one pixel-based organic-player safe zone that covers every device and caption length. On a 1080 × 1920 canvas, this guide uses conservative working buffers of 220 px top, 400 px bottom, 60 px left and 120 px right. Treat them as an editorial template and test on the target account.
How do I add Instagram trending audio after editing in CapCut?
Edit to a reference track, mute or remove that track before export, then add the native sound on Instagram's Reel posting screen. That preserves Instagram's audio attribution and connection to the sound page. Check the license before using any music commercially.
Can I upload from CapCut directly to Instagram?
CapCut mobile may offer an Instagram share hand-off, depending on version, region and account. Saving the original MP4 to the camera roll first is more predictable and gives you a file to inspect. Desktop and web users can move the local file to a phone or upload through Instagram's computer flow.
Should I export CapCut Reels at 30 fps or 60 fps?
Use 30 fps as a practical upload preset, not a universal Instagram minimum. Keep the native-rate master if the source is 24 or 25 fps; make a separate 30 fps copy if your uploader requires it. Choose 60 fps for footage captured at 60 fps when smoother motion matters. Exporting 30 fps footage at 60 does not create native detail.
What size should an Instagram Reels cover be?
Build a 1080 × 1920 master so it matches the vertical Reel, then inspect Instagram's cover and profile-grid crops. Instagram's official cover recommendation is 420 × 654, or 1:1.55. Keep the headline and subject central, and set the cover before publishing because Instagram's help page says it can't be edited after upload.
For the next platform-specific workflow, use the CapCut social-media hub. If you need one master for several networks, the cross-platform export guide separates delivery files from an archival master.